Technology Posts

Posted By

The police department in Sandy Springs, GA is one of several that adhere to a policy of Verified Response when it comes to burglar alarms. They require proof that a crime has occurred before they will respond. Proof can come in one of several forms, which we will be discussing here.

Different police jurisdictions define verified response in different ways with different verification criteria. In some jurisdictions, a second burglar alarm activation on a different zone within the same address occurring within a certain period of time qualifies as verification. For others, there must be audio, video, or onsite verification before the police will respond. In Sandy Springs, GA, the latter type of verification is required. The full Alarm Dispatch Guidelines for Sandy Springs, GA can be found here.

This is not to say that the City of Sandy Springs or any other police department that otherwise requires verification won't respond to any type of alarm without proof of an issue at the site. For most jurisdictions, if there is a Panic, Duress, Hold-up, Medical, CO, Elevator or Fire alarm, the requirement for verification is waived and immediate dispatch can be requested. But, at least in the case of Sandy Springs, if authorities respond and there is no evidence of criminal activity or any other emergency, then false alarm fees will apply.

Furthermore, if a monitoring station employee requests public safety dispatch on an alarm based on audio or video proof that a crime is occurring or has occurred, then Sandy Springs requires that they submit proof of verification within 24 Hours of the dispatch request. Failure to do so will incur additional fines! Proof can either be described to the monitoring station employee by the end-user after checking their cameras or other means of verification, or it can come from the monitoring station employee themselves having reviewed audio or video evidence. The burden of proof has been placed squarely on the monitoring company.

If a customer has an alarm system that uses Audio Alarm Verification, sometimes referred to as 2-Way Voice, then the monitoring station can use this to verify if an unauthorized individual is onsite. In the case of Sandy Springs, silence does not count as proof of an issue, the monitoring station dispatcher must hear footsteps, talking, sounds of rummaging, or other proof of an issue at the site. If the customer has video surveillance, either the customer, or in some cases the monitoring station, can use the video system to verify if an alarm is an actual break-in. The customer may even have a friendly neighbor who is willing to receive a notification from the alarm monitoring company and will go and check things out for them and report back.

However, not every monitoring company will support 2-Way Voice. Currently at Alarm Grid, we don't support this option. And not every customer wants to blanket their property with security cameras. Some properties are too large, or too far away from neighbors to make relying on a neighbor a viable option. In these cases, the best option may be to employ a guard service.

In the past few years, Alarm Grid has partnered with a company called Vet Sec to provide an onsite guard response to monitored locations in jurisdictions such as Sandy Springs. Vet Sec employs guards, in most cases these guards are unarmed or they may be armed with non-lethal weapons (tasers). Once an alarm occurs, the monitoring station will contact Vet Sec, rather than the local police department. A single guard will respond and check the location for signs of a break-in or any other criminal activity, such as vandalism. If evidence of a crime is found, they will notify the monitoring station and wait up to 30 minutes for a key holder and the authorities to arrive. In exchange, they charge a fee for this site visit. The price may vary by location. In most cases, the police should respond within 30 minutes, but if it takes longer for them to arrive, and the customer or other key holder wants the guard to wait with them, then additional fees may apply.

There are several great things about this service. For one, just like with Alarm Grid monitoring, there is no contract so a customer can cancel at any time. Also, this is a "pay as you go" service, so a customer is only billed if a guard actually responds to their monitored location. The fees are billed to Alarm Grid and are then applied to the customer's monthly monitoring fee on the next automatic bill date. Alarm Grid does not markup this fee, we simply pass the fee along to the customer. What we pay, you pay.

Areas in the United States where Verified Response is Required:

State City Guard Service Available?
Alaska Cantwell No
Delta Junction No
Fairbanks No
Galena No
Healy No
Nenana No
Northway No
Tok No
Arizona Surprise No
California Fontana Yes
Colorado Fort Collins No
Golden Yes
Georgia Sandy Springs Yes
Michigan Detroit Yes
Nevada Henderson Yes
Las Vegas Yes
North Las Vegas Yes
Golden Yes
Oregon Eugene Yes (Within City Limits Only)
Washington Bellingham Yes
Burien Yes
Wenatchee No
Kent (Commercial Only) No
Yakima Yes
Seattle (Recommended, not Required) Yes
Wisconsin Milwaukee Yes
Golden Yes
Utah Salt Lake City Yes
Golden Yes

Please keep in mind that this list is something that may evolve with little notice. It may be difficult to keep the list 100% accurate, but we will do our best. There have actually been a few places where the police department tried using verified response, and then changed their mind due to increases in property crime. San Jose, CA is one that comes to mind. It was reported in 2019 that they had decided to change their policy and move away from requiring verified response.

You may have noticed that the list above didn't feature any locations from our neighbor to the north. There are a couple of places in Canada that require a version of verified response. Winnipeg, Manitoba, and London and Toronto, Ontario have all adopted a more lax definition of this type of verification. In all three of these locations, the police department will accept two or more activations of two or more separate burglary zones as a form of verification. Currently, Alarm Grid does not offer a guard service in any of the Canadian provinces. If this changes, we'll be sure to update this blog post.

So, of course the burning question is, "How much does it cost?" For most locations the charge is $45 per site visit. There are a few locations where the price differs. In Sandy Springs, GA, the price is $68 per site visit. In Albuquerque, NM customers currently pay $57.07 per visit, and in Eugene, OR the price is $60 per site visit.

What do you think of the Verified Response Policy recently implemented in Sandy Springs, GA? Is it overdue, or overreach? Tell us what you think in the comments below. We'd love to hear from you. Stay tuned to our blog for more exciting security industry news. If you need help figuring out what system you have in the house you just moved into, or you're looking to upgrade an existing system, or to install one for the first time, reach out to us via email at support@alarmgrid.com. We're here Monday - Friday from 9 am to 8 pm Eastern. We look forward to hearing from you!

Tags: , , , , , ,

Comments


Posted By

Qolsys recently released a service bulletin describing an issue with certain IQ Hardwire 16-F units. This issue affects both the small enclosure and large enclosure versions. Under certain circumstances, affected units can signal a false tamper/tamper restore message for connected zones.

Qolsys TSB #210708, which was released on July 8, 2021, describes this issue, and the corrective action Qolsys is taking to remedy the problem. They do not provide a lot of information regarding what "conditions" bring about this behavior. We have asked for more detail, and if more information is forthcoming, we will provide updates here in our blog.

Rest assured that only a certain number of these devices are affected, and we will provide users with the necessary information to determine if they have one of these units. Qolsys IQ Hardwire 16-F units that were manufactured outside of the window in question are not affected and should not exhibit this behavior.

How to determine if your Qolsys IQ Hardwire 16-F small enclosure (SKU: QS7133-840) is affected:

On the unit itself, or on the box that the unit came in, check the Revision Sticker. This will appear as a bar code on the sticker and will be marked with SN: and DL: If the 4th character of the SN, moving from left to right, is a "C" then the Qolsys IQ Hardwire 16-F small enclosure should be returned/replaced. This sticker may be found on the rear of the unit and may require that you dismount the unit from the wall to get access it.

How to determine if your Qolsys IQ Hardwire 16-F large enclosure (SKU: QS7134-840) is affected:

On the Qolsys IQ Hardwire 16-F large enclosure, the way you determine the revision is the same, but the revision information is different. On these units the revision to be on the lookout for is "B" rather than "C". This sticker should also appear on the unit itself as well as on the box that the unit comes in. Since these devices come from the factory with an enclosure, the sticker may be on the enclosure rather than the printed circuit board. Unfortunately, it may also be on the back of the enclosure, requiring that it be removed from the wall to be accessed. When reading the sticker, the 4th character when viewing the SN from left to right is "B" on affected units. See the example below:

Qolsys has pulled back available affected stock to correct this issue. Units that may have been affected, but have since been pulled back into manufacturing and reworked or replaced, will sport a sticker that says "TEST OK".


If you purchase a Qolsys IQ Hardwire 16-F that falls within the Revision range discussed above, but the item has a "TEST OK" sticker affixed somewhere on the packaging or the unit itself, then you do not have to worry about this issue. If you purchased a Qolsys IQ Hardwire 16-F prior to the date that this notice was released, and your device falls within the revision range discussed above, then you should contact your distributor to discuss replacing the unit. Per Qolsys, you should do this even if you haven't observed the behavior described in this Technical Service Bulletin.

If you are an Alarm Grid customer, and you purchased an affected unit from Alarm Grid, you can contact us at support@alarmgrid.com. We are here Monday - Friday from 9am to 8pm ET. If you prefer to speak to us by phone, you can reach us at 888-818-7728. It is our pleasure to assist you with any and all of your alarm needs. Stay safe!

Tags: , , , , , , , , ,

Comments


Posted By

We have a quick and easy tip for those using Z-Wave locks with Honeywell and Resideo ProSeries Panels like the Honeywell Home PROA7PLUS. You can have your panel user code pushed down to your Z-Wave lock, and you can also have your system automatically disarm when you enter that code into the lock.

Setting this feature up will offer some great convenience in your life. You can imagine walking up to your home, entering your panel code into your Z-Wave lock, the door unlocking, and then your system disarming, without you needing to interact with the panel at all, and then going about your day. We'll show you how to make it happen.

You can set this feature up for any panel code that you have programmed on your ProSeries System. Begin from the main screen, and choose the three (3) horizontal bars button at the bottom, followed by Settings, then User Management. Enter your Master Code (default 1234, but usually changed) or your Installer Code (default 4112) to get in. Then select the user with the code you want to use at the lock. Scroll down to Z-Wave Lock Control, and you can choose one of the following three (3) options:

  • None - Turns the feature off
  • Sync User Code to Lock - The code will be pushed to the lock so that you can unlock using the code.
  • Sync User Code to Lock & Disarm - The "money" option! The code will be pushed to the lock so that you can unlock using the code, AND the ProSeries System will disarm when you enter the code and unlock the lock!

Just choose the option that you want for that code (you know which one we recommend), and then press the black Save button in the upper-right corner. You will need to provide the system's Master Code to confirm the change, and then you're all set! We can't state enough how cool this feature is, so take advantage of it!


But before you go and make your life more convenient, why not make your life more EXCITING by leaving a comment on the Alarm Grid Blog? Let us know what you think of the feature. Have you tried it out before? Are you going to test it now. Do you need to buy a Z-Wave lock first? How about the Yale YRD226? We think that's a handsome lock, and it will look great in your residence. We promise! Anyway, stay tuned for more great content like this on the Alarm Grid Blog, coming soon!

Tags: , , , , , , , , , , ,

Comments


Posted By

Alarm Grid is happy to announce that the Honeywell Home PROSIXRPTR Wireless Repeater is now available for purchase. The wireless repeater works with Honeywell Home and Resideo PROSIX Sensors and Honeywell SiX Sensors used with the ProSeries Security Panels, including the PROA7PLUS.

If you aren't familiar with wireless repeaters, these devices effectively double the range of compatible wireless sensors. This works by taking the wireless signal sent out from a wireless sensor and sending it out a second time, thereby effectively repeating the signal and doubling the sensor's range, assuming that the repeater module is placed strategically. The PROSIXRPTR is the first wireless repeater released from Resideo since the Honeywell 5800RP Wireless Repeater which is used to repeat the wireless signals of Honeywell 5800 Sensors. The new PROSIXRPTR is also the first-ever encrypted wireless repeater released by Resideo. Up to two (2) PROSIXRPTR devices can be used with a ProSeries System, with each repeater being placed in a different direction from a centralized ProSeries Panel.

There's a lot to take in with the PROSIXRPTR, so we'll do our best to cover everything here. The first thing we want to note is that the PROSIXRPTR is not a "plug-and-play" device, as you may be accustomed to with most wireless repeaters. In other words, the PROSIXRPTR will not begin repeating wireless signals until it is enrolled with a ProSeries Panel. These panels include the aforementioned PROA7PLUS, the Resideo PROA7PLUSC, the Resideo PROA7C, and the Honeywell Home PROA7. Any ProSeries Alarm System in need of a PROSIXRPTR Wireless Repeater must be on at least Firmware Version 3.591.92.0, which you can read about in greater detail here. The reason why the PROSIXRPTR needs to be enrolled with the alarm panel is because it is interacting with encrypted signals, and it needs to know sensitive network information to do its job successfully. Although you can have two (2) different PROSIXRPTR modules paired with a single ProSeries Panel, the two units will not communicate or "talk with" each other in anyway, and you cannot use a "series" setup to "triple" the range by having a sensor signal bounce off of one PROSIXRPTR to another PROSIXRPTR on its way to the panel. The PROSIX or SiX wireless signal will only be recognized by a single PROSIXRPTR, it will get repeated once, and will then end up at the ProSeries alarm panel.

There are other limitations affecting the PROSIXRPTR Repeater that should be discussed. While the unit can repeat SiX Sensors used with a ProSeries Alarm Panel on a high enough firmware version, the PROSIXRPTR cannot repeat the signals for SiX Series Sensors used on a Honeywell Lyric Security System. Remember, the PROSIXRPTR must enroll with the panel it is being used with. The unit has no way of integrating with the Lyric, and it cannot repeat wireless SiX Series signals used with that system. Unfortunately, Resideo never released a repeater for the Lyric and SiX Sensors, so that is just a limitation that Lyric users will have to live with, at least for now. The PROSIXRPTR also cannot repeat the signals of any legacy sensors that are being used with the Honeywell Home PROTAKEOVER Module. There are various legacy wireless repeaters available, so please reach out to us at support@alarmgrid.com during our usual 9am to 8pm ET M-F business hours if you need help figuring out which one to get for your alarm system.

One other thing we want to note with the PROSIXRPTR is that while it comes with its own transformer and backup battery, it does not come with any cabling for connecting the transformer. Make sure you have some around when you go to set it up. The unit supports a wire run of up to fifty (50) feet (~15.2 meters) when using 18 AWG cabling, and the maximum distance goes down if thinner cabling is used, so make sure to observe the permitted wire runs. Alarm Grid offers alarm wiring on its website if you need some. We even offer 10 ft., 15 ft., and 25 ft., pre-cut lengths of 22 gauge, 4-conductor wire. Or, you should be able to find some at your local hardware store. You can also use a Honeywell LT-Cable if you don't want to prepare your own wiring.

The PROSIXRPTR can be purchased on our website now! Please email us if you have any questions. Also, don't forget to leave a comment down below to share your thoughts on this new unit. We would love to hear what you have to say. And of course, keep paying close attention to the Alarm Grid Blog if you want to hear the latest security news, tips, and product releases. We'll be back soon, so stay posted!

Tags: , , , , , , , , , , , , , , , ,

Comments


Posted By

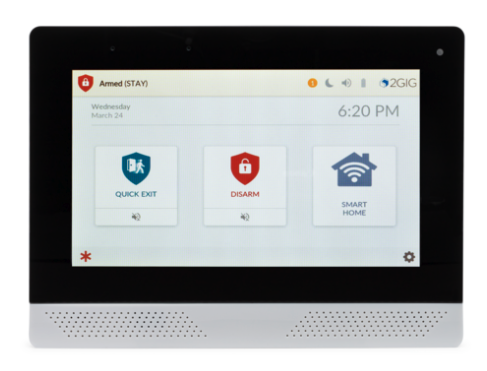
Welcome back from 4th of July! We have had a busy past couple of weeks at Alarm Grid since our last video recap. This time, we have seven (7) new videos to show you, including five (5) with Jorge and two with myself. We cover the PROA7PLUS, 2GIG Edge Cameras, and 2GIG GC2 Firmware Updates!

2GIG Edge: Alarm.com Cameras that Support Live Streaming

Jorge explains which Alarm.com Security Cameras can be streamed directly to a 2GIG Edge Alarm Panel. Most of the newer Alarm.com Cameras can be used in this way. In order for this to work, a camera must be paired with the same Alarm.com account used with the 2GIG Edge, and it must be enabled for panel streaming from the Alarm.com website or mobile app. Cameras can be streamed from the Smart Home Menu on the 2GIG Edge.

2GIG Edge: Alarm.com Cameras that Support 2-Way Audio via Live-Streaming

Jorge teaches users about two-way audio playback when live-streaming security cameras on the 2GIG Edge. While nearly all Alarm.com Cameras can be used for video streaming on the 2GIG Edge, only a smaller selection of cameras can be used for live audio streaming. Really, it's mostly the indoor residential cameras that do audio streaming. Most of the Alarm.com Commercial Cameras that support Power over Ethernet (PoE) and all Alarm.com Outdoor Cameras do not support two-way audio, as they typically do not have built-in microphones.


2GIG Easy Updater Tool: Updating

Jorge explains how to update the 2GIG UPDV Easy Updater Tool that is used to update the firmware on a 2GIG Go!Control GC2 Security System. The Easy Updater Tool contains the firmware update for the GC2 System. If the firmware on the Updater Tool is outdated, then you must update the Updater Tool by following the process outlined in this video. The current downloaded firmware on the Updater Tool will be displayed across the device screen when power is applied. This will let you know if you need to updater the Updater Tool.


2GIG GC2: Updating Using the Easy Updater Tool

Jorge teaches you how to use the 2GIG UPDV Easy Updater Tool to update the firmware on a 2GIG Go!Control GC2 Alarm Panel. After you have updated the firmware on the Updater Tool itself, you can then use the device to update the firmware on the GC2 Panel. Updating to the latest firmware version will ensure that you can use all of the released features for the system and that all of the latest hardware is supported. The LTE communicators for activating with Alarm.com and alarm monitoring will require a certain firmware version.


Honeywell Home PROA7PLUS: Delete a Zone

Jorge shows you how to delete a zone on a Honeywell Home PROA7PLUS or other ProSeries Alarm System. When you delete a zone, the associated sensor will no longer be programmed with the system. You would need to re-enroll it in order to continue using it. For the encrypted PROSIX Sensors and SiX Sensors, after deleting the sensor, you will then be able to enroll it with a new ProSeries Panel, provided that the sensor received the deletion signal from the panel. When deleting PROSIX and SiX Sensors, be sure the sensor is powered on and within range of the ProSeries Panel at the time of deletion.


Honeywell Home PROA7PLUS: Add a User Code

I show you how to add a new user code to a Honeywell Home PROA7PLUS Alarm System or other ProSeries Panel. All of the ProSeries Systems support up to (96) total user codes, so you should have no trouble giving everyone in your household or office their very own code to use when controlling the system. After you have added a user code, you can then go back into user settings to configure automatic Bluetooth disarming and Z-Wave lock functionality for the user.


Honeywell Home PROA7PLUS: Clear a Tamper Error

I show you how to clear a tamper error on a Honeywell Home PROA7PLUS or other ProSeries Security Controller. A tamper error occurs when the red tamper button on the back of the ProSeries Controller isn't held down properly. This is usually because the system has been taken off its backplate, or it isn't mounted on its backplate properly. Once you get the panel back on the backplate, you can then acknowledge the tamper condition by entering the system's Master Code when prompted.

Tags: , , , , , , , , , , , , , ,

Comments


Posted By

The leading keypad option for the Qolsys IQ Panel 2 Plus is unquestionably the Qolsys IQ Remote. This innovative touchscreen keypad mimics the screen of an IQ2 or IQ2+, and it allows for security and automation control from a second on-site location. But sadly, it lacks a replaceable battery!

To be clear, the Qolsys IQ Remote does have a backup battery. When AC power for the IQ Remote is lost (either due to the transformer being unplugged or an electrical outage), the backup battery will keep it running for several hours. But like any rechargeable battery, the one inside the Qolsys IQ Remote has a limited useful life. And once that useful life is up, the battery cannot be replaced with a new one. This means that the IQ Remote Keypad will need to be plugged in at all times in order to be used. If AC power becomes lost for any reason once this happens, then the IQ Remote will immediately power down. Also, the keypad will then always show a low-battery warning that can never be cleared. While not completely debilitating, it is an unfortunate aspect of the Qolsys IQ Remote device.

When we spoke with Qolsys about this issue, they assured us that the IQ Remote battery is "very long lasting", and a user shouldn't encounter this issue for at least ten (10) years from the initial manufacture date, assuming that the battery is cared for properly. Additionally, the company has stated that they have not received any excessive reports of IQ Remote battery failures since its release more than five (5) years ago. But it's fair to expect that Qolsys might be hearing about this issue more frequently in about five year's time when a large number of Qolsys IQ Remote batteries begin failing! At least most IQ Remote Keypads are not carried or transported around, and most users just leave them mounted in a single location. If a user gets a backup generator for the device, then the issue might not cause serious problems.

Still, this is definitely a disappointing limitation of the Qolsys IQ Remote Keypad. We hope that Qolsys will see this message and consider updating the IQ Remote to support an end-user replaceable battery. A well-constructed device can certainly be used for more than 10 years, but it needs a replaceable battery option so that it can truly go the maximum distance. Also, for anyone considering the IQ Remote for use with an IQ Panel 2 or IQ Panel 2 Plus, we still think it's a great keypad option, and we still recommend using it. Just be aware that after ten (10) years or so, the battery will probably stop holding a charge and will begin not working as intended. The keypad will need to be plugged in and receiving power at all times once this happens, or else it will power down immediately. Our hope is that Qolsys redesigns the IQ Remote Keypad to put an end to this issue. Then a user can buy a new battery once the original reaches its end-of-life, install the new one, and keep using this great keypad!

For now, we would love to hear what you have to say about the Qolsys IQ Remote lacking a replaceable battery. Does this issue influence your decision in buying this keypad? Or do you think that it's not a major concern? Please let us know your thoughts in a comment down below. We're sure that many users who buy this keypad, and also those who have bought it in the past, may be surprised to learn that the device's backup battery cannot be replaced. And if we ever learn of Qolsys updating the IQ Remote to fix this issue, or releasing a successor keypad with a replaceable battery, then we will be sure to let you know in the Alarm Grid Blog so that you can make an informed buying decision. Please stay tuned for more security news and updates coming real soon!

And before we forget, we wish everyone in the United States a Happy Independence Day (4th of July) over this upcoming weekend! We are open today, Friday, July 2nd, and we will also be open for business as usual on Monday, July 5th. We look forward to serving you!

Tags: , , , , , , , , ,

Comments


Posted By

If you are looking for an affordable and effective way to monitor your home and see what's going on while you are away, then image sensors might be worth exploring. When used in conjunction with security systems, image sensors offer great function and convenience, all for a low price.


The simplest way to describe an image sensor is as a motion detection sensor combined with a still-picture camera. Unlike security cameras that capture full-motion video footage, most image sensors will only produce non-moving images. These are some of the most interesting and unique devices that you can use with a home alarm system. While image sensors certainly aren't for everyone, many end-users take full advantage of these peripherals and what they have to offer. Overall, image sensors can go a long way towards rounding out your security system and helping you get the most out of it.

Perhaps the best way to use image sensors is as alarm verification devices. If you live in a jurisdiction where verified response is required, then using image sensors is often the only option you can use to verify an intrusion, short of upgrading to full video monitoring service. Depending on the image sensor and system you are using, you may be able to achieve a setup where captured image sensor pictures are sent to the central station for immediate review. A trained operator can review the images and use them as sufficient proof of a crime in progress and use that as grounds for requesting emergency dispatch. You should check your local alarm codes and ask your monitoring company if verified response is enforced in your area. .Alarm Grid monitored customers can email us at support@alarmgrid,com. We respond to emails during our regular business hours of 9 am to 8 pm ET M-F.

You might be wondering why image sensors aren't more popular than they already are. While image sensors sound excellent in theory, and they often meet those high expectations in practice as well, they are somewhat quirky devices that can present a unique set of challenges. That's also not to mention that some image sensors have notable limitations and restrictions in how they can be used. This shouldn't scare you away from using them, but you should understand that you may have to overcome some obstacles to achieve the setup you want. And also understand that some systems cannot support image sensors in any fashion.

One thing to consider with image sensors is that they are always two-way communication devices. You might call them bi-directional sensors. With image sensors, it's not as simple as the sensor sending a signal to the alarm panel. The panel also needs to send signals to the image sensor. For example, if an alarm is triggered on the system, then the system needs to be able to tell the image sensor that an alarm has occurred, and the image sensor needs to capture a photo of the scene. Then the image sensor needs to turn around and send the image to the panel so that it can ultimately be distributed to an interactive security notification platform, and potentially the central station, and the end-user. The bi-directional communication is also what makes it possible for an end-user to request image sensor photos in real-time, when supported. Because of this, many alarm panels cannot support image sensors unless a specific image sensor transceiver module is added to facilitate two-way communication. And for some panels, image sensor support isn't even possible, as no compatible image sensors and/or image sensor transceivers exist for the panel.

Now that we have talked about image sensors in general, let's start exploring some of the specific models. To make this a bit more simple, we will try and focus on different options available on a panel-by-panel basis. Just like with regular sensors, image sensor support depends on which panel is being used. We will start by addressing the fact that most of the Honeywell Alarm Panels don't support image sensors, though there is an exception. The Honeywell Lyric, the Honeywell LYNX Panels, and the Honeywell VISTA Panels all lack image sensor support.

Interestingly though, the Honeywell Home and Resideo ProSeries Panels - PROA7PLUS, PROA7PLUSC, PROA7, and PROA7C - all have a fairly unique image sensor option in the Honeywell Home PROINDMV. This is the only image sensor presented in this blog that can be set to capture full-motion video (10 fps) or still motion images (320x240). Captured video and images can be viewed at the panel under Panel Camera History, with the ten (10) newest captures being available for viewing. Captured footage is also sent to Total Connect 2.0 for remote viewing. At the time of this writing, the PROINDMV is the only image sensor available for use with TC2. This also makes it the only image sensor we offer that can be used with an IP-only monitoring plan. We're sure that Resideo is also working on a way to make captured video and photos visible to central station operators, but we haven't heard of such a feature being set up just yet. There is also a downside to the PROINDMV in that you cannot use it to request video and/or images. In other words, no peek-in function is available for the PROINDMV, at least not at this time.

Moving onto the Alarm.com Security Systems, pretty much all of the most popular systems have some image sensor option available. It seems that Alarm.com has really embraced this technology and made it possible for almost all users to start using image sensors. We will start with the PowerG Image Sensors, which are some of the most popular image sensors we offer. As PowerG already operates using two-way communication, PowerG Image Sensors do not require any special modules or add-ons for support. You just need a system that supports regular PowerG Sensors, such as a Qolsys IQ Panel 2 Plus or a DSC PowerSeries NEO with an added PowerG Transceiver. And even better if you have an IQ2+ you will be able to view captured images from the alarm panel, in addition to viewing them from Alarm.com. One limitation however is that these image sensors will only capture images when they specifically trigger alarms on the system. Alarms caused by other zones will not result in the PowerG Image Sensors producing photos. There are currently two (2) PowerG Image Sensors, those being the DSC PG9934P Indoor Image Sensor and the DSC PG9944 Outdoor Image Sensor.

All of the other image sensors used with Alarm.com Systems require some type of hardware add-on for the panel. Sticking with Qolsys, adding the Qolsys IQ Card-IS to the original IQ Panel 2 will make it possible to enroll the Qolsys QZ81030-840 Image Sensor with the system. Technically, you can also add the IQ Card-IS to a newer Qolsys IQ Panel 2 Plus, but doing so will require it to "steal" the internal antenna used by the PowerG Daughtercard. This will result in the system having virtually zero useful wireless range with Power Sensors. As a result, anyone with an IQ Panel 2 Plus is strongly discouraged from going the route of the IQ Card-IS and QZ81030-840 combo, and just get PowerG Image Sensors instead. But if you do have an original IQ2, then using a QZ81030-840 with an IQ Card-IS is a great option.

The 2GIG Alarm Panels also support image sensors, but only if an image sensor module add-on has been added to the system. Starting with the 2GIG GC2 and its successor, the 2GIG GC2e, both systems can support the 2GIG IMAGE1 Image Sensor after a 2GIG XCVR2-345 Image Sensor Module has been added and installed. Unfortunately, for 2GIG GC2e users, adding the 2GIG XCVR2-345 will take away the system's ability to support 2GIG eSeries Encrypted Sensors. We have heard rumors in the past that a 2GIG XCVR2e-345 Image Sensor Transceiver Module would be specifically manufactured for the 2GIG GC2e so that the system could support both image sensors and encrypted sensors simultaneously, but it's looking increasingly likely as of late that such a release may never see the light of day. Even then, the 2GIG IMAGE1 is an older device, and it isn't known for producing the most detailed images. Still, for alarm verification purposes, it usually gets the job done. Both the IMAGE1 and the XCVR2-345 are still available on our website.

Moving onto the 2GIG GC3 and 2GIG GC3e, both of these systems support the 2GIG XCVR3-GC3 Image Sensor Module, to allow 2GIG IMAGE2 and 2GIG IMAGE3 Image Sensors to be paired. Don't let the need for the XCVR3-GC3 scare you away. The module is extremely affordable and very easy to install. It just uses a 4-wire connection with the system board, and it hangs out the back of panel. Unlike the issues experienced with the GC2e, adding the 2GIG XCVR3-GC3 to a GC3e will NOT take away the panel's ability to support 2GIG eSeries Encrypted Sensors. Furthermore, the supported image sensor devices for the XCVR3-GC3 are newer, and they are known for producing clearer images than the earlier IMAGE1. The 2GIG IMAGE2 is still relatively basic with its 320x240 QVGA resolution. But the 2GIG IMAGE3 really shines with its 640x480 VGA resolution, thereby making it one of the best image sensors on the market. These image sensors can be set to automatically produce images during alarm events, and a user can even manually request images using the "peek-in" feature on Alarm.com. All things considered, image sensor support for the GC3 and GC3e is surprisingly robust, and in our opinion, quite underrated. These really are some of the best alarm systems available for image sensor support, and we think more GC3 and GC3e users should take advantage of images sensors and what they can bring to one of these systems.

Unfortunately, we have to end this post with the sad story of image sensor support on the 2GIG Edge. While the 2GIG Edge has made a huge splash in the security industry, representing one of the most exciting panel debuts we have seen of late, image sensor support for the system is basically non-existent. To elaborate, the 2GIG Edge supports the same image sensor module add-on as the GC3 and GC3e, that being the 2GIG XCVR3-GC3, and it remains very easy to install, using the same 4-wire connection as before, and just hanging out the back of the panel. Once added, you can pair the 2GIG IMAGE3 Image Sensor with the Edge, but the 2GIG IMAGE2 is unsupported. We're glad that 2GIG chose the "better" of the two image sensors to work with the Edge, but we're still a bit surprised that the IMAGE2 can't interface with the Edge and the XCVR3-GC3 combo. Fortunately, just like with the 2GIG GC3e, adding the 2GIG XCVR3-GC3 to the Edge will not eliminate the system's ability to support 2GIG eSeries Encrypted Sensors.

However, and this is a big deal, the 2GIG Edge with 2GIG XCVR3-GC3 will only see the 2GIG IMAGE3 as a standard motion detection sensor. In other words, the Edge cannot receive any of the captured images from the IMAGE3. And since the Edge can't get the captured images, it therefore cannot forward them to Alarm.com and/or the central station. This makes the 2GIG IMAGE3 nothing more than a fancy motion sensor for the Edge. It's super unfortunate, and one of the saddest things to learn about the 2GIG Edge. There is a ray of hope though. 2GIG has stated that this behavior between the Edge and IMAGE3 is not intentional, and they are working on a firmware fix to provide true image sensor support for the Edge in the future. No ETA for a fix is currently available, but we are hopeful that the 2GIG Edge will one day be able to carry on 2GIG's legacy of having some of the best image sensor support in the industry. For more information, we have a blog on the limitations of the 2GIG Edge in regards to image sensor support, which you can view here. And you can certainly expect Alarm Grid to provide an update once image sensor support for the 2GIG Edge has been fixed and made to work as intended.

We hope that this post has opened up your mind towards adding image sensors to your security system. They really are some useful and handy devices when set up properly. Users in verified response jurisdictions who aren't quite ready to make the jump to video cameras and the more expensive monitoring plans that come with them can often get started with image sensors at very little cost. And with a bit of testing and configuration, yours can truly be great and help you keep your home safe. If you have any thoughts or questions about image sensors, please leave them in a comment down below. We are eager for some fun and enthusiastic discussion about image sensors and what they can offer for home security. And don't forget to keep checking the Alarm Grid Blog, as we will have some more great topics to cover and discuss in the near future.

Tags: , , , , , , , , , , ,

Comments


Posted By

For anyone watching Samsung SmartThings it's impossible not to notice that the platform has experienced a substantial shift in identity. While the platform was once developed upon physical hardware, that is no longer the case, as SmartThings is now largely built around intangible software.

This change in focus can be seen in multiple facets of SmartThings. The legacy "Classic" SmartThings App has been left behind, and developers have instead put their resources into SmartThings Labs and the recently re-titled Matter initiative, which was previously known as Project CHIP. It's obvious that Samsung still sees value in the SmartThings platform, if only from a virtual aspect. This can be especially seen in Matter, as initial Matter-speaking devices are set to release later in 2021.

But while Samsung clearly has interest in the software side of SmartThings, the hardware side has been relatively quiet. The original 1st-gen SmartThings Hub stopped working nearly a year ago. Meanwhile, Samsung has been attempting to pass the hardware development side to others, as Aeotec has released the first third-party SmartThings Hub. Stock for SmartThings hardware is down, and it is becoming increasingly difficult to find basic equipment. What it all suggests is that Samsung wants its focus to be on their SmartThings ecosystem, not on the equipment itself.

To make this possible, Samsung is pushing the SmartThings platform to rely even more heavily on the wireless protocols that allow for connectivity and communication between the different equipment. These wireless protocols include WIFI, Z-Wave Plus, Zigbee, and even more obscure wireless networks like Thread, and their own pet-project, Matter. Simply put, Samsung wants to focus on building the smart wireless ecosystem making automations possible, and not necessarily on the sensors and smart hubs that users physically set up and hold in their hands. Apparently its in the intangible aspects of a smart home where Samsung feels they can bring the most value.

SmartThing users often say that the platform is one of the easiest and most proficient ways to design and maintain a smart home. It's obvious that Samsung still views SmartThings as a crucial component of their brand. However, while the SmartThings division was once largely an endeavor of tangible hardware, that appears to no longer be the case. The future of SmartThings as developed by first-party Samsung appears to be that of a virtual focus, in which software development reins supreme. Elsewhere, the actual legwork of building the physical hardware components can apparently be left to whomever will step up in their place.

What do you think about this change of focus for Samsung? Do you think this is a good move for the company to primarily focus on the intangible software components of SmartThings? Do you believe that other third-party companies can properly step-up and handle the hardware development and manufacturing steps of the process in their place? Also are you a fan of SmartThings in general, or do you prefer other smart home automation platforms? Let us know your thoughts in a comment down below. And stay tuned to the Alarm Grid Blog for more security and automation discussions coming soon!

Tags: , , ,

Comments


Posted By

There is an important key change coming to the way that Alarm.com Video Analytics are handled. Notifications for Alarm.com Video Analytics are now being as soon as a person, vehicle, or animal is detect. A notification will link to the live camera feed so that you can view the action.

This new change will apply to all new and existing Alarm.com Video Analytics recording rules. Previously, Alarm.com Video Analytics notifications were sent out once the associated video clip was fully uploaded. The one exception to the change is for email and SMS text message Video Analytics notifications that are specifically configured to "Attach a Video Clip" are still going to be sent after the video clip has been uploaded.

According to Alarm.com, the new method with the notification linking to the associated camera video feed will make it easier for users to quickly access the associated camera so that they can gain knowledge of the situation at-hand in a faster time period than they were able to previously. While this might seem like a relatively small change here, it will actually have a pretty big impact on Alarm.com Video Analytics and how they are used.

Remember that Alarm.com Video Analytics are based around Video Analytics Rules. If you want to add a new Video Analytics Recording Rule through the Alarm.com Website, then start by logging into your Alarm.com account through a compatible web browser. Choose Video on the left-hand side, then Recording Rules, followed by Add New Rule, and then Video Analytics. Remember that your alarm monitoring provider must have enabled both video monitoring and Video Analytics on your account before you will be able to do this. Alarm Grid customers must have a Platinum Plan (Self or Full) or an Alarm Grid Video-Only Plan to use any form of Alarm.com Video Analytics.

Do you have any thoughts on this seeming small, yet major change to Alarm.com Video Analytics notifications? Share your viewpoint in a comment down below. Maybe you like this change, because it will allow you to access your cameras more quickly? Or maybe you think that Alarm.com should have just left things alone. In any case, we would love to see some discussion. And don't forget to to stay tuned to our blog for more security news coming soon.

Tags: , , , , , , , , , , ,

Comments


Posted By

If you are a regular reader of the Alarm Grid Blog, then you have likely heard us joke about the current paltry selection of Total Connect 2.0 IP Cameras from Resideo (formerly Honeywell). But what if Resideo were to revamp their camera lineup? Today, we speculate what could be possible.

First, let's look at the currently available TC2 IP Cameras. There are two (2). We have the Honeywell IPCAM-WIC1 and the Honeywell IPCAM-WIC2. Both are indoor cameras, with the IPCAM-WIC1 being a "budget" 720p camera, and the IPCAM-WIC2 as the premium 1080p camera offering. There isn't anything inherently wrong with these cameras, and the IPCAM-WIC2 is actually quite nice. However, since the Honeywell IPCAM-WOC1 was discontinued, there is no outdoor camera for the lineup, and if you compare this selection with the Alarm.com Camera Lineup, quite frankly, Resideo should feel embarrassed.

But it doesn't necessarily have to be this way! Not only have we heard grumblings about some new cameras coming out of the Resideo pipeline, we're also happy to do our very own speculating. So let's play pretend for this blog post, and imagine what might be possible from Resideo and Honeywell Home.

With the Honeywell Home PROA7PLUS positioned as one of the leading next generation security panels, just imagine what could be possible if it had a robust and complete camera lineup to accompany it. Actually, you don't have to imagine, because we're going to do it for you. Right here, right now, we're going to drop some ideas and speculation about what Resideo could be cooking up. Who knows, maybe we'll see some of these thoughts become reality at ISC West 2021 next month.

We would want these cameras to look sleek and impressive. They should be easy to pair with your Total Connect 2.0 account. How about QR code pairing through the Total Connect 2.0 Mobile App? That would be quick and easy. WPS pairing for WIFI connectivity would likely be possible, but there should also be more secure Access Point (AP) mode pairing for greater security. We wouldn't be too disappointed if WPS pairing were dropped entirely, just as long as there were an efficient and simple process for network connectivity. Maybe they could do something where you connect an initial camera to the network, then other cameras could connect with that "Master Camera" and automatically pair with the network? There would be some security kinks to iron out there, but that sounds quick, easy and simple, which is optimal for end-users. And actually, if you were to use a power over ethernet setup, then you wouldn't even need WIFI connectivity.

Here's a quick and easy idea that consumers will love - a simple color option for each camera. Release each camera in the classic white coloring option, as when you think of security cameras, you usually think of white. But what about also a jet black color option? The black-colored cameras would be well-hidden in the darkness of night and catch intruders off-guard. Why hasn't this been done yet? Plus, consumers love fun choices like this. It's simple, sure, but black-colored security cameras would be a major market hit. Speaking of night time, we would want these cameras to have IR night vision capabilities for recording in the dark. We wouldn't expect anything less from these top-of-the-line cameras.

How would you go about viewing these camera feeds? Well obviously you would be able to access them remotely through the Total Connect 2.0 platform. You could use the website or mobile app. We also know that there would be connectivity through the PROA7PLUS Alarm Panel, and the PROWLTOUCH Keypad. For the most part, that would probably be enough. But let's get creative here. What if you put an HDMI or other type of port on each camera, and then you could connect a loose monitor just to get a quick peak at the camera's feed while you are installing the devices in the field? Maybe that's packing too many features into a tight space, but at the same time, why not?

Speaking of, we have to wonder how the cameras would receive power. You could do what Alarm.com does. They have a "residential" lineup of cameras that uses simple, yet effective, plug-in transformers. They're quick and dirty, but they get the job done. Then there's also a "commercial" lineup that uses Power over Ethernet (PoE). We'll give you the best of both worlds here and just say that each camera should have both options available. Bundle a transformer, and release a universal "extension cable" for those who need a long wire run. But at the same time, allow a user to lose that transformer and just run an ethernet cable for both network and power connectivity. More choice, more options, more power.

And also, why not battery power? Allow a camera to run off AA batteries or CR123A batteries, and make something truly wire-free. Battery power is only becoming more impressive as technology grows and changes. This could also be a backup power option during electrical outages. Maybe you could do something where the camera pairs with the PROA7PLUS like a sensor, and then it uses its cellular connection (via the PROLTE-A or PROLTE-V) to remain connected to the network even if the internet is down? This might be a bit unrealistic at the present time, but hey, we can dream right?

This post wouldn't be complete without talking about some camera types. We will start simple. There would have to be a universal go-to and basic indoor model. The equivalent of the ADC-V523 (for those familiar with Alarm.com Cameras). This would be a versatile device that you could use in pretty much any indoor installation. And if there's an indoor model, then there would also have to be an outdoor model, ala the ADC-V723. And why not have a budget model, aka the ADC-V515. Maybe tone down some of the features and give an affordable option. There could even be a budget outdoor camera, the fictitious ADC-V715, which doesn't even exist... yet.

Would Resideo and Honeywell Home release their own version of the ADC-V622-WELL? Sure, why not. Actually, Honeywell has definitely attempted a "social camera tower" device before. We do like the idea. An interactive camera with a call button and two-way voice. It's creative and unique, and it could absolutely be a hit. Imagine pressing the camera call button and then getting an alert on the panel or via push notification from Total Connect 2.0. This is an excellent option for those taking care of sick relatives, or aging family members.

We would like to see some dome camera options. Dome cameras are easy to hide, and they offer some excellent installation opportunities. How about a small dome camera like the ADC-V821, and a big dome camera like the ADC-VC826. Maybe the big dome camera would get a boost in specs and capabilities, like pan/tilt and possibly even zoom, to take advantage of the larger size. Resideo Dome Cameras and Honeywell Home Dome Cameras for residential and commercial applications alike. And they would certainly be suitable for outdoor use as well. The dome design practically screams "Install Me Outside Please!", and we don't see why not.

Lastly, we want to go out with a BANG! here. You know the ADC-VC836 Turret Camera? Well imagine a design like that, but then you can go into Total Connect 2.0 to remotely control the turret camera's position like a robot. A remote control camera, kinda like a stationary drone. Wait, a Drone! Resideo Drone Camera and Honeywell Home Drone Camera! Why not just release a Resideo Drone or a Honeywell Home Drone? Pair it with your Total Connect 2.0 account, select the Drone Camera, and then use your phone or computer as a controller for it. Take flight and scope out your home or business with your drone camera. An outdoor model could charge using solar power. Fly around and capture all of the activity recorded. Not only would you get amazing coverage, it would be COOL.

We can just imagine spending hours flying our TC2 Drone Camera. If privacy concerns are a thing, you could set the camera to only record footage while it is within the assigned property address. We're strictly talking for monitoring your own property. Still, the possibilities of flying a mini TC2 drone around a 3-story house or multistory company office would be pretty neat. Imagine the drone riding in the elevator and then surprising your co-worker as the door opens! Two-way voice capabilities would allow you to communicate through your drone in real-time. Again, we know a drone might a bit scary and open up some unnecessary espionage opportunities. But this is too cool not to at least imagine and dream about.

None of the ideas or topics discussed in this blog are known to exist, and this is just purely conceptional imagination "what-if" at this point. The odds of Resideo actually showcasing a drone camera at ISC West 2021 are slim-to-zero. At some point, the camera fairy tales in this post became exactly that - fairy tales. That's not going to stop Alarm Grid from thinking about a day in the future where Resideo has an incredible lineup of security cameras, and we laugh the fact that at one time it was just the IPCAM-WIC1 and IPCAM-WIC2.

What can we expect out of Resideo as far as new cameras at ISC West 2021? Well a drone, or even a stationary turret camera ala an ADC-VC836-like design that you can actually use for 360-degreee control through Total Connect 2.0 is probably asking too much. Let's come back down to planet Earth for a second. It's fair to expect a new indoor and outdoor camera for use with Total Connect 2.0. Seriously, TC2 users deserve a better camera selection. And even if we saw some nice dome cameras for the platform, we would probably still be blown away. Resideo has to up their camera game. Why not give the public something impressive?

Can you dream big on some Resideo and Honeywell Home Camera ideas? Or has this writer lost his marbles? Leave your thoughts in a comment down below. What would you like to see out of a next generation of Honeywell IP Cameras? What's realistic, and what's a fun fantasy idea? We clearly crossed the line into the realm of fantasy in this post, but why not get a little creative once in awhile? Security is fun, don't ever forget that. Speaking of fun, stay tuned to the Alarm Grid Blog for more security news and other content coming soon.

Tags: , , , ,

Comments