2GIG GC2 Posts

Posted By

The Smart Arming feature can be enabled for any residential customer who has an interactive monitoring plan with Alarm.com. Once enabled, the feature can easily be configured using either the customer website or iOS or Android app.

Once configured, the Smart Arming feature will automatically arm the system to the Stay Mode once the occupants of the home have gone to bed. This can be accomplished using a schedule, or by configuring certain door and/or motion sensors to work in conjunction with the feature. You can reach the Smart Arming settings by going to Security, or through the Automation page. The Smart Arming programming is listed as Goodnight for Arming, and Wake Up for Disarming.


For example, you can set the system to Arm Stay at 10:00 PM, or you can set the system to Arm Stay when no activity has been detected for 30 Minutes between 10:00 PM and 11:30 PM (this is just an example, and you can use whatever time frame you want). If you choose the latter option, you then configure which zones you want to apply this logic to.

For the Stay Arming feature, doors, windows, and motions can be used along with the feature. So, once you choose the zones to be used with this logic, if no activity has been detected on ALL of those zones for a full 30 Minutes, and the time is between 10:00 PM and 11:30 PM, the system will automatically Arm Stay. Smart Arming logic is canceled if the system is already Armed Away.

For Disarming the options are similar. You can set the system to Disarm at a specific time, or you can set it to Disarm when motion is detected on certain motion detectors within a specific time window. For example, in our screenshot below, you can see we have our system set to Disarm if the Upstairs Motion detects movement between 8:00 AM and 9:00 AM. We also have it set so that if no motion is detected, the system will still disarm at 9:00 AM, which is sort of the best of both worlds.

Notice that only Motion Detectors are now available to tie to the Disarm logic. You don't want someone opening a door to disarm the system. By the same token, be sure that no outdoor motions are configured to work with this automation.


This is an excellent new feature that can go a long way toward preventing false alarms. No more forgetting to disarm the system when you go to let the dog out in the morning. As long as you set it up so that a motion you walk past on your way to the door causes the system to Disarm, you're all set. No more laying in bed wondering if you remembered to set the alarm. Now, as long as you have configured the Goodnight options, you know your system will arm itself based on either a schedule or activity (or lack thereof) combined with a time window.

The following Alarm.com compatible panels support this feature:

Panel Compatible Motion Sensor
Groups (Arm & Disarm)
Compatible Contact
Sensor Groups (Arm Only)
2GIG GC2/e 4, 10, 23 1, 2, 3, 4, 5, 8, 10, 23
2GIG GC3/e 4, 10, 23 1, 2, 3, 4, 5, 8, 10, 23
2GIG Edge 4, 10, 23 All
DSC PowerSeries Neo/Pro 4, 5, 9, 10 4, 5, 9, 10
Interlogix Concord 15, 17, 18, 20 14, 16
Interlogix Simon XT/XTi/XTi-5i 15, 35 14, 16
Qolsys IQ Panel 2 17, 20, 44, 43, 35 8, 9, 10, 12, 13, 14, 16, 25
Qolsys IQ Panel 4 17, 20, 44, 43, 35 8, 9, 10, 12, 13, 14, 16, 25
Note: Sensor-based disarming is only available in the Simon XT/XTi/XTi-5i with firmware versions below 193a.

What do you think of this new Alarm.com feature? For that matter, what do you think of Alarm.com's commitment to bringing you new products and features in general? They're doing an excellent job of listening to customers and responding with great new options. Drop us a note in the comments and let us know what you think. We always look forward to hearing from you!

Tags: , , , , , , , , , , , , , , , , , , , , , , , , , , , , , , , , , , ,

Comments


Posted By

Alarm panel manufacturers routinely offer panel firmware updates. This allows them to add features and correct issues. However, most DIY users don't have access to the restricted portion of the company's site where these files are housed. Alarm Grid offers the latest firmware file downloads.

Most alarm panels can be updated Over-the-Air (OTA) using either Alarm.com or AlarmNet360. AlarmNet never charges anything for these updates, and Alarm.com also offers them for free, unless they have to be sent to the panel using cellular data. In that case, the update will incur a small fee, depending on the size and number of updates that need to be sent.

Qolsys panels will not perform an OTA update unless the panel is connected to WIFI. If you have one of these panels installed in a location where WIFI is not available, then the only option is to either update using a cell phone as a WIFI Hotspot, or download the firmware files, and then install them via either Micro SD Card (IQ2/IQ2+) or Access Point (IQ4).

Honeywell L5200, L5210, and L7000

Honeywell used to offer free firmware updates for the LynxTouch panels that they pushed remotely using AlarmNet360. It was a messy process, AlarmNet tech support was required to request these updates individually, per account. So, sometime after the introduction of the Lyric panel, they stopped this practice. The Lyric can only be firmware updated using AlarmNet360, but the update can be requested by the dealer, and now, the customer can also request the firmware update via the panel. When Honeywell, now Resideo, ceased offering OTA updates for the LynxTouch panels, they released the Honeywell LYNXTOUCH-MSD Firmware Update Tool. This tool can be used to update the L5200, L5210, or L7000 panels.

When an L5200 is updated to the latest version, it becomes an L5210 internally, though there are certain physical traits of the L5200 that won't change, like the screen size. Depending on when you purchased the LYNXTOUCH-MSD tool, it may come with the latest firmware version already on the SD Card (it comes with both L5210 and L7000 firmware already loaded). However, if you purchased your update tool when they were first released, it will have an older firmware version on it, and you will need to download the newest firmware to the SD Card and update the panel again to get the most current version. The update files are housed on the Resideo website in the password-protected portion of MyWebTech, so we offer the files for download from our site:

2GIG Go!Control 2 (GC2) or 2GIG GC2e

The 2GIG GC2 and 2GIG GC2e have a couple of different methods for updating the firmware. There is the 2GIG UPDV Easy Updater Tool and the 2GIG UPCBL2 Firmware Update Cable. The updater tool is geared more toward a professional installer who will be updating multiple different panels over the course of years. It comes with a version of either the 2GIG GC2 or GC2e firmware loaded but the tool itself will then have to be updated when newer firmware is released. The files to load are available from our site and are linked below.

The updater cable is the method of update most DIY users choose to use. It requires that the user have a windows computer available. The cable is a fixed length, so the computer that will be used needs to be near the alarm panel in order to perform the update. Ideally, a laptop is used. Instructions for using the updater cable to load the latest firmware onto a 2GIG GC2 or 2GIG GC2e can be found here. Instructions for loading new firmware onto the 2GIG UPDV Easy Updater Tool can be found here. Instructions for using the updater tool to update a 2GIG GC2 or GC2e panel once it has the latest file loaded can be found here.

The 2GIG GC2 and 2GIG GC2e firmware pages are linked below. Each page has both Updater Tool and Updater Cable files:

2GIG GC3 and 2GIG GC3e

The 2GIG GC3 and 2GIG GC3e technically use the same firmware. The 2GIG GC3e was released at firmware version 3.2.1, so any GC3e panel will have at least this version of firmware already installed. Alarm Grid offers firmware versions 3.0.1 up through 3.2.4.6725 on our 2GIG GC3 Firmware Update Page. On our 2GIG GC3e Firmware Update Page, we offer 3.2.3.6713 up through the current version which, at the time of this writing, is 3.2.6.6770.

The 2GIG GC3 and 2GIG GC3e are both much easier to update than the 2GIG GC2 or GC2e. Both 2GIG GC3 versions offer WIFI, which makes OTA updates simple, as well as free. For systems that need it, an OTA update can be pushed from Alarm.com via cellular for a nominal fee. Again, Alarm Grid offers this type of upgrade to our customers at our cost, with no markup. If WIFI is not available at the panel, and a user doesn't want to pay for an OTA update, we offer the upgrade files from our site. This FAQ provides a walkthrough on how to perform the update using the files from our site. Instructions for performing the update are also listed on the page along with the firmware files.

2GIG Edge

The 2GIG Edge updates in the same way as the 2GIG GC3 and GC3e. It has a USB port located on the top of the panel. Once the firmware update file has been loaded onto the root directory of a USB drive, the drive is inserted into the port on the panel's top and the panel prompts the user to update. For full instructions on updating a 2GIG Edge, check out this FAQ.

Qolsys IQ Panel 2 and IQ Panel 2 Plus

The IQ Panel 2 and IQ Panel 2 Plus also use the same firmware version. The difference between the two panels is hardware. The IQ Panel 2 does not support PowerG, and the IQ Panel 2 Plus does. As noted above, Qolsys panels will not download firmware updates via cellular data, so the options are to connect the panel to WIFI, temporarily connect the panel to a Hotspot on a cellular phone, or update locally using a Micro SD Card. The step-by-step instructions for loading the firmware from an SD Card are shown on the firmware update page.

Qolsys IQ Panel 4

The Qolsys IQ Panel 4, like the previous IQ Panels, will not download firmware updates via cellular data. However, unlike the IQ Panel 2 or IQ Panel 2 Plus, the IQ Panel 4 does not have a Micro SD Card slot. Instead, if WIFI is not accessible by the panel, either directly or via a cell phone Hotspot, then the firmware update files have to be downloaded to a phone or tablet, then the phone or tablet must be connected to the IQ Panel 4 Access Point, and the files then loaded to the panel from the phone or tablet. Instructions for updating using the Access Point are available on the firmware download page.

Above are links to all the different panel firmware pages we offer here on the Alarm Grid site. In addition to alarm panel firmware, we also offer some firmware pages for the Honeywell Home TUXEDOW or Resideo TUXEDOWC touchscreen keypads as well as the older Tuxedo Touch firmware. We don't have a page for the older 6280 touchscreen keypads, but if you need access to that firmware, send an email to support@alarmgrid.com letting us know what you need and we can get you access to it.

As mentioned above, the Lyric panel can only be updated via AlarmNet360 and in order to update the firmware, the panel has to be actively monitored. The same is true of the newer Honeywell Home and Resideo ProSeries panels (PROA7, PROA7PLUS, PROA7C, and PROA7PLUSC). These panels must be actively monitored and registered with AlarmNet360 before an update can be applied to them.


Tags: , , , , , , , , , , , , , , , , , , , , , , , , , , , ,

Comments


Posted By

It seems every week we're reporting a new feature being rolled out by Alarm.com. They recently added remote Duress Code programming through the Alarm.com app or website. Alarm.com must first enable this feature for the dealer, then users will have access if their panel supports the feature.

Before any Alarm.com user can start configuring codes remotely, the alarm dealer for the customer account must have this feature enabled. If the feature is not showing up when a user attempts to remotely program the Duress Code, contact the Alarm.com dealer and ask them to enable it. They may need to contact their Alarm.com Sales Representative to get the feature enabled.

Next, be sure that the alarm panel being used supports this feature. We have an FAQ on how to set up this feature via the Alarm.com Website and another FAQ on how to set up this feature using the Alarm.com App. Both of these FAQs have a list of compatible panels, and advise if a single or multiple codes are supported by the panel.

The way a Duress Code works is simple. If a system user is forced to interact with their alarm panel in any way, though this will usually involve disarming the system, if the Duress Code is used, then in addition to performing the security system function a silent signal is sent to the monitoring station alerting them to the fact that the system user is under duress. They are being forced to do something against their will. The monitoring station will receive this signal and then process it according to the customer's pre-stated wishes, and their own policies regarding duress situations.

The key element to the use of a Duress Code is the ability for someone who is not onsite to receive the signal and immediately take action. If the security system is not monitored by a trained 24/7 monitoring station employee then the Duress Code might just as well not exist. It may be possible to send a text, email, or push notification to someone outside the home or business, but there's a good chance that person may never see it, or may not understand what they're seeing. If there is any concern that a duress situation might occur, then central station monitoring is the best way to protect the people you love.

And finally, one thing I nearly forgot to mention above, an Alarm.com dealer cannot program a Duress User for a customer through their panel programming portal. Only the Admin Alarm.com Account user, the homeowner or business owner, is allowed to affect these codes remotely. So, what do you think about this new feature? Do you like the idea of being able to control system Duress Codes remotely? Leave a comment below and let us know your thoughts. We always enjoy hearing from our readers. That's all for now, stay safe out there.

Tags: , , , , , , , , , , , , , , , , , , , , , ,

Comments


Posted By

Nortek has announced discontinuing various 2GIG products, likely in an effort to make room for bigger and brighter things. The end of sale date for these products is November 30, 2020. This news comes after Nortek just recently discontinued a large selection of 2GIG products in September.


Starting November 30, 2020, it will no longer be possible to order the 2GIG products listed below. The last possible shipment date for these products is December 14, 2020. We will likely be discontinuing these products on our website when this happens, and we would expect other retailers to do the same. The complete list of products is outlined below, along with any appropriate replacement options, when applicable. Please note that many of these products were for use with overseas 2GIG equipment and not sold by Alarm Grid.

PRODUCT
DESCRIPTION
2GIG-3GTC90X-A2GIG-3GTC90X-A Alarm.com 3G Turkcell Communicator for GC2
2GIG-3GVF67-A Alarm.com 3G Vodafone Communicator for GC2
2GIG-CAM-111-NET Indoor WIFI Camera for SecureNet
2GIG-CAM-250-PB Outdoor Mini Dome PoE Camera
2GIG-CO3-345 2GIG CO Detector for GC2 & GC3
Replacement: 2GIG CO8-345
2GIG-CP21-345 2GIG Go!Control GC2 Panel
Replacement: 2GIG GC2e Panel
2GIG-CP21-433T 2GIG 433 MHz Turkish Panel
2GIG-DBELL1-345 2GIG Wireless Doorbell for GC2 & GC3
2GIG-DW10-120PK 120 Pack of 2GIG DW10
Note: Individual DW10 Still Available
2GIG-GC3-DEMOKIT 2GIG GC3e Demo Kit
2GIG-GC3E-345-K31 2GIG GC3e 3-1 Kit (Pre-Packaged by 2GIG)
Replacement: GC3e AT&T LTE 3-1 Kit & GC3e Verizon LTE 3-1 Kit
2GIG-GC3GUPX-U 2GIG Uplink Multi-Carrier 3G Cell Communicator for GC2
2GIG-GCKIT31GV 2GIG GC3e 3-1 Kit w/ Glass Breaks (Pre-Packaged by 2GIG)
2GIG-KV-T-GC2 2GIG GC2 w/ Telus 3G Kit
2GIG-LDM-15 2GIG Plug-In Lamp Dimmer
Replacement: GoControl PD300EMZ5-1
2GIG-LTEV-A-GC2 2GIG Verizon LTE Communicator for GC2
Replacement: 2GIG LTEV1-A-GC2
2GIG-PIR4-433 2GIG 433 MHz PIR Motion Sensor w/ Pet Immunity
2GIG-SDS1-345 2GIG Wireless Smoke Detector Ring for GC2 & GC3
2GIG-SMKT3-345 2GIG Smoke, Heat, & Freeze Detector for GC2 & GC3
Replacement: 2GIG SMKT8-345
2GIG-SP2-GC3 2GIG SP2 Touchscreen Keypad for GC3 & GC3e
Replacement: 2GIG SP1 Touchscreen Keypad for GC3 & GC3e
2GIG-LAN-GC3 2GIG GC3 Ethernet Module
234830 Loose LED Light REC1
TL-WA850RE TP-LINK 300Mbps Universal WIFI Range Extender
NSC-DWMAGBR-BK2 DW10 Magnet Brown - 25 Per Bag, 1,000 Magnet Moq.
GC-DBC-PS2 GoControl Doorbell Power Transformer, 16VAC, 30VA
PD300Z-2 Z-Wave Plug-In Dimmer Switch w/ Pass-Through Outlet
Replacement: GoControl PD300EMZ5-1
PD300Z-R4 4-Pack of PD300Z-2
WA00Z-1 GoControl Battery Powered Z-Wave Switch/Scene Controller
FR20Z5-1 Z-Wave Plus Relay
FR20Z-R2 2-Pack of FR20Z5-1
GD00Z-7 Z-Wave Plus Garage Door Opener
Replacement: GD00Z-8-GC (Coming Soon to Alarm Grid)
WS15Z-SUB Z-Wave In-Wall Switch
Replacement: WS15Z5-1

If you have any questions about 2GIG products, including those set for discontinuation and/or their replacements (when applicable), please reach out to our team by emailing support@alarmgrid.com. We check our email during our usual business hours of 9am to 8pm M-F. We look forward to hearing from you!

Tags: , , , , , , , , , , , ,

Comments


Posted By

With a new year comes reduced pricing on many of our great existing products. We have just dropped the prices on 73 of our existing offerings. You can certainly find something great to upgrade your existing system or use with a new installation. Let's check out these awesome products!


Before we go through and list each and every reduced price product, we figured we'd go through and talk about some of the ones that excite us the most. After all, sorting through a list of 73 products is pretty daunting. Our initial "best-of" list may help you find exactly what you're looking for. These products are great if you have an existing system, or if you are building a new system and want to add some cool accessories.

These products are presented in alphabetical order:

Alarm.com ADC-V723 Outdoor Camera


The ADC-V723 is the current flagship outdoor security camera for use with the Alarm.com platform. This simple, yet powerful camera makes the perfect addition to any home or small business. It can capture video at up to 1080p quality, and it makes use of High Dynamic Range (HDR) to improve image depth and luminosity.

Alarm.com T2000 Smart Z-Wave Thermostat

Alarm dot com t2000 smart thermostat


If you are still looking for a smart Z-Wave thermostat, then the ADC-T2000 is an outstanding entry-level option. It conveniently wires in place of your existing thermostat to give you smart control over your HVAC system. It can pair nicely with both the Alarm.com and Total Connect 2.0 platforms. You just need a compatible Z-Wave hub to get started.

DSC PG9312 Outdoor Door/Window Sensor

Dsc pg9312 wireless powerg outdoor door slash window contact


The DSC PG9312 is the premier outdoor contact sensor for any user with a PowerG-compatible security system. It offers a maximum magnet spacing gap of 1.75", which gives you more flexibility in choosing a location for the sensor and magnet. Like all PowerG Sensors, it offers a wireless range of up to 2 km away from the panel, as well as 128-bit AES encryption.

DSC PG9914 Motion Sensor

Dsc pg9914 powerg 915mhz out wireless motion detector


Anyone with a PowerG Security System looking to add a basic indoor motion sensor should turn to the DSC PG9914. This is a simple, yet effective motion sensor that is great for use in nearly any home or business. It offers a modest coverage area of 39 feet, and the sensor provides pet immunity for small animals weighing up to 85 lbs.

Encore FireFighter FF345 Smoke/CO Listening Module

Encore firefighter ff345 circular smoke detector takeover module


The Encore FireFighter FF345 is perfect if you have existing high-voltage smoke detectors that you want to integrate into a 345 MHz wireless system. The module can detect both the Temporal 3 sound of an activated smoke detector and the Temporal 4 sound of an activated CO detector. And if your high-voltage devices are one-go-all-go, then a single FF345 can takeover your entire network.

Honeywell 5822T Garage Door Tilt Sensor

Honeywell 5822t wireless garage tilt sensor


Also for 345 MHz system users, the Honeywell 5822T allows your system to monitor your garage door to see if it's opened or closed. This wireless sensor works great for security and automation purposes alike. You might even create a special smart scene that activates as soon as the 5822T detects that you garage door has been opened!

Honeywell IPCAM-WIC1 Indoor Camera

Honeywell lyric c1 wifi indoor 720p hd total connect security ca


The Honeywell IPCAM-WIC1 Indoor Camera is for anyone with an existing Total Connect 2.0 Video Monitoring service plan that they want to expand upon. This is a simple and straightforward camera that captures video at up to 720p quality. It can be easily rested on a desk or table, and no hard-mounting is required.

Qolsys IQ DW MINI-S Door/Window Sensor

Qolsys iq dw mini s encrypted wireless sensors for iq panel 2 qs


The Qolsys IQ DW MINI-S can be used by anyone with a 319.5 MHz wireless system, including the Qolsys IQ Panel 2 Plus w/ Legacy Interlogix & Qolsys Daughtercard. This is a straightforward door and window contact sensor that makes a nice addition to any compatible system. Its small and compact design allows for a tidy installation.

Please see our complete list of reduced price products in the table below, organized by product type:

Product Type
Products
Alarm Panels (6)
Cameras, Image Sensors, & Accessories (6)
Communicators (5)
Door/Window Sensors (8)
Environmental Sensors (2)
Garage Door Sensors (1)

Glass Break Detectors (5)
Hardwired Zone Expanders (2)
Home Automation & Smart Home (4)

Life-Safety Products (5)
Key Fobs & Panic Buttons (2)
Keypads & Desk Mounts (3)
Motion Sensors (8)
Power Supplies & Relays (2)
Sirens & Speakers (6)
Wireless Converters, Receivers, Repeaters & Translators

If you have any questions about these products or any of the other products on our site, including product compatibilities, please reach out to us. You may also contact us if you want to learn more about our monitoring services. The best way to reach us is to email support@alarmgrid.com. Or you may call us at (888) 818-7728. Remember that our support hours run from 9am to 8pm ET M-F. We look forward to helping you find the perfect product for your needs!

Tags: , , , , , , , , , , , , , , , , , , , , , , , , , , , , , , , , , , , , , , , , , , , , , , , , , , , , , , , , , , , , , , , , , , , , , , , , , , , , , , ,

Comments


Posted By

Hi DIYers! We recently made a post that compared wireless systems with hardwired ones. We ultimately concluded that most end users are better-suited with a wireless system. If you have decided that you need a wireless home security system, this buyer's guide can help you review the options.

Remember, no matter which system you buy, you will need an alarm monitoring plan to go along with with it. Please review our alarm monitoring page for more information. Below are some of the best wireless security systems on the market today and what makes them so great:

Qolsys IQ Panel 2 Plus

Qolsys iq panel 2 plus verizon lte with powerg s line and legacy

The Qolsys IQ Panel 2 Plus is arguably the most robust alarm system on the market today. Each version provides support for PowerG 915 MHz Sensors and a choice of one legacy sensor type (319.5 MHz, 345 MHz or 433 MHz). The PowerG Sensors are particularly renowned for their ability to be used from up to 2,000 feet away from the IQ2+ System in open air. This is also one of the few wireless all-in-one panels with the ability to display the live feed for Alarm.com Security Cameras right from its screen. The panel also includes a built-in LTE cellular communicator (AT&T or Verizon) and a fully functional Z-Wave Plus Controller. In fact, this is one of the very few systems where virtually no add-ons are needed. However, the IQ Panel 2 Plus is one of the more expensive wireless panels available on the market. But users will certainly appreciate its sleek, modern design and superb functionality. The system uses Alarm.com as its interactive service platform, and it can readily connect with the service. All versions of the IQ Panel 2 Plus can be seen here.

Choose the IQ Panel 2 Plus if:

  • You want the remarkable signal range that comes with PowerG Sensors.
  • You want the ability to easily bring over existing wireless sensors (319.5 MHz, 345 MHz or 433 MHz) with your new security system.
  • You want the ability to view your security cameras right from your panel.
  • You don't mind paying top-dollar for an alarm system.

Honeywell Lyric Controller

Honeywell lyric controller encrypted wireless security system

The Honeywell Lyric Controller is still the flagship HomeKit security system from Honeywell, and the time-tested company has once-again produced an excellent panel. The Lyric is perhaps the best system on the market today for use with Apple HomeKit. It can pair natively with HomeKit in order to provide all of the functionality that a user would expect with the feature. The Lyric System also has its own lineup of encrypted sensors, called the Honeywell SiX Series. Additionally, it is backwards compatible with the Honeywell 5800 Series. Another factor that separates the Lyric from other systems is its ability to be used with Total Connect 2.0. This service is designed exclusively for Honeywell Alarm Systems, and it offers similar functionality to that of Alarm.com. The system's built-in WIFI card allows it to readily connect with the service. One downside to the Lyric is that it only includes a Z-Wave classic controller as opposed to a Z-Wave Plus controller. While it can support Z-Wave Plus devices, they will only have the capabilities of Z-Wave classic devices when used with this system. Please note, a separate Lyric Cellular Module is needed for cellular connectivity.

Choose the Lyric Controller if:

  • You plan to use your alarm system with Apple HomeKit.
  • You prefer using Total Connect 2.0 over Alarm.com.
  • You want to use encrypted Honeywell SiX Series Sensors.
  • You don't require a Z-Wave Plus controller.

2GIG GC3

2gig gc3 diy wireless security system w slash 7 screenThe 2GIG GC3 just gave itself a major upgrade in the form of partitioning support. This makes the GC3 the first ever AIO wireless system to support partitioning. 2GIG refers to this feature as "smart areas", and the system on the latest firmware, and up to four of these areas can be supported. Beyond that, the GC3 is also highly regarded for its strong build quality. That's not to say the other panels are lacking in that department, but the GC3 is perhaps the sturdiest system we have ever worked with. Its touchscreen controls are extremely responsive, and its full-color 7-inch display is a joy to look at. The system can use 2GIG 345 MHz Sensors and Honeywell 5800 Series Sensors. One weakness of the system is that it does not support any type of encrypted sensors at this time. But it does include a built-in Z-Wave Plus Controller for smart home devices. Like the IQ Panel 2 Plus, the system uses the Alarm.com service. But the user will need to buy a separate GC3 cellular communicator to use ADC.

Choose the GC3 if:

  • You need partitioning support.
  • You want a system with superb build-quality.
  • You want to use the Alarm.com platform.
  • You don't need encrypted wireless sensors.

2GIG GC2

2gig cp21 345 front

The 2GIG GC2 is our pick as a "budget" security system. We know that many people getting into home security will not need all of the advanced features that the state-of-the-art systems have to offer. That is where is the 2GIG GC2 comes into play. With the right support, it can still serve as an extremely viable option for many users. The panel features a 3.75" by 2.25" touchscreen with very responsive controls. This is considerably smaller than the 7-inch touchscreen displays of the other panels on this list, but it will work just fine for many users. The panel can support up to 60 wireless zones. Again, this is considerably less robust than the other systems, but it will be perfectly acceptable for most smaller and medium-sized homes. The system includes a Z-Wave classic controller for supporting smart home automation devices. In order to get the GC2 connected with Alarm.com, a separate GC2 cellular communicator is needed. Overall, if you're looking for a new security system at a reasonable price, you can't go wrong with the 2GIG GC2.

Choose the GC2 if:

  • You're shopping for a system on a budget.
  • You want a simple, yet capable alarm system.
  • You don't need support for as many wireless zones.
  • You don't need a larger touchscreen display.

If you still need help deciding on a wireless system, don't hesitate to reach out to us for support! You may email us any time at support@alarmgrid.com. Or you can call us at (888) 818-7728 from 9am to 8pm EST Monday thru Friday. We look forward to hearing from you!

Tags: , , , , , , , , , , , ,

Comments


Posted By

Intro to the 2GIG GC2

The 2GIG Go!Control, also referred to as the GC2, is an incredibly versatile security panel with many uses and capabilities. But as an alarm system, its main function consists of interacting with a variety of different sensors. Each sensor is programmed with the GC2 System individually. The system can readily interface with a large number of wireless sensors as needed. However, the sensor programming process for the GC2 System is a little different from most other wireless security panels. This guide will help you with every step necessary to get sensors up and running with a 2GIG GC2 Alarm System.

The Panel - Basic Information

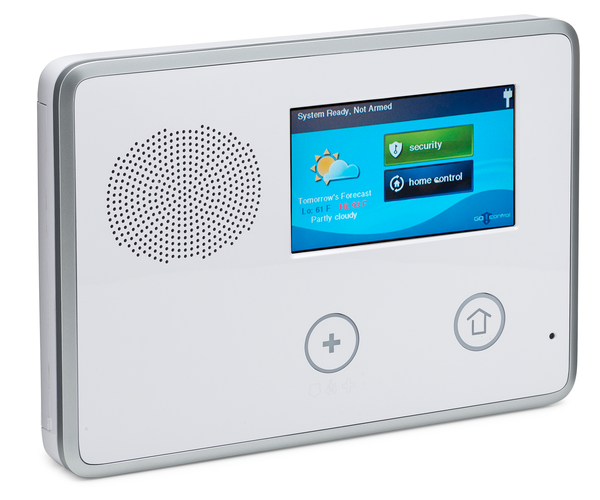
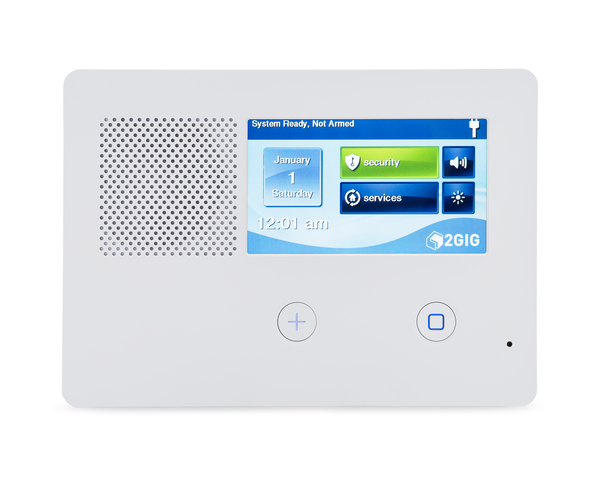
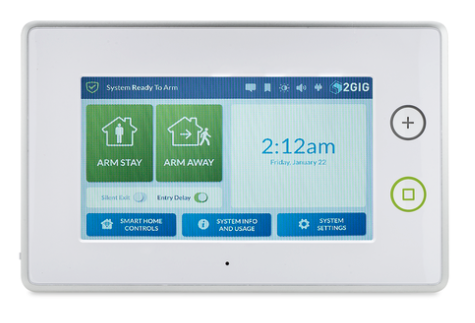
Before attempting to program a 2GIG GC2 Panel, it is helpful to know a little bit about the system. The GC2 is an all-in-one alarm system with a built-in 3.75" by 2.25" touchscreen controller. This makes it easy for the user to navigate between menus and make programming adjustments. The panel includes an integrated wireless receiver, allowing any sensor with a wireless frequency of 345 MHz to interface with the system. This is famously the same wireless frequency used by Honeywell 5800 Series Sensors. This means that any Honeywell 5800 Series Sensor and any 2GIG Sensor can communicate with the system. Finally, the GC2 Panel provides 60 different wireless zones for setting up wireless sensors with the system. It also includes two built-in hardwired zones and a Z-Wave controller for smart home devices.

2gig cp21 345 front

Accessing System Configuration - Zone Programming

In order to set up any wireless sensor with a GC2 System, the user must access the System Configuration Menu. The System Configuration Menu is also sometimes referred to as Zone Programming. This menu serves as the primary hub for learning-in new sensors. Accessing this menu is key for setting up a GC2 Panel.

To access System Configuration, start from the home screen of the GC2 System. Press the Go!Control icon in the bottom-right corner of the screen. Then enter the Installer Code for the system. The default Installer Code for a GC2 Panel is 1561. We recommend keeping the Installer Code at the default so that you do not become locked out of programming later. After entering in the Installer Code, choose the option "System Configuration". This will take you to the System Configuration Menu.

Navigating System Configuration - Selections, Questions and Sub-Questions

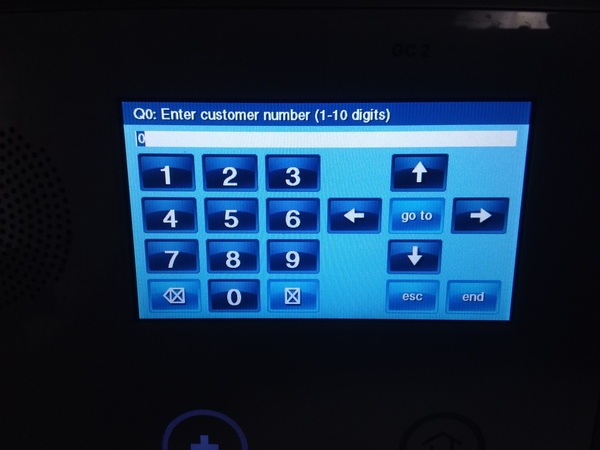
The System Configuration screen (shown in the picture below) consists of a numerical keypad, four arrows, and buttons labeled "go to", "skip", "sum", "esc" and "end". Depending upon the current selection, different buttons may be available. The system uses question-based programming that may seem a little confusing to new users. But once you know how to navigate this menu, the process becomes more intuitive. A good way to think about this is that each "Question" represents a different menu option for the GC2 System


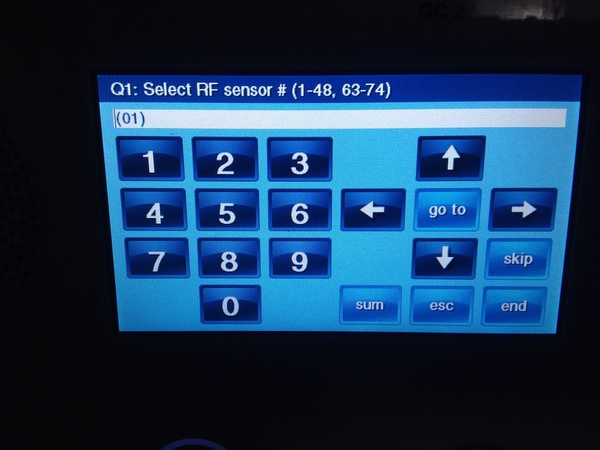
When navigating the System Configuration menu, you should always pay attention to the "Question" at the top of the screen. This is indicated by the letter Q, followed by a number, and then the current menu option (Question). Checking this information will let you know what setting you are currently configuring. For example, the first Question is as follows:

Q1: Select RF Sensor # (1-48, 63-74)

For this Question, you are choosing the wireless zone that is being configured. A zone can be assigned a wireless zone numbered 1 through 48, or 63 through 74. The white rectangular box below the Question shows the current selection.

Pressing the right and left arrows will allow you to navigate between different possible selections for that Question. For example, let's say that you are on Q1: Select RF Sensor # (1-48, 63-74), with a current selection of (02). Pressing the right arrow will take you to the next possible selection of (03). Pressing the left arrow will take you to the previous possible selection of (01). Keep scrolling through the possible selections until you reach the one needed. You will stay within the same question while doing this.

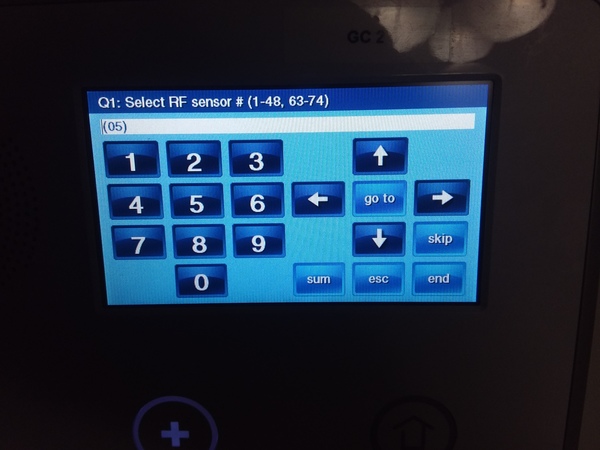
Alternatively, you can also use the numerical keypad on the left to put in the digits associated with the desired selection. For example, if you are on Q1: Select RF Sensor # (1-48, 63-74), entering in "05" will automatically adjust the current selection to (05). This can be a quick way to make a selection, without having to manually scroll between different options. Again, you will stay within the same question.

Within Questions numbered 1 through 4 on the GC2 System, there are various Sub-Questions. These Sub-Questions are used to provide additional options for the menu selection that is being programmed. Pressing the up and down arrows will take you to a different Sub-Question for the current setting that is being configured. A Sub-Question can be identified by having no number following the letter Q. Pressing the down arrow will take you to the next Sub-Question. Pressing the up arrow will take you to the previous Sub-Question within the sequence.

Please note that in some cases, pressing the up or down arrows will simply take you to the next Question in the sequence, rather than a Sub-Question. That is why it is always important to keep a close eye on the current Question at the top of the screen when programming a GC2 System. Remember, you will only have to consider Sub-Questions for Questions 1 through 4 on the system.

There also other ways to navigate between Questions. Pressing the "skip" button will automatically take you to the next Question in the sequence. For example, if you are on Q4, pressing the "skip" button will take you to Q5. Please note that the "skip" button will no longer be available for Q5 onward. At this point, pressing the down arrow will take you to the next Question in sequence. The "skip" button is removed for Question 5 onward due to the fact that these Questions have no available Sub-Questions. Instead, pressing the down arrow accomplishes the same goal.

You can also press the "go to" button to manually enter a 2-digit Question number and be taken to that Question. A single-digit Question number will be entered with a 0 in front of it - e.g. 07 for Q7. Please note that there are a total of 97 possible Questions on a 2GIG GC2 System. Entering in a 2-digit Question number higher than 97 (98 or 99) will take you to Q97. There is also a Q0 on the system for Question 0.


Using Question 1 to Learn-In Wireless Sensors

With 97 different Questions available on a GC2 System and various Sub-Questions available as well, programming a GC2 System can certainly seem intimidating at first glance. But fortunately, the vast majority of sensor programming is accomplished through Question 1 and its set of Sub-Questions. This makes learning-in a new sensor with the system a relatively easy process. To thoroughly explain the process, we will go through Question 1 and its Sub-Questions in their entirety.

As explained in the previous section, the main selection of Question 1 involves choosing RF Sensor Number, also called the Zone Number. A Sensor Number of 1 through 48 or 63 through 74 can be selected, for a total of 60 possible wireless sensors. Enter in the 2-digit Sensor Number to choose which Zone Number you will be working with. Once you have made the selection, you can press the down arrow to move on to the first Sub-Question of Question 1.

Setting the Sensor Type

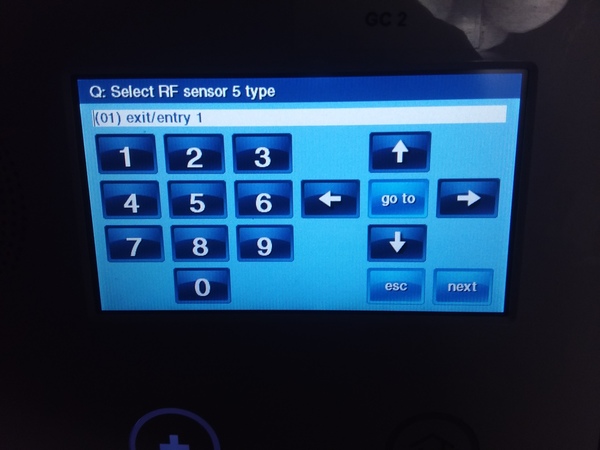
The first Sub-Question is the Sensor Type, which might also be called the Response Type. There are many options available. You can scroll between different options by pressing the right and left arrows. We will now go through each and every one:

(00) Unused - This means that no sensor is being used for that Sensor Number. In other words, this wireless zone is open.

(01) Exit/Entry 1 - If the sensor is activated while the system is armed stay or armed away, then the system must then be disarmed within the system's entry delay 1 period (set in Question 6 of programming). If the system is not disarmed within this time period, an alarm will occur.

(02) Exit/Entry 2 - If the sensor is activated while the system is armed stay or armed away, then the system must then be disarmed within the system's entry delay 2 period (set in Question 7 of programming). If the system is not disarmed within this time period, an alarm will occur.

(03) Perimeter - If the sensor is activated while the system is armed stay or armed away, an instant alarm will occur.

(04) Interior Follower - If the sensor is activated while the system is armed away, an instant alarm will occur, unless an Entry/Exit zone was activated first. If the system is set to armed stay, then the sensor will be bypassed and unable to cause an alarm.

(05) Day Zone - If the sensor is activated while the system is armed stay or armed away, an instant alarm will occur. Additionally, if the sensor is activated while the system is disarmed, a trouble condition will occur.

(06) 24-Hour Silent Alarm - If the sensor is activated, an instant alarm will occur. However, no siren or strobe will occur on the system. This will always occur, regardless of whether the system is armed or disarmed.

(07) 24-Hour Audible Alarm - If the sensor is activated, an instant alarm will occur. Any siren that has been set up with the system will activate. This will always occur, regardless of whether the system is armed or disarmed.

(08) 24-Hour Auxiliary Alarm - If the sensor is activated, the system sounder will activate, and an instant alarm will occur. However, any external siren or strobe programmed with the system will not activate. This will always occur, regardless of whether the system is armed or disarmed.

(09) 24-Hour Fire - If the sensor is activated, an instant alarm will occur. Any siren that has been set up with the system will activate. This will always occur, regardless of whether the system is armed or disarmed.

(10) Interior with Delay - If the sensor is activated while the system is armed away, then the system must be disarmed within the system's entry delay 1 period (set in Question 6 of programming). If the system is not disarmed within this time period, an alarm will occur. If the system is armed stay, then the sensor will be bypassed and unable to cause an alarm.

(14) 24-Hour Carbon Monoxide - If the sensor is activated, an instant alarm will occur. Any siren that has been set up with the system will activate. This will always occur, regardless of whether the system is armed or disarmed.

(16) 24-Hour Fire with Verification - If the sensor is activated twice within a two minute period, or if the sensor is activated and remains activated for 30 straight seconds, an instant alarm will occur. Any siren that has been set up with the system will activate. This will always occur, regardless of whether the system is armed or disarmed.

(23) No Response Type - The sensor will not be able to cause any system events, including alarm conditions. However, the sensor can still be monitored by a central station, and activity alerts can still be sent to Alarm.com.

(24) Silent Burglary - If the sensor is activated while the system is armed stay or armed away, a silent alarm will occur. A distress signal will be sent out to a central station. However, the system sounder, along with any sirens or strobes, will not activate.


Upon setting the Sensor Type, you can press the down arrow to move on to the next Sub-Question.

Setting the Equipment Type

The options available for the next Sub-Question of Q1 will depend upon the Sensor Type that was selected in the previous Sub-Question. In some cases, you will be prompted to choose a specific equipment code. You can use the right and left arrows to scroll through the possible selections.

For other Sensor Types, you may be asked to select a generic equipment type, such as a contact or a motion. The selections available will depend on the Sensor Type that was chosen.

Once you have made the appropriate section, press the down arrow to move on to the next Sub-Question.

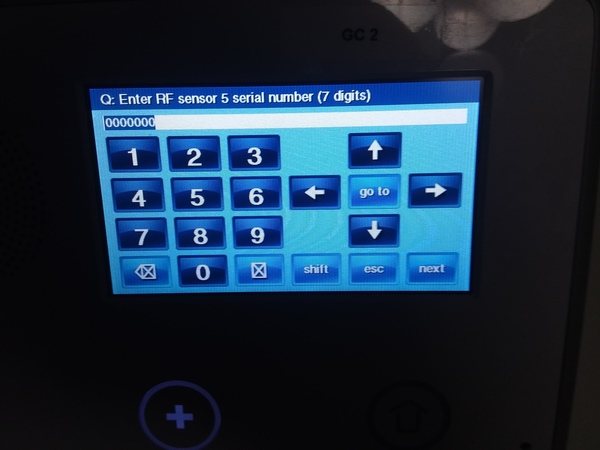
Setting the Serial Number

The serial number is a 7-digit code that is unique to each individual sensor. The serial number is usually located somewhere on the sensor, and it can be manually entered into the system. However, we strongly recommend auto-enrolling any sensor to have the serial number learned-in automatically. Not only will this prevent you from mis-entering the serial number, it will also ensure that the sensor is able to communicate properly with the GC2 System.

To auto-enroll the sensor, first press the "shift" key. Then press the "learn" key that will appear on the left side of the screen. You will be taken to a screen titled "Activate a sensor to learn its ID", along with the message "Waiting for RF sensor # transmission...". From this screen, activate the sensor you want to learn-in.

The process for activating the sensor will depend on the type of sensor that is being used. For example, a door and window contact will require you to separate the sensor from its magnet, while a smoke detector will have you activate the device's tamper switch.

Once the sensor has been detected, its Type and ID Number will be displayed on the screen. Verify that the information is correct, and press the OK button in the bottom-right corner of the screen. Then press the down arrow to move on to the next Sub-Question.


Continue Programming the Sensor

As you continue to move through the various Sub-Questions, you be able to apply various programming settings for the sensor.

Equipment Age has no affect on the performance of the sensor. The idea is that you can choose 0 if the sensor is brand-new, and 1 if the sensor was used previously. Either selection will work just fine.

The Loop Number is important for ensuring that the sensor performs as it should. Many sensors can perform multiple functions by setting a different Loop Number for the device. Check the manual for the sensor to determine which Loop Number should be used.

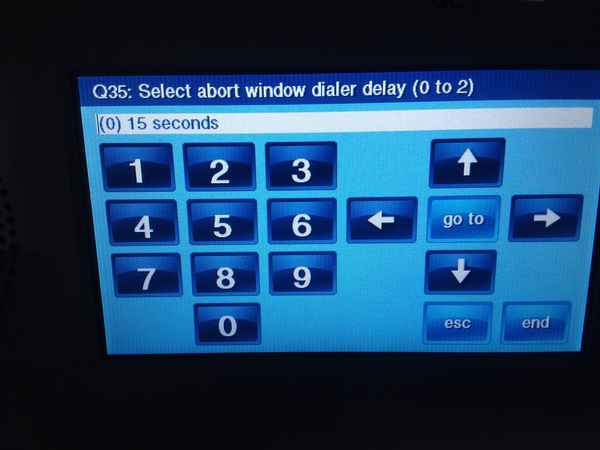
The Dialer Delay option determines whether or not dialer delay will be enabled for the sensor. This feature instructs the sensor to delay the process of sending out a notification signal to the user or a central station. Setting this option to 0 will have Dialer Delay disabled, while setting it to 1 will have the feature enabled. A user can set the Dialer Delay for their GC2 Panel by going to Question 35 of System Configuration. Selections of 15 seconds, 30 seconds and 45 seconds are available.


Setting the Voice Descriptor

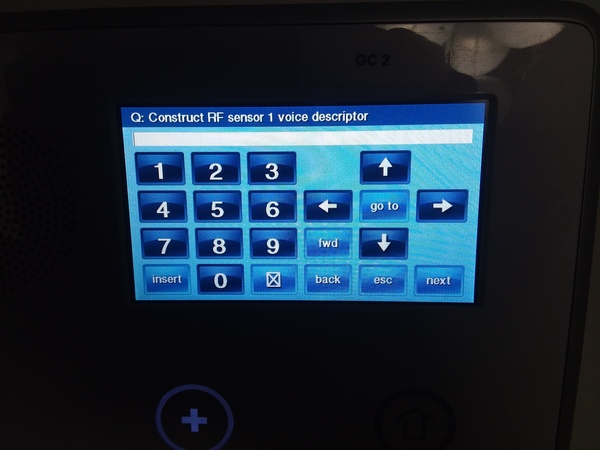
The Voice Descriptor is the audio annunciation the system will use to verbally identify the sensor. The GC2 Panel includes a built-in voice function that it uses to read out the Voice Descriptor for any given sensor. The Voice Descriptor for a sensor is determined by choosing a set of preprogrammed words for the panel to read out. Up to five individual words can be applied to a single Voice Descriptor. Because of the amount of options available setting the Voice Descriptor can seem challenging at first. But the process is actually very simple.

To add a new word to the Voice Descriptor, press the "insert" button. With a word highlighted, you can the choose the desired word in one of two ways. You can either use the left and right arrows to scroll through the list of available words. Or you can also enter in the 3-digit code for any given word to have that word applied. Once you have entered the 3-digit code, the new word will automatically replace the highlighted one. The entire list of available words and their respective 3-digit codes is available on pages 38 and 39 of the 2GIG GC2 Programming Guide.

Remember, any additional words that you plan on including for the Voice Descriptor must be added by pressing the "Insert" button. To scroll between words, press the "fwd" button to move to the right, and press the "back" button to move to the left. To delete a word, highlight the word you want to delete, and press the picture of the box with an X in it.


Once you have finished setting the Voice Descriptor, press the down arrow to move on to the next Sub-Question in the sequence.

Setting the Final Sensor Options

The Sensor Reports option will determine whether or not the sensor will send out a report to a central station in the event that it causes an alarm. Set Sensors Reports to 0 for disabled and 1 for enabled. If you want the sensor to send a signal to a central station, this option should be set to 1 for enabled.

The Sensor Supervised option determines whether or not the GC2 System will periodically look for check-in signals from the sensor. If the Sensor Supervised option is enabled, the system will experience a trouble condition if the sensor is ever unable to communicate with panel. This could be caused by the sensor being taken out of range of the panel or by a dead battery on the sensor. However, even if Sensor Supervised is disabled, the GC2 System will still alert the user about a low sensor battery and for an activated tamper cover.

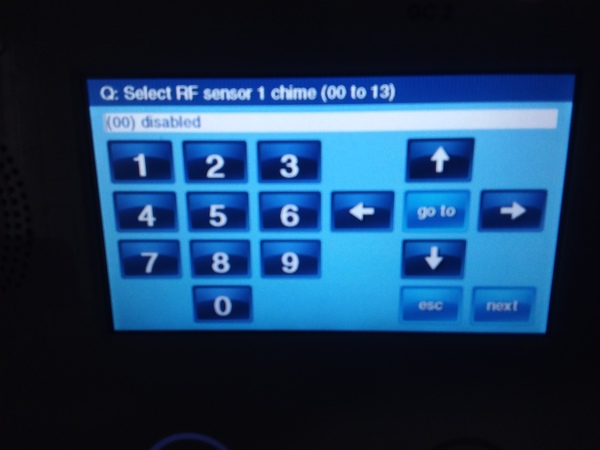
The Chime option is used to set an audible alert that will emit from the system whenever the sensor is activated. The Chime will play whenever the sensor is activated, even if no alarm is set to occur. You can use the right and left arrows to scroll between different Chime options. Any Chime with voice will have the Voice Descriptor spoken when the sensor is activated.


Finish Programming the Sensor

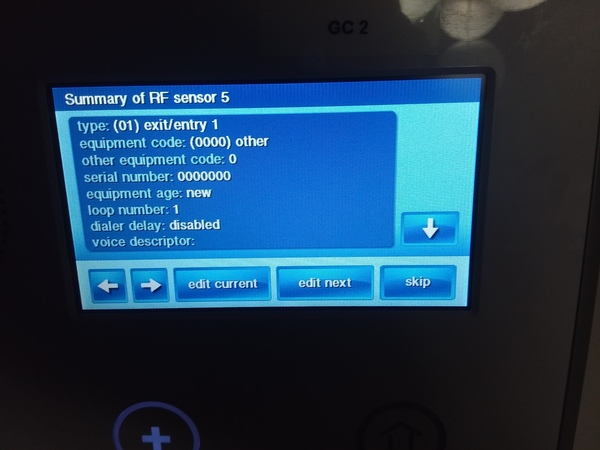
After pressing the down arrow from the Chime setting, you will be taken to a summary screen where you can view all of the selections you made for the configurations for that sensor.

Use the up and down arrows on the right side of the screen to view all of the selections. Use the left and right arrows in the bottom-left corner of the screen to scroll between the summary screens for different RF Sensors on the GC2 System (1-48 and 63-74).

Press the "edit current" button to make changes to the RF Sensor that is currently selected. Press the "edit next" button to make changes to the next RF Sensor in the numerical sequence.

Press "skip" to continue on to Q2: Select Wired Sensor # (1 to 2), which is used for programming the two hardwired zones that can be set up with the GC2 Panel.


Save Your Changes

If you are finished programming, press either of the "edit" buttons or the "skip" button. Then press the "end" button in the bottom-right corner of the screen. You will be taken to a summary screen that shows all of the current settings for Questions 5-97 in System Configuration. You can use the up and down arrows on the right side of the screen to review these settings. Pressing the "back" button in the bottom-left corner of the summary screen will have the system return to the System Configuration Menu so that you can make any additional changes that are necessary.

To finish and save your changes, make sure that the box next to "save changes" is checked. If it isn't, click on the box to apply a yellow checkmark next to the "save changes" setting. Then press the "exit" button in the bottom-right corner of the screen. The GC2 System will automatically reboot. Upon reloading, all of the changes that were made in the System Configuration Menu will be automatically applied and taken into effect.

Tags: , , ,

Comments


Posted By

Alarm Grid is making firmware pages available for upgradeable AUI security systems and touch screens that we sell. As a large number of them, including the older Tuxedo Touch, allow the software on them to be upgraded, an end user can extend the life of their system and get all the newest features simply by adding the latest and greatest software to the device. Moreover, any pesky security-critical problems can be easily solved without having to replace the panel.

For now, we've got the the following pages setup:

If you have any questions about how you might install the firmware onto these systems, please email support@alarmgrid.com. We'll be glad to help any of our monitored customers.

Tags: , ,

Comments