2GIG GC3 Posts

Posted By

The maker of the 2GIG GC3 and GC3e recommends that all users with a panel approaching 3 years of age replace the backup battery. Initially, the expected battery life was between three and five years. With the recent notice Nice, 2GIG's parent company is now suggesting a battery replacement ahead of schedule.


Apparently, swelling has been observed in some of these panels' lithium-polymer batteries. The manufacturer notes that some minor swelling is normal, but based on the notice it sounds like some batteries may be swelling beyond what is normal.


Once you open up the GC3/GC3 panel to access the battery, Nice is also warning not to puncture the battery upon removal. Do not use any type of sharp object to remove the battery. Puncturing the battery could allow dangerous chemicals to spill from the casing. Once the battery is removed, please follow local guidelines with regard to the proper disposal of lithium-ion batteries.

It is also recommended in this notice to do a firmware upgrade of your 2GIG GC3 or GC3e alarm panel at the time you replace the battery. The latest revision for these panels is 3.2.6.6770.

Reading through the firmware release notes, it does mention that the latest firmware update includes the addition of battery testing, and conditioning, as well as a status indicator for battery replacement. So, we will double down on the advice to update your panel's firmware. This revision also includes compliance with UL 985 edition 6. This standard requires that the panel recognize batteries that can no longer provide battery backup for at least 5 minutes worth of alarm signaling. When the panel recognizes that the battery lacks this capacity, it will alert the user of a low battery and the battery should be replaced at that time.

The 2GIG GC3 and GC3e use the same firmware beginning with revision 3.2.3. If you already have revision 3.2.1 or higher, then you can find all updates on the GC3e firmware update page. Older revisions may require a stepped approach to upgrading and cannot be updated all-at-once. You can find the older firmware versions on the GC3 firmware update page.

You must update to the base build of each revision, and then you can skip to the latest build of that revision. The base of each version is 3.0.x then 3.1.x, then 3.2.x. If you have an earlier revision and attempt to update directly to 3.2.1, your panel will very likely be damaged and will have to be replaced. Updating over the air using Alarm.com can help with this process, as their server should only allow you to update in the proper order.

GC3/GC3e firmware updates can be sent by your alarm dealer. When the update can be sent using WIFI at the panel, there is usually no charge, though different dealers may have different policies on this. An upgrade that has to be sent using cellular data will incur a fee, which will likely be passed onto the user by the dealer. Alarm Grid always passes these fees along with no markup. We recommend that you update using the USB port at the top of the panel. We have written detailed instructions on updating the firmware using the USB port to make this process easier to accomplish.


If your panel is approaching or past the 3-year mark, it is best to be proactive and purchase your new GC3/GC3e battery today. Then make sure to install the latest firmware, as recommended.


Tags: , , , , , , , , , , , , ,

Comments


Posted By

The Smart Arming feature can be enabled for any residential customer who has an interactive monitoring plan with Alarm.com. Once enabled, the feature can easily be configured using either the customer website or iOS or Android app.

Once configured, the Smart Arming feature will automatically arm the system to the Stay Mode once the occupants of the home have gone to bed. This can be accomplished using a schedule, or by configuring certain door and/or motion sensors to work in conjunction with the feature. You can reach the Smart Arming settings by going to Security, or through the Automation page. The Smart Arming programming is listed as Goodnight for Arming, and Wake Up for Disarming.


For example, you can set the system to Arm Stay at 10:00 PM, or you can set the system to Arm Stay when no activity has been detected for 30 Minutes between 10:00 PM and 11:30 PM (this is just an example, and you can use whatever time frame you want). If you choose the latter option, you then configure which zones you want to apply this logic to.

For the Stay Arming feature, doors, windows, and motions can be used along with the feature. So, once you choose the zones to be used with this logic, if no activity has been detected on ALL of those zones for a full 30 Minutes, and the time is between 10:00 PM and 11:30 PM, the system will automatically Arm Stay. Smart Arming logic is canceled if the system is already Armed Away.

For Disarming the options are similar. You can set the system to Disarm at a specific time, or you can set it to Disarm when motion is detected on certain motion detectors within a specific time window. For example, in our screenshot below, you can see we have our system set to Disarm if the Upstairs Motion detects movement between 8:00 AM and 9:00 AM. We also have it set so that if no motion is detected, the system will still disarm at 9:00 AM, which is sort of the best of both worlds.

Notice that only Motion Detectors are now available to tie to the Disarm logic. You don't want someone opening a door to disarm the system. By the same token, be sure that no outdoor motions are configured to work with this automation.


This is an excellent new feature that can go a long way toward preventing false alarms. No more forgetting to disarm the system when you go to let the dog out in the morning. As long as you set it up so that a motion you walk past on your way to the door causes the system to Disarm, you're all set. No more laying in bed wondering if you remembered to set the alarm. Now, as long as you have configured the Goodnight options, you know your system will arm itself based on either a schedule or activity (or lack thereof) combined with a time window.

The following Alarm.com compatible panels support this feature:

Panel Compatible Motion Sensor
Groups (Arm & Disarm)
Compatible Contact
Sensor Groups (Arm Only)
2GIG GC2/e 4, 10, 23 1, 2, 3, 4, 5, 8, 10, 23
2GIG GC3/e 4, 10, 23 1, 2, 3, 4, 5, 8, 10, 23
2GIG Edge 4, 10, 23 All
DSC PowerSeries Neo/Pro 4, 5, 9, 10 4, 5, 9, 10
Interlogix Concord 15, 17, 18, 20 14, 16
Interlogix Simon XT/XTi/XTi-5i 15, 35 14, 16
Qolsys IQ Panel 2 17, 20, 44, 43, 35 8, 9, 10, 12, 13, 14, 16, 25
Qolsys IQ Panel 4 17, 20, 44, 43, 35 8, 9, 10, 12, 13, 14, 16, 25
Note: Sensor-based disarming is only available in the Simon XT/XTi/XTi-5i with firmware versions below 193a.

What do you think of this new Alarm.com feature? For that matter, what do you think of Alarm.com's commitment to bringing you new products and features in general? They're doing an excellent job of listening to customers and responding with great new options. Drop us a note in the comments and let us know what you think. We always look forward to hearing from you!

Tags: , , , , , , , , , , , , , , , , , , , , , , , , , , , , , , , , , , ,

Comments


Posted By

Alarm panel manufacturers routinely offer panel firmware updates. This allows them to add features and correct issues. However, most DIY users don't have access to the restricted portion of the company's site where these files are housed. Alarm Grid offers the latest firmware file downloads.

Most alarm panels can be updated Over-the-Air (OTA) using either Alarm.com or AlarmNet360. AlarmNet never charges anything for these updates, and Alarm.com also offers them for free, unless they have to be sent to the panel using cellular data. In that case, the update will incur a small fee, depending on the size and number of updates that need to be sent.

Qolsys panels will not perform an OTA update unless the panel is connected to WIFI. If you have one of these panels installed in a location where WIFI is not available, then the only option is to either update using a cell phone as a WIFI Hotspot, or download the firmware files, and then install them via either Micro SD Card (IQ2/IQ2+) or Access Point (IQ4).

Honeywell L5200, L5210, and L7000

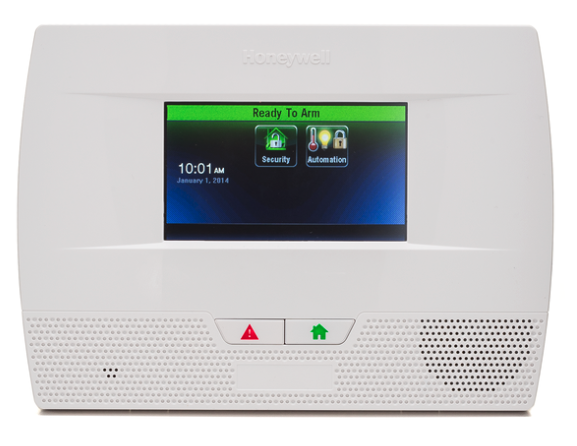
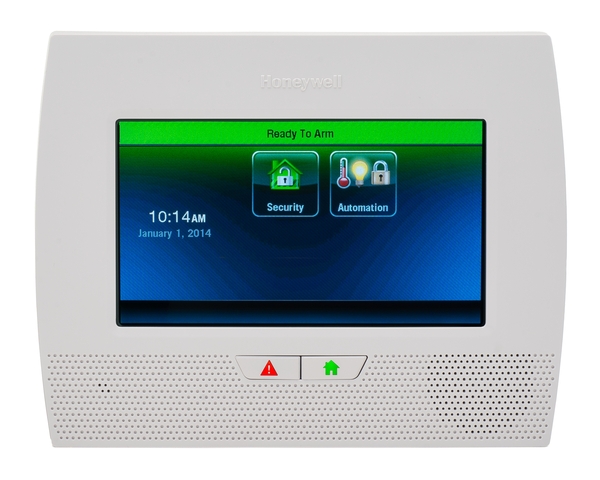
Honeywell used to offer free firmware updates for the LynxTouch panels that they pushed remotely using AlarmNet360. It was a messy process, AlarmNet tech support was required to request these updates individually, per account. So, sometime after the introduction of the Lyric panel, they stopped this practice. The Lyric can only be firmware updated using AlarmNet360, but the update can be requested by the dealer, and now, the customer can also request the firmware update via the panel. When Honeywell, now Resideo, ceased offering OTA updates for the LynxTouch panels, they released the Honeywell LYNXTOUCH-MSD Firmware Update Tool. This tool can be used to update the L5200, L5210, or L7000 panels.

When an L5200 is updated to the latest version, it becomes an L5210 internally, though there are certain physical traits of the L5200 that won't change, like the screen size. Depending on when you purchased the LYNXTOUCH-MSD tool, it may come with the latest firmware version already on the SD Card (it comes with both L5210 and L7000 firmware already loaded). However, if you purchased your update tool when they were first released, it will have an older firmware version on it, and you will need to download the newest firmware to the SD Card and update the panel again to get the most current version. The update files are housed on the Resideo website in the password-protected portion of MyWebTech, so we offer the files for download from our site:

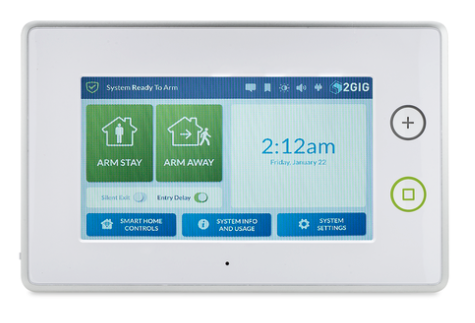
2GIG Go!Control 2 (GC2) or 2GIG GC2e

The 2GIG GC2 and 2GIG GC2e have a couple of different methods for updating the firmware. There is the 2GIG UPDV Easy Updater Tool and the 2GIG UPCBL2 Firmware Update Cable. The updater tool is geared more toward a professional installer who will be updating multiple different panels over the course of years. It comes with a version of either the 2GIG GC2 or GC2e firmware loaded but the tool itself will then have to be updated when newer firmware is released. The files to load are available from our site and are linked below.

The updater cable is the method of update most DIY users choose to use. It requires that the user have a windows computer available. The cable is a fixed length, so the computer that will be used needs to be near the alarm panel in order to perform the update. Ideally, a laptop is used. Instructions for using the updater cable to load the latest firmware onto a 2GIG GC2 or 2GIG GC2e can be found here. Instructions for loading new firmware onto the 2GIG UPDV Easy Updater Tool can be found here. Instructions for using the updater tool to update a 2GIG GC2 or GC2e panel once it has the latest file loaded can be found here.

The 2GIG GC2 and 2GIG GC2e firmware pages are linked below. Each page has both Updater Tool and Updater Cable files:

2GIG GC3 and 2GIG GC3e

The 2GIG GC3 and 2GIG GC3e technically use the same firmware. The 2GIG GC3e was released at firmware version 3.2.1, so any GC3e panel will have at least this version of firmware already installed. Alarm Grid offers firmware versions 3.0.1 up through 3.2.4.6725 on our 2GIG GC3 Firmware Update Page. On our 2GIG GC3e Firmware Update Page, we offer 3.2.3.6713 up through the current version which, at the time of this writing, is 3.2.6.6770.

The 2GIG GC3 and 2GIG GC3e are both much easier to update than the 2GIG GC2 or GC2e. Both 2GIG GC3 versions offer WIFI, which makes OTA updates simple, as well as free. For systems that need it, an OTA update can be pushed from Alarm.com via cellular for a nominal fee. Again, Alarm Grid offers this type of upgrade to our customers at our cost, with no markup. If WIFI is not available at the panel, and a user doesn't want to pay for an OTA update, we offer the upgrade files from our site. This FAQ provides a walkthrough on how to perform the update using the files from our site. Instructions for performing the update are also listed on the page along with the firmware files.

2GIG Edge

The 2GIG Edge updates in the same way as the 2GIG GC3 and GC3e. It has a USB port located on the top of the panel. Once the firmware update file has been loaded onto the root directory of a USB drive, the drive is inserted into the port on the panel's top and the panel prompts the user to update. For full instructions on updating a 2GIG Edge, check out this FAQ.

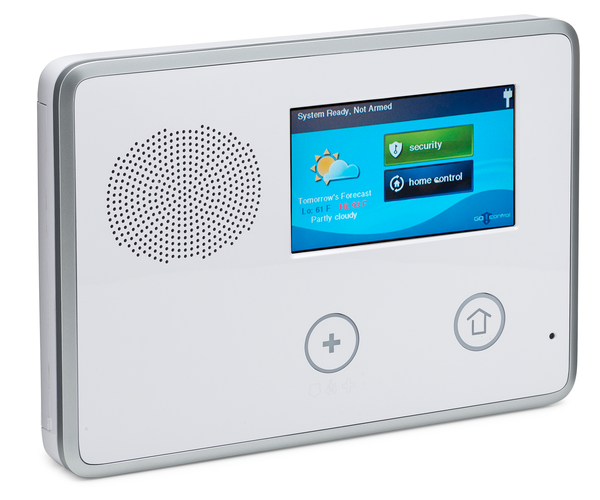
Qolsys IQ Panel 2 and IQ Panel 2 Plus

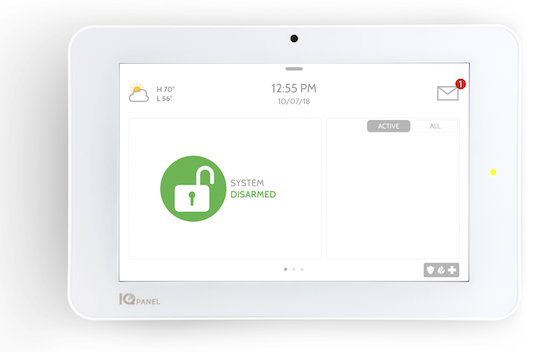
The IQ Panel 2 and IQ Panel 2 Plus also use the same firmware version. The difference between the two panels is hardware. The IQ Panel 2 does not support PowerG, and the IQ Panel 2 Plus does. As noted above, Qolsys panels will not download firmware updates via cellular data, so the options are to connect the panel to WIFI, temporarily connect the panel to a Hotspot on a cellular phone, or update locally using a Micro SD Card. The step-by-step instructions for loading the firmware from an SD Card are shown on the firmware update page.

Qolsys IQ Panel 4

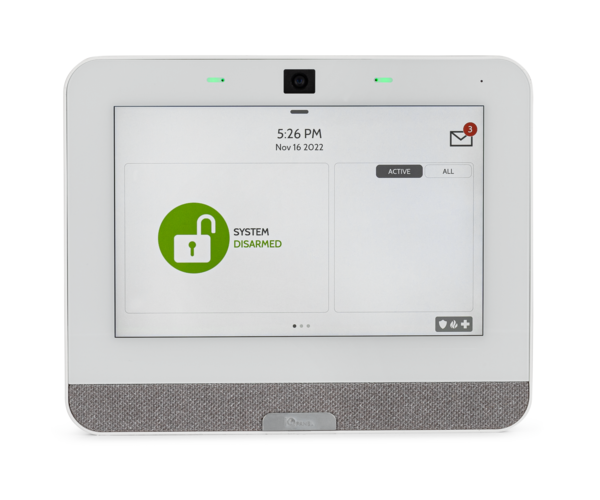
The Qolsys IQ Panel 4, like the previous IQ Panels, will not download firmware updates via cellular data. However, unlike the IQ Panel 2 or IQ Panel 2 Plus, the IQ Panel 4 does not have a Micro SD Card slot. Instead, if WIFI is not accessible by the panel, either directly or via a cell phone Hotspot, then the firmware update files have to be downloaded to a phone or tablet, then the phone or tablet must be connected to the IQ Panel 4 Access Point, and the files then loaded to the panel from the phone or tablet. Instructions for updating using the Access Point are available on the firmware download page.

Above are links to all the different panel firmware pages we offer here on the Alarm Grid site. In addition to alarm panel firmware, we also offer some firmware pages for the Honeywell Home TUXEDOW or Resideo TUXEDOWC touchscreen keypads as well as the older Tuxedo Touch firmware. We don't have a page for the older 6280 touchscreen keypads, but if you need access to that firmware, send an email to support@alarmgrid.com letting us know what you need and we can get you access to it.

As mentioned above, the Lyric panel can only be updated via AlarmNet360 and in order to update the firmware, the panel has to be actively monitored. The same is true of the newer Honeywell Home and Resideo ProSeries panels (PROA7, PROA7PLUS, PROA7C, and PROA7PLUSC). These panels must be actively monitored and registered with AlarmNet360 before an update can be applied to them.


Tags: , , , , , , , , , , , , , , , , , , , , , , , , , , , ,

Comments


Posted By

It seems every week we're reporting a new feature being rolled out by Alarm.com. They recently added remote Duress Code programming through the Alarm.com app or website. Alarm.com must first enable this feature for the dealer, then users will have access if their panel supports the feature.

Before any Alarm.com user can start configuring codes remotely, the alarm dealer for the customer account must have this feature enabled. If the feature is not showing up when a user attempts to remotely program the Duress Code, contact the Alarm.com dealer and ask them to enable it. They may need to contact their Alarm.com Sales Representative to get the feature enabled.

Next, be sure that the alarm panel being used supports this feature. We have an FAQ on how to set up this feature via the Alarm.com Website and another FAQ on how to set up this feature using the Alarm.com App. Both of these FAQs have a list of compatible panels, and advise if a single or multiple codes are supported by the panel.

The way a Duress Code works is simple. If a system user is forced to interact with their alarm panel in any way, though this will usually involve disarming the system, if the Duress Code is used, then in addition to performing the security system function a silent signal is sent to the monitoring station alerting them to the fact that the system user is under duress. They are being forced to do something against their will. The monitoring station will receive this signal and then process it according to the customer's pre-stated wishes, and their own policies regarding duress situations.

The key element to the use of a Duress Code is the ability for someone who is not onsite to receive the signal and immediately take action. If the security system is not monitored by a trained 24/7 monitoring station employee then the Duress Code might just as well not exist. It may be possible to send a text, email, or push notification to someone outside the home or business, but there's a good chance that person may never see it, or may not understand what they're seeing. If there is any concern that a duress situation might occur, then central station monitoring is the best way to protect the people you love.

And finally, one thing I nearly forgot to mention above, an Alarm.com dealer cannot program a Duress User for a customer through their panel programming portal. Only the Admin Alarm.com Account user, the homeowner or business owner, is allowed to affect these codes remotely. So, what do you think about this new feature? Do you like the idea of being able to control system Duress Codes remotely? Leave a comment below and let us know your thoughts. We always enjoy hearing from our readers. That's all for now, stay safe out there.

Tags: , , , , , , , , , , , , , , , , , , , , , ,

Comments


Posted By

Alarm Grid has been hearing reports from 2GIG GC3 and 2GIG GC3e users with trouble conditions that they cannot clear. According to reports, these unclearable errors only occur on these systems when Smart Area Partitioning is enabled. While inconvenient, they shouldn't cause much issue.


When a "trouble" condition appears on a 2GIG GC3 or 2GIG GC3e with partitions enabled, the "Smart Areas" menu button on the panel will appear yellow. Normally, you fix the trouble condition itself first. Then, you acknowledge the trouble by clicking on Smart Areas, entering your Master Code, and clicking the "speech bubble" next to the partition associated with the trouble. Then the trouble should clear, and the Smart Areas button should return to its usual blue state, indicating that everything is normal. More information on the trouble-clearing process can be found in this FAQ.

In the case of our customers who have reported this issue, they received a valid trouble condition of "Console Broadband Network Failure" or "Cellphone Communication Failure" appearing on various Smart Areas of their GC3 and GC3e systems. Because this was a system trouble, it showed up on multiple partitions. The trouble condition was then resolved successfully, as evidenced by the ability to send successful test signals via all communication paths to Alarm.com. However, the trouble message became stuck in multiple partitions and could not be cleared by any means.

Alarm Grid was able to replicate a similar issue through a relatively unique method. We found that if you enrolled a sensor with a GC3 or GC3e, put the sensor into a trouble condition (e.g. loss of RF supervision, cover tamper, etc.), and then deleted that sensor from the system without ever correcting and clearing the trouble condition, then the same situation would occur. Whichever partition the sensor was assigned to would be stuck with a permanent trouble condition that could never be cleared, regardless of which troubleshooting method was attempted. Of course, this would rarely happen in practice, as a responsible user would fix a trouble condition before intentionally deleting a sensor. But nevertheless, we were able to replicate a similar problem in practice.

Various methods have been attempted to fix this issue, but nothing has worked at removing these seemingly unclearable troubles. Some of the methods attempted have included disabling and then reenabling partitions, powering down the panel for a hard reboot, performing a reboot through System Manager, upgrading the firmware version, and factory defaulting the system. Users have reported that once they acknowledge the error that the panel stops making any audible sounds associated with the trouble condition, but still, the Smart Areas button remains a disturbing yellow color.

Not every GC3 and GC3e with partitions enabled appears to be affected. From what we can tell, only a small number of these systems are displaying such an error. Either that, or most users have chosen simply to ignore the issue, and not report it to us. Most of our monitored customers with a GC3 or GC3e have not reported this issue. But the ones who have reported the issue have left us at a loss for a solution. We apologize to these users, as we know how frustrating this can be. We don't often encounter issues we can't solve with a little bit of thinking, but this is one of those rare cases where we are just as confused as you are.

While this issue is annoying and bothersome, it doesn't appear to have any major impact on the performance of the system. The GC3 or GC3e System will still report to Alarm.com as intended, and it can still be relied upon for security and life-safety purposes. The one pressing factor though is that this issue can make it difficult for a user to determine when in fact there is a legitimate trouble condition on their system. Most GC3 and GC3e users who use partitions rely on the Smart Areas button to tell them if something is wrong. If it's blue, then everything is okay. But if it's yellow, then something needs their attention. This is a pretty simple check, and when it's not functioning properly, it's understandably frustrating.

Unfortunately, we do not have a solid fix for this problem at the current time. But luckily, if a new trouble condition occurs, the system will provide a trouble beep locally. It will continue to beep until a user acknowledges the new trouble condition. In addition, if you have trouble notifications enabled through Alarm.com, then you will also receive a new trouble notification via text, email, and/or push notification should any new issues arise. Nortek and 2GIG have been apprised of this error, and advise they are working on a fix.

Our reports indicate that this issue is still present in both the latest GC3 Firmware and the latest GC3e Firmware. The highest firmware currently available for these panels is Version 3.2.5, and even systems on this latest firmware have been shown to be affected. We are hopeful that 2GIG and Nortek will release a fix for these unclearable trouble conditions in Firmware Version 3.2.6. But unfortunately, we have not yet received any indication that such a fix will be implemented. We also have no release date for Version 3.2.6 at this time. Again, we apologize for any inconvenience.

If you are affected by a trouble condition that you cannot clear, make sure to try the conventional methods of clearing it first. Correct the cause of the trouble, and then acknowledge the trouble by following the the steps in the FAQ linked earlier in this post. If you still can't clear the trouble, then please, report it to our support team by emailing support@alarmgrid.com. Your data is valuable to us in reporting the problem to 2GIG and Nortek so that a fix can be implemented. Our support team is available to check and respond to emails from 9am to 8pm ET M-F. As always we look forward to hearing from you!

Tags: , , , , , , , ,

Comments


Posted By

2GIG and Nortek have announced that many of their products have been discontinued, effective immediately. This list is headlined by the 2GIG GC3, which has been replaced by the 2GIG GC3e. These products are no longer being manufactured, and new models will no longer be available.

Most of the products on this list are older products with proper replacements, as well as some unpopular products and products designed for markets outside of the United States. Although the list is quite extensive, there's really nothing too surprising here. Many of these products weren't even available through Alarm Grid, so not much will change in terms of our product offerings. The move simply allows 2GIG to dedicate more resources to manufacturing newer and more robust products.

The list of discontinued items can be seen below:

  • 2GIG 2GIG-ANT1X External In-Wall GSM Antenna
  • 2GIG 2GIG-CAM-101-NET Indoor WiFi Camera, Powered By Securenet
  • 2GIG 2GIG-CAM-HD100 Camera HD100 Indoor W/Night Vision
  • 2GIG 2GIG-CP22-345B GC2 345MHz security, 921 Z-Wave, Brazil
  • 2GIG 2GIG-CP61-345C Control Panel 345 Mhz GoControl Pr
  • 2GIG 2GIG-DW10-120PK Thin Door/Window Contact, 120 bulk pack
  • 2GIG 2GIG-GC3-345 GC3 Panel (North America) 345 MHz
  • 2GIG 2GIG-GC3GA-T GSM 3G AT&T Telular GoControl
  • 2GIG 2GIG-GCKIT30IMG GC2 Image Sensor Kit; 1 GC2 Panel, 3 DW10 Sensors, 1 Image Sensor
  • 2GIG 2GIG-GCKIT311 GC2 Kit 3-1-1
  • 2GIG 2GIG-GCKIT410 GC2 Kit 4-1-0
  • 2GIG 2GIG-GC-POTS GC2 Plain Old Telephone Service (POTS) Module
  • 2GIG 2GIG-KIT311-GC3 GC3 3-1-1 Kit
  • 2GIG 2GIG-KV-T-GC3 GC3 Telus VKit: GC3-345 Panel and GSM/3G Telus cellular radio (2GIG 2GIG-3GTL-A-GC3)
  • 2GIG 2GIG-LAN-GC3 GC3 Ethernet Module
  • 2GIG 2GIG-LTEV-A-GC3 Alarm.com Verizon Cat-3 4G LTE Cell Radio For 2GIG GC3 With 2 LTE Antennas
  • 2GIG 2GIG-MNT-250B 2GIG Camera Mount For Outdoor Mini-Dome, Series 250, Black
  • 2GIG 2GIG-MNT-250B 2GIG Camera Mount For Outdoor Mini-Dome, Series 250, Black
  • 2GIG 2GIG-RELY-KIT3 Rely 3-1-1 Kit for SecureNet Backend with Camera. Note: A KIT3 includes KIT2 (3-1-1 Rely for SecureNet) and the Camera
  • 2GIG 2GIG-SDS1-345 Wireless Smoke Detector Sensor 345MHz (Smoke Ring)
  • 2GIG 2GIG-TS1-SLO 2GIG 2GIG-Ts1-Slo (This is not the 2GIG TS1, which is still available)
  • 2GIG 2GIG-Z-CT100 Ct100 Thermostat
  • GoControl GD00Z-4A Garage Door Controller : GoControl Z-Wave Plus Garage Door Control. Plain white box. Frontpoint.
  • GoControl WD1000Z-1 GoControl Z-Wave White In-Wall Dimmer Switch. 1000 Watt Max
  • GoControl WD1000Z-R4 Retail Replenishment pack of 4 WD1000Z-1. Z-Wave white wall dimmer switch. 1000 Watt max. 300 Series. North American product
  • GoControl WD500Z-1 Z-Wave white wall dimmer switch. 500 Watt max. 300 Series. North American product.
  • GoControl WD500Z-R6 Retail Replenishment pack of 6 WD500Z-1. Z-Wave white wall dimmer switch. 500 Watt max. 300 Series. North American product
  • GoControl WDKIT-AL WD 4 PC Trim Kit Almond, 1ea
  • GoControl WDKIT-AL-R4 Retail Replenishment pacK of 4 WD ALMOND trim kits
  • GoControl WI15VZ-1 Z-Wave 15 Valve Irrigation Controller. US

If you have any questions about these discontinued products, or if you are needing suitable replacements for any discontinued product, please email us at support@alarmgrid.com. We check our email from 9am to 8pm ET M-F. We look forward to hearing from you!

Tags: , , ,

Comments


Posted By

Alarm Grid is back with another video recap! This time, we have six (6) new videos to share. We spent a lot of time this week focusing on the 2GIG GC3e, but we also covered some other security equipment as well. We hope you enjoy this latest batch of videos. Let's check them out!

Alarm grid inside security stickers

Properly Opening Up a 2GIG GC3e

I show you how to open up the 2GIG GC3e Security Panel. Before opening the system, you must loosen the set screw at the bottom. If the panel is wall-mounted, you can press the panel against the wall and lift upward. Otherwise, lay the panel face-down, and pop off the back plate using your finger or a screwdriver. Opening up the GC3e Panel is often done to access the system's terminal block and backup battery.


Powering On the 2GIG GC3e

I show you how to power on the 2GIG GC3e Alarm System. The system uses a 14VDC, 1.7A transformer for primary power. If primary power is lost, then a backup battery will keep the system running. When powering on the 2GIG GC3e, we recommend connecting the backup battery first, followed by the transformer. Alarm wiring is not included with the 2GIG GC3e, so you must supply your own. We recommend using a Honeywell LT-Cable for this purpose.


Deleting a Defective Z-Wave Device from the GC3 or GC3e

I show you how to delete a defective Z-Wave device from a 2GIG GC3 or 2GIG GC3e. Some reasons why a Z-Wave device might be displayed as failed include the device being powered down or out of wireless range. Deleting a defective Z-Wave device is usually a good option if the device is lost or destroyed so that a traditional exclusion process cannot be performed. Any failed Z-Wave device will have an error icon next to it in the Smart Home Devices Menu.


Setting Up a Cellular Communicator for a 2GIG GC3e

I show you how to add a cellular communicator to a 2GIG GC3e Security System. Doing this will allow you to activate the 2GIG GC3e System for monitoring service. And if the monitoring plan includes access to Alarm.com, then you will also be able to control the system remotely through that platform. The 2GIG GC3e has a side slot for you to easily install a cellular radio. Remember to power down the system completely before installing the cellular communicator.


Powering the TG-1 Express Using the On-Board Terminals

I show you how you can power the Telguard TG-1 Express using its on-board power terminals. The Telguard TG-1 Express is used to take over the phone dialer for a panel so that it can communicate across a cellular network. Normally, the TG-1 uses a single RJ31X connection for power and communication with the panel. But if the existing power wires from the RJ31X cable are cut, then you can instead make the auxiliary power connections at the TG-1 on-board terminals.


Properly Closing the Qolsys IQ Panel 2

I show you how to properly close the Qolsys IQ Panel 2 Security System. To properly close the system, you want to align the top tabs first. Then you should lock the bottom two (2) tabs into place. Lastly, make sure the top four (4) tabs remain closed, and click them into place if they are not. The panel will make a strange noise every half-hour if it is not closed properly. The main reason to open the IQ2 is to replace its backup battery every few years.

Tags: , , , , , , , , , , , , , , , , ,

Comments


Posted By

Hi DIYers! We are happy to announce that there are new firmware updates available for the Qolsys IQ Panel 2 Plus and the 2GIG GC3e & GC3 Systems. Qolsys users can apply the firmware update locally at the panel. 2GIG users can apply from USB or have it pushed from Alarm.com for a small fee.

Qolsys iq panel 2 at and t wireless security system with at and

2gig gc3 diy wireless security system w slash 7 screen

Qolsys IQ Panel 2 Plus Version 2.3.4

Starting with the Qolsys IQ Panel 2 Plus, Firmware Update 2.3.4 is now available. This is a relatively minor upgrade to the system that improves recognition of the PowerG daughterboard for supporting wireless PowerG Sensors. Although you can technically apply this update to an original Qolsys IQ Panel 2 System, it won't make a difference, because that system does not have a PowerG daughtercard. Since you can apply this update locally at the panel, there is no fee required to receive this update. Remember, your system must be actively monitored and connected with Alarm.com for the update to go through.

In order to apply this update, you must have your Qolsys IQ Panel 2 Plus connected to WIFI. The panel should be plugged into AC power, and it should not have a low-battery condition. To begin, start from the main screen of the system. Press the small grey bar at the top of the screen. Choose Settings > Advanced Settings> Installer Code (default 1111) > Upgrade Software > Patch Tag > enter iqpanel2.3.4 > OK > Upgrade Using Network. The system should begin downloading the update. Once the download is complete, the update will be applied. This process should take about five (5) minutes. The panel will reboot at this time. The process is complete after the reboot finishes.


2GIG GC3e & GC3 Firmware Version 3.2.3

The 2GIG GC3e System just became available very recently. This Firmware Update Version 3.2.3 is a great way to get your new GC3e System up and running. Additionally, existing users of the original 2GIG GC3 System can also apply this same update. The update provides support for the new AT&T LTE Communicator (coming soon!) and allows for 6-digit user codes with both the panel and compatible Z-Wave locks. It also provides various fixes and helps the system run smoother overall. It is recommended that every GC3e and GC3 user receives this update so that they can continue to get the most out of their system.

The easiest way to receive Firmware Version 3.2.3 is to simply have it pushed down from Alarm.com. To do this, the system must have an Alarm.com Cellular Communicator installed and activated. You must contact your alarm company and ask them to push the update. There will be a small fee for this service. If you don't have Alarm.com, you can get more information on our monitoring page. The latest update can also be applied directly at the panel. To do this, you must download the update file onto a USB flash drive and insert the drive into the panel. You will then be able to apply the update locally at no cost. More information on this process can be found in this helpful FAQ. Although that FAQ is specific to the original 2GIG GC3 System, the 2GIG GC3e will follow the same process. Remember, there is no cost required to update via USB.


Alarm grid inside security stickers

If you have questions about either of these firmware updates, or if you would like to learn more about our monitoring services, please reach out to us! The best way to contact us is always to email support@alarmgrid.com. We will check your email at our earliest convenience and reply back as soon as possible. You may also call us at (888) 818-7728 during our normal business hours of 9am to 8pm EST M-F. We look forward to hearing from you and answering your questions!

Tags: , , , , , , , , , , , ,

Comments


Posted By

Hi DIYers! If you haven't heard yet, a new firmware version for the 2GIG GC3 System is now available. This update provides support for the system's screensaver feature, and it allows video demos to be uploaded to the panel. It also fixes a few minor bugs that were known to cause issues.

2gig gc3 diy wireless security system w slash 7 screenThe firmware update is version 3.2.1.6653. Although the changes it offers are relatively minor, it's still worth downloading for users who want to get the very most out of their GC3 Systems. The biggest change is the addition of the screensaver feature, which will also likely be referred to as the slideshow feature. Users can add personal photos to a USB drive and transfer them to their GC3 System or associated 2GIG SP1 Keypad. They can then arrange these pictures to appear in a slideshow, which will automatically go into effect if the system is left unused for a certain period of time. These options are available in a new My Photos Menu found within System Settings.

Also included in the update is the video demos feature. Although this feature was intended with alarm dealers in mind, there's no reason why it can't be used by end users as well. Users will transfer personal video clips to the panel through a USB drive. They can then use the new Demo Menu option within the Installer Toolbox to add demo videos to the panel. Just like with the slideshow feature, the demo videos can be viewed from both the GC3 System and the 2GIG SP1 Keypad. Both photos and videos are uploaded independently so that a user can have different slideshows and demo videos between their system and their SP1 Keypads.

Other updates included fixed to low-battery indications and problems with the Access Point mode. If you want to download this firmware update, please check our GC3 Firmware Update Page. Download the necessary file, and transfer it to the root directory of a USB drive. You can then insert the USB drive into the top of the GC3 System. Then confirm the update, and provide either the Master Code or the Installer Code (default 1561) to begin. The system will reboot, and the update will be applied. Alarm Grid customers can also ask us to push the update down manually. However, this will include added costs.

If you have any questions about this update please email support@alarmgrid.com. You may also call us at (888) 818-7728 during our normal business hours of 9am to 8pm EST M-F. We look forward to hearing from you!

Tags: , , , ,

Comments


Posted By

Hi DIYers! We have a quick product highlight for your today. We're taking a look at the 2GIG IMAGE3. This is an image sensor module for a 2GIG GC3 that doubles as both a motion detecting sensor and camera. It sends four high-quality images to Alarm.com upon activation for easy viewing.


Motion sensors are great for users who want to easily confirm break-ins, without having to invest in security cameras. Just last week we took a look at the Qolsys Image Sensor. Now we're looking at the 2GIG version. Really, this device is pretty similar, but it works with the 2GIG GC3 instead. Please note that you will need 2GIG XCVR3-GC3 installed in the system to support the module, and the GC3 System needs to be running Firmware Version 3.0.1 or higher. Also keep in mind that any Alarm Grid customer will need a Gold-level Plan or higher.

The 2GIG IMAGE3 knows to produce images when its motion sensor is activated. This is a PIR motion sensor that responds to the changes in infrared energy that occur with movement. The device also includes IR night vision so that it can detect motion and capture images in the dark. It will produce four images when activated, and they can quickly be viewed remotely through Alarm.com. This is possible both through the Alarm.com Website and the Alarm.com Mobile App on Android and iOS Devices. A user can even have Alarm.com send them email and text alerts so that they are sure to be notified.

The images produced by the 2GIG IMAGE3 have a 320 x 240 resolution, and they are full-color. The sensor has a battery life of three years. An LED light on the sensor provides assistance with setup and general troubleshooting. Overall, this is a very convenient sensor for anyone who want to quickly confirm intrusions, without having to worry about false alarms.

You can buy the 2GIG IMAGE3 from Alarm Grid right now. Get one to improve the protection and security and your home!

Tags: , , , , ,

Comments