Alarm.com Posts

Posted By

Hi DIYers. We have a relatively small video recap this time. Our team managed to make four (4) new videos. This includes three (3) from Jorge and one (1) from Jarrett. They are both ready and eager to help you learn your security system. Let's check out the new videos for this week.

Arming a Honeywell Alarm System Using Alexa

Jorge talks about how you can use Amazon Alexa to Arm your Honeywell Security System. This is made possible using Total Connect 2.0. You must open the Alexa App on your Android or iOS device and link your Total Connect 2.0 account. In order to use Total Connect 2.0, you will need an alarm monitoring plan that includes access to the service. You can use Alexa to Arm Away, Arm Stay and activate TC2 smart scenes. You cannot use Alexa to Disarm your system.


Low Battery Supervision On The 2GIG TAKE-345

Jorge explains how if your 2GIG TAKE-345 has a low backup battery, then all the associated zones will show a low-battery trouble condition. The 2GIG TAKE-345 is a wired to wireless converter designed for use with 2GIG Security Panels. Hardwired sensors connect with the TAKE-345. The module then sends a 2GIG 345 MHz Signal to the panel. The system sees these sensors as wireless sensors. If the 2GIG TAKE-345 has a low battery, then the associated wireless zones will show low battery. You cannot use hardwired life-safety sensors with the TAKE-345.


Getting Power To The Lyric Security System

Jarrett teaches users how to power the Resideo Lyric Alarm System. The system receives primary power from a plug-in DC transformer. If the electricity goes out, a backup battery will keep it powered on. There are 4-hour and 24-hour backup battery options available. We recommend using a Honeywell LT-Cable to connect the panel to its transformer. You can also use 18-gauge, 2-conductor wire to complete the connection. The system will power off if it is not receiving plug-in or battery power.


Testing My Alarm Panel Through Alarm Grid

Jorge explains how Alarm Grid customers can test their security systems. We recommend testing your system monthly. You must test your system once per year to receive an updated certificate of alarm (CoA). By receiving a CoA from Alarm Grid, you can save money on your homeowner's insurance. You must always put your system on test mode before testing your system. You can put your system on test mode by contacting us, contacting our central station partner Criticom, or use the MyAlarms.com feature.

Tags: , , , ,

Comments


Posted By

Hi DIYers! We are happy to announce that the Alarm Grid logo will now appear in the lower-left corner of downloaded Alarm.com video clips. This new feature applies to any Alarm Grid customer who uses Alarm.com Cameras for video surveillance. You should notice the logo effective immediately.


The Alarm Grid logo should appear in the bottom-left corner of any downloaded video clip from Alarm.com. This includes any video clip that you choose to share through email, text message or social media. Sharing the clip effectively downloads it. This will count towards your monthly limit of allowed clip downloads. The logo will be semi-transparent so that it is clearly visible, but does not obscure the video in any fashion.

We believe that this new addition will add a nice touch to Alarm.com video clips. It will also help to identify the source of the clip in the event that you ever need to present video evidence to the authorities. Other than this image, you should not notice any changes to your Alarm.com video clips or your Alarm.com service in general.

Please note that this image will not be present in the live video feed for Alarm.com Cameras. The logo will also not appear in clips you view directly from Alarm.com. It will only be present in downloaded video clips.

Below is an example of what the image should look like in a video clip:


If you do not have Alarm.com video surveillance included in your monitoring plan, you can check our monitoring page for more information. You will need a Platinum Plan to use Alarm.com Cameras. We also offer a standalone video surveillance plan if you want to use Alarm.com Security Cameras without regular monitoring service.

Please email us at support@alarmgrid.com if you have any questions about this new feature or the Alarm.com service in general. You may also call us at (888) 818-7728. Our regular office hours are 9am to 8pm EST M-F. We look forward to hearing from you.

Tags: , , , , , , , , , , , , , , , , , , , , ,

Comments


Posted By

DSC decided to extend the lifespan of their Impassa System by releasing a dual-path LTE communicator. The communicator is called the DSC TL8055LTVZ, and it is available for purchase right now from the Alarm Grid website. This is the first LTE communicator for the DSC Impassa Alarm System.

Dsc scw457aatnt front open

The DSC TL8055LTVZ provides connectivity with the Verizon LTE Network. It uses a hardwired ethernet connection for internet access. If one communication path goes down, the other will be there to back it up. The communicator will allow the system to connect with the Alarm.com Servers. Please note that you will need a Gold Plan or higher to activate the communicator and use it with Alarm.com.

In order to use the DSC TL8055LTVZ, your Impassa Panel must be running firmware version 1.3 or higher. This is the same firmware version required for an Impassa to use any cellular communicator and connect with Alarm.com. If you already have an Impassa System connected with Alarm.com, you can just swap out the old communicator for the new TL8055LTVZ. The system will provide normal operation after you activate the module.

At this time, Alarm Grid does not offer a standalone Impassa System with no communicator installed. We also do not offer an Impassa with a TL8055LTVZ already installed. We only recommend the DSC TL8055LTVZ for customers with an existing Impassa who want to extend the lifespan for their system. With LTE connectivity, the TL8055LTVZ will ensure that your Impassa can stay monitored for many years to come.

If you are looking for a new Alarm.com Security System, then we recommend going with a Qolsys IQ Panel 2 Plus instead. This is a state-of-the-art security system that offers all the features and functions you could ever want. You might also consider waiting for the new 2GIG GC2e and GC3e Systems, which we expect to be available later this summer. However, if you have an existing Impassa, then the DSC TL8055LTVZ is for you.

Additionally, Alarm Grid is also now offering the DSC WS4933 Wireless Carbon Monoxide Sensor. The device uses electro-chemical sensing technology to detect odorless and tasteless carbon monoxide (CO) gas. This sensor features a slim-line design and a built-in 85dB sounder. It comes equipped with a test button and a low-battery indicator. It uses a single CR123A battery for power. The device has an average battery life of five (5) years with typical use. It is available for purchase now.

If you have any questions or concerns about the DSC WS4933 or the DSC TL8055LTVZ, please email us at support@alarmgrid.com. You may also call us at (888) 818-7728 during our regular business hours of 9am to 8pm EST M-F. We look forward to answering your questions.

Tags: , , , , ,

Comments


Posted By

Hi DIYers! It's time for another video update from Alarm Grid. This time we're covering the videos from May 30th and 31st. We have six new videos this time. Joe has four, while Jorge and Jarrett each have one. The Alarm Grid boys are back to help you learn your system. Let's check them out.

Connecting an LTE-XV to a VISTA-21iP

The ever-friendly Joe teaches you how to connect a Honeywell LTE-XV to a Resideo VISTA-21iP Security System. The Honeywell LTE-XV is a Verizon LTE Communicator for VISTA Series Systems. It follows the same setup process as the Honeywell LTE-XA, which is the AT&T LTE Communicator. Please note that by adding an LTE-XV or LTE-XA to a VISTA-21iP, you will disable the integrated IP communicator for the system. If you want to use an external dual-path communicator with a VISTA-21iP, you should add a Honeywell LTE-IV instead.


The ADC-V522IR Audio Features

Joe explains the two-way audio capabilities of the Alarm.com ADC-V522IR Security Camera. If you use this camera with the Qolsys IQ Panel 2 Plus, you can livestream the audio and video directly from the panel. You can also get live audio and video from the Alarm.com Mobile App. This app can be conveniently accessed right from your Android or iOS device. You can even speak through your Android or iOS device and have your voice come through the camera. This will allow you to have a live two-way conversation with whoever is at the other end.


Connecting the August Smart Lock Pro to WIFI

Joe helps you connect your August Smart Lock Pro to a WIFI network. To do this, you will need an August Connect WIFI Bridge. Getting your August Smart Lock Pro connected with WIFI is recommended if you want to use the device with Apple HomeKit. However, it is not required. The only other way to use HomeKit with the August Smart Lock Pro is to have your HomeKit Hub within Bluetooth range (10 to 15 feet) of the lock. Your HomeKit Hub can be an iPad, HomePod or AppleTV (4th Generation or higher).


Arm Stay vs. Arm Instant

Fan-favorite Jarrett explains the differences between Arm Stay and Arm Instant. The major difference is that Arm Instant ignores all Entry Delay settings. This means that any Entry/Exit Zones will effectively operate as Perimeter Zones. If you fault an Entry/Exit Zone while the system is Armed Instant, then an immediate alarm will occur. If you want to Disarm the System while it is Armed Instant, you will need to do so without activating an Entry/Exit Zone. We recommend using a Security Key Fob or an interactive service platform like Alarm.com or Total Connect 2.0.


Response Types Supported by the SiXPIR

Jorge discusses the Response Types that can be used with the Honeywell SiXPIR Motion Detecting Sensor. The only available Device Type for a SiXPIR Zone is "Motion Sensor". This restricts the Response Types that can be used. You cannot set the Device Type to "Other" to gain access to the full list of Response Types. As a result, the only Response Types you can use with the SiXPIR are Interior Follower, Perimeter, Day/Night, Interior With Delay, Resident Monitor, Resident Response, General Monitor, and General Response.


Using the August Smart Lock Pro with Apple HomeKit

Joe talks about using the August Smart Lock Pro with Apple HomeKit. By including the August Smart Lock Pro with your Apple HomeKit network, you can operate the lock from anywhere using your iOS device. There are two ways to use the lock with HomeKit. The first is to pair the August Smart Lock Pro with the August Connect WIFI Bridge. This will allow the lock to connect with a WIFI network so that you can access it remotely. The other option is to have the lock within Bluetooth range of your HomeKit Hub. This can be an AppleTV (4th Generation or higher), iPad or HomePod.

Tags: , , , ,

Comments


Posted By

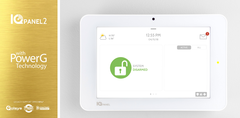
Hi DIYers! We would like to inform you that Software Update 2.3.3 is now available for the Qolsys IQ Panel 2 Plus and original IQ Panel 2. This update does not add any new features, but it does include some useful system improvements and general fixes. The update can be easily applied.

Qolsys iq panel 2 at and t wireless security system with at and

Software Update 2.3.3 really only applies useful improvements for the IQ Panel 2 Plus. However, original IQ Panel 2 owners can still perform the update to get their systems on the latest version. This update is very important for helping our technicians provide the best possible support for IQ Panel 2 Plus owners.

The following general improvements are included in Software Update 2.3.3:

  • Can now obtain the Long Sensor ID for the PowerG board and report it to Alarm.com
  • Can now obtain the Device Firmware Version for any auto-learned PowerG Sensor enrolled after updating to 2.3.3 and report it to Alarm.com.
  • Can now send Alarm.com the Radio Firmware Version and Modem Firmware Version for the PowerG board.

To perform the update, your system must be running at least 2.0.1, be connected to a local WIFI network, have its power transformer plugged-in, and have a charged battery. Once you have met the requirements, start from the main system screen. Press the small grey bar at the top. Choose Settings > Advanced Settings > enter the Installer Code (default 1111) > Upgrade Software > Patch Tag > enter iqpanel2.3.3 > OK > Upgrade Using Network > OK.

It will take about five (5) minutes for the update to download. The panel should reboot to the home screen when complete. If you have any questions about this update, do not hesitate to email us at support@alarmgrid.com, or call us at (888) 818-7728 during our regular business hours of 9am to 8pm EST M-F.

Tags: , , , , , , , , , , , , , , , ,

Comments


Posted By

Hi DIYers! We recently learned that the Sonos Speaker integration for Alarm.com is now available. This allows users to control their Sonos Speakers and include music into scenes alongside other smart home devices. It is now easier than ever to create the perfect ambiance for your home.


There are many fantastic features available through the Alarm.com Sonos Speaker integration. You can play audio from a variety of different sources, including Spotify, iTunes, SoundCloud and more. It's also super convenient to control the audio feedback right from Alarm.com. Users can play/pause, adjust the volume, mute/un-mute and more. You can even choose to play music on all speakers or select a particular set.

But the most exciting part of this integration is the ability to include the speakers into smart scenes. This way you can have Alarm.com activate your Sonos Speakers based on a set schedule or with certain system events. For instance, you might have your music turn on as soon as you get home and Disarm your system. Or you could have your music activate when you open up a door. You can even have it activate with other devices like your lights and your smart thermostat.


In order to use the ADC Sonos Integration, you will need either an iOS device running Firmware Version 8.0 or higher or an Android device running Firmware Version 2.1 or higher. You will also need:

  • Alarm.com Mobile App Version 4.10.4 or higher
  • The latest version of the Sonos Mobile App and Speaker Software
  • The Alarm.com Audio Integration Service Package provided from your monitoring company
  • The Sonos Speakers must be connected to the internet on the same network as your iOS or Android device for initial pairing.

To get started with the Sonos integration, you should contact your monitoring company and ask them to activate the Alarm.com Audio Integration Service Package on your account. Alarm Grid customers can do this by sending an email to support@alarmgrid.com. You can complete the rest of the process from Alarm.com.

Login to your Alarm.com account on the mobile app. Press the hamburger button (three horizontal bars), followed by Audio. Select "Sonos" from the dropdown menu. Then press Start, followed by Continue. You will then need to login to your Sonos account and give Alarm.com permission to control your Sonos System. After you complete the process, you will see an Audio option in the main menu of your Alarm.com account through the mobile app. This will allow you to conveniently play audio.


If you have any questions about the Alarm.com Sonos integration, please email us, or call us at (888) 818-7728 during our business hours of 9am to 8pm EST M-F. We look forward to hearing from you.

Tags: , , ,

Comments


Posted By

Alarm Grid has learned of technical difficulties between certain PowerG Sensors and the Qolsys IQ Panel 2 Plus. These issues affect the PG9914 Wireless Motion Sensor and the PG9933 Wireless Carbon Monoxide Sensor when used on an IQ2+ System running PowerG Version 80.17.

Qolsys iq panel 2 at and t wireless security system with at and Due to this issue, any DSC PowerG PG9914 Wireless Motion Sensor manufactured before August 23, 2018 will not work with a Qolsys IQ Panel 2 Plus running PowerG Firmware Version 80.17. This includes any PG9914 running firmware V3.0.5 or V3.0.7. Also, if the first four (4) digits of the Serial Number are less than "3618", then the device is affected.

Below are some pictures of a PG9914 that will not work with an IQ Panel 2 Plus running PowerG Version 80.17:


Additionally, any DSC PowerG PG9933 Carbon Monoxide Sensor manufactured before March 26, 2019 will not work with a Qolsys IQ Panel 2 Plus running PowerG Firmware Version 80.17. Any PG9933 manufactured after this date will include a sticker indicating compatibility with the IQ Panel 2 Plus.

If you want to check the PowerG Firmware for your IQ Panel 2 Plus, you can do so from the panel. Start from the main screen. Press the small grey bar at the top. Choose Settings > Advanced Settings > enter the Installer Code (default 1111) > About > PowerG. You should check the Radio Firmware Version.


If you have any questions about these incompatibilities, please reach out to us. The best way to contact us is by emailing support@alarmgrid.com. We will check your email at our earliest convenience and respond back as soon as possible. We look forward to hearing from you.

Tags: , , , , , ,

Comments


Posted By

Hi DIYers! We hope that you had a safe and fun Memorial Day weekend. Our video team managed to produce eight (8) new videos last week. Joe was featured in five (5) new videos, mostly covering the August Smart Lock Pro. Jorge and Jarrett both had a video apiece, and I made one as well.

Connecting an August Smart Lock Pro with the August Home App

Joe explains how to connect your August Smart Lock Pro with the August Home App. This is one of the first things you will do with the August Smart Lock Pro. The August Home App allows you to operate your lock from your smartphone. You can control the lock through Bluetooth if you are within 10 to 15 feet. You can also operate the lock remotely from almost anywhere if you have the August Connect WIFI Bridge.


Including the August Smart Lock Pro

Joe shows users how to include the August Smart Lock Pro with a Z-Wave network. This is important if you want to control the August Smart Lock Pro from an interactive service platform from Total Connect 2.0 or Alarm.com. The pairing process is completed through the August Home App. You will need to have the lock paired with the app before you can pair it with a Z-Wave network. You will also need access to your Z-Wave hub or controller.


Defaulting the August Smart Lock Pro

Joe teaches users how to perform a factory default for an August Smart Lock Pro. To perform a factory reset, you will need to access your August account through the August Home App. Doing this will clear any Z-Wave and WIFI settings for the lock. You will need to reprogram the lock from scratch using the app. You should only perform a factory reset if you plan on giving away the lock or as a final troubleshooting step.


Excluding the August Smart Lock Pro

Joe covers the process for excluding the August Smart Lock Pro from a Z-Wave network. Unlike most Z-Wave devices, you don't need to clear the August Smart Lock Pro before adding it to a Z-Wave network. Instead, you will only do this if you are clearing the device from the network so that you can add it to a new one. You can complete the exclusion process through the August Home App. If you don't have access to your Z-Wave hub, you will need to perform a Z-Wave factory reset.


Getting an Alarm or Zone Open or Close to Activate a Honeywell IP Camera

Joe talks about how you can create notifications to have your Resideo IP Cameras activate when sensors are faulted or during alarm events. Normally, these cameras will only activate when they detect motion or sound. You can create these notifications through Total Connect 2.0. It is also possible to set specific hours when a camera can initiate a recording. This way, even if a zone is faulted, the camera will only capture clips during certain predetermined hours.


Temperature Sensor Notifications from a Lyric via Apple HomeKit

Jorge explains how you cannot receive temperature sensor notifications from Apple HomeKit when used with a Resideo Lyric Alarm System. HomeKit will only provide specific alerts for intrusion zones on the Lyric. For all other zones, only a General Lyric System Alert will be displayed. This makes it impossible to determine exactly which zone was faulted. However, you can still use HomeKit alongside Total Connect 2.0. The TC2 service will provide specific alerts for any faulted zone.


Is AlarmGrid Compliant with Nationally Recognized Industry Standards?

In a very rare video appearance, I talk about how Alarm Grid is compliant with Nationally Recognized Industry Standards. Nearly all of the systems and sensors that we sell are certified by Nationally Recognized Testing Laboratories. Additionally, our central monitoring partner Criticom Monitoring Services is UL Listed and FM Approved. While we may occasionally have equipment on our site that is still in the process of being approved by a NRTL, we stand behind our manufacturers and are confident in their offerings.


Finding the Firmware Revision on a Lynx Touch

Coming through with a video at the very last minute, Jarrett teaches users how to find the Firmware Revision on a Resideo Lynx Touch System. If you want to perform a firmware update for these systems, then you will need the LYNXTOUCH-MSD Updater Tool. It is no longer possible to push an update over-the-air (OTA). Getting these systems on the latest firmware is important if you plan to use an LTE cellular communicator. Please note that you will also need an alarm monitoring plan that includes cellular connectivity.

Tags: , , , , , , , , ,

Comments


Posted By

Hi DIYers! We are happy to announce that we are now selling encrypted IQ Panel 2 Plus Kits. Each kit includes a brand-new IQ Panel 2 Plus with built-in LTE communicator, two (2) IQ DW MINI-S Encrypted Contacts, a single IQ Motion-S Encrypted Motion Sensor, a transformer and a power cable.

Qolsys iq panel 2 plus at and t lte with powerg s line and legac

Last week, we announced that we are now offering IQ Panel 2 Plus Kits that feature the Versa-GE Door and Window Contacts. While these are excellent door and window sensors, they do not offer encrypted communication. Users who want added security will want to use encrypted sensors whenever possible.

The encrypted sensors included with the encrypted IQ Panel 2 Plus Kits use rolling code encryption. When these sensors are enrolled with compatible encrypted systems, they become synced with the panel. This allows a rolling code to be established. Only the panel and that exact sensor will know what the next rolling code transmission will be.

Currently, we are offering two versions of the encrypted IQ Panel 2 Plus Kits. There is an AT&T LTE option and a Verizon LTE option. Both kits are listed below:

The version of the IQ Panel 2 Plus included in these kits is compatible with the Qolsys S-Line Sensors that use this rolling code encryption. Additionally, it is also compatible with the PowerG Sensors that use 128-bit AES encryption. Both the PowerG Sensors and the Qolsys S-Line Sensors are nearly immune to wireless takeover attacks.

Encrypted sensors like these are perfect for users who want protection against possible hacking attempts. The included system is also backwards compatible with non-encrypted 319.5 MHz sensors. This includes the legacy Qolsys and Interlogix/GE Sensors. Each encrypted Qolsys IQ Panel 2 Plus Kit listed on our site comes pre-packaged by Qolsys. As a result, we cannot make substitutions for these kits.

At this time, we do not have kits for the 345 MHz IQ Panel 2 Plus or the 433 MHz IQ Panel 2 Plus. If you want either of those systems, you will have to purchase all the components individually. The only encrypted sensors that can be used with those systems are the PowerG Sensors. Both systems include a transformer and a prepared cable for providing power.

We are sure that many customers will love these new encrypted kits! If you have any questions please email us at support@alarmgrid.com. You may also call us at (888) 818-7728 from 9am to 8pm EST M-F to speak to one of our alarm system planners. We look forward to helping you design the perfect system for your home!

Tags: , , , , , , ,

Comments


Posted By

Hi DIYers! We have many customers who wonder what happens if their security system is destroyed when an intruder breaks into their home. Fortunately, alarm manufacturers considered this possibility. They put protective measures in place to deal with this issue. Enter Crash & Smash and APL.

2gig gc3 diy wireless security system w slash 7 screenCrash and Smash (C&S) for Alarm.com and Advanced Protection Logic (APL) for Total Connect 2.0 are both features designed to provide an added layer of protection in case an alarm panel and/or its communicator are destroyed during a home invasion. These features help ensure that the police are still dispatched and that the end user receives the help they need. An intruder might think they're okay because they have destroyed the panel, but the system is smart enough to overcome this issue.

Just last week, we made a post covering Entry and Exit Delays. Well it turns out that the Entry Delay period plays a big part in C&S and APL. As we discussed last week, if an Entry/Exit Zone is faulted while the system is Armed, an Entry Delay countdown begins. This period gives the end user a chance to Disarm their system before an alarm occurs. But what if the panel gets destroyed during this countdown? After all, the panel won't be able to send out an alarm signal. But this is where Crash and Smash and APL take priority. How they do this is actually quite smart.

Whenever a system goes into Entry Delay, it immediately sends out a signal to the Alarm.com Servers (ADC) or the AlarmNet Servers (TC2). This signal just lets the server know that the system is now in an Entry Delay period. The servers are smart enough to know that since the system is now in an Entry Delay period, a Disarm or an Alarm must follow. If neither event follows, then logically the panel must have been destroyed. The server will then know to send a signal to the central station to let a trained dispatcher know that the panel has been destroyed and dispatch is needed right away.

Please note that the Alarm.com Servers and the AlarmNet Servers do not send signals to the central station as soon as the usual Entry Delay period expires. These servers also account for delays in sending signals. A little more than a minute of additional time is added beyond the normal Entry Delay period before a C&S or APL signal is sent to the central station. This is done to prevent false alarms.

Advanced Protection Logic and Crash & Smash also work during alarms that do not follow Entry Delay periods. If the system has Alarm Report Delay enabled and an intrusion alarm occurs, then the system will not actually alert the central station the very instant that the alarm occurs. The system will actually enter into a short Alarm Report Delay period that is usually less than a minute in length. This delay period gives the user a chance to Disarm the system and cancel the alarm to stop the signal from being sent out. If an intruder destroys the system during this Alarm Report Delay period, APL or C&S will ensure that emergency dispatch is still sent out. Alarm Grid encourages users to disable Alarm Report Delay on their panel if possible.

It's also worth mentioning that the Alarm.com Servers and the AlarmNet Servers send all C&S and APL signals directly to the central station. The end user does not receive an alert from Alarm.com or Total Connect 2.0 when these signals are sent out. In other words, C&S and APL do not work with self-monitored customers. You need a central station monitoring plan to use these features. Also, C&S and APL do not work with phone line monitoring. You need an IP communicator or a cellular communicator. UPDATE: Alarm.com can now alert a user directly via a Push Notification on their phone when a C&S event occurs.

If you have any questions about Crash & Smash or Advanced Protection Logic, or if you want to learn more about our monitoring service, please reach out to us! The best way to contact us is to send an email to support@alarmgrid.com. We will check the email at our earliest convenience and respond as quickly as possible. If you prefer to speak on the phone, we are available from 9am to 8pm EST M-F at (888) 818-7728. We look forward to hearing from you!

Tags: , , , ,

Comments