If you're looking to get started with DIY home security, then your first step is usually to get a system. What many people don't realize is that they don't necessarily need a brand-new panel and sensors to get started. Most users can achieve dependable security setups with used systems.

Really, the decision to whether you get new or used equipment comes down to personal preference. For some users, there's nothing quite like taking a fresh panel out of the box and appreciating its modern beauty and shiny exterior. We understand. It's fun. Believe it or not, this is actually why many of the people at Alarm Grid chose this profession - we love working with the latest and most advanced security equipment on a regular basis!
For other users, this might not mean as much. They might not care how their system looks or if it is technically the most advanced model. They just want a reliable piece of equipment that will keep their home or business safe for many years to come. And that's fine. Alarm Grid embraces these customers just the same as those who are willing to shell out thousands of dollars for brand-new state-of-the-art equipment. In fact, we often view trying to use existing equipment as the true DIY spirit. If you have it and it works, why replace it?
From our perspective, we don't really care whether you use new or used equipment. We just want to get you monitored and keep your home or business safe. Our monitoring plans are not dependent upon which system and sensors you use. They are dependent upon the services you receive. Customers pay higher monthly fees for necessary services like cellular connectivity, central station monitoring, access to an interactive service platform like Total Connect 2.0 or Alarm.com, smart home automation features and video surveillance.
In other words, your monitoring fee is not affected by whether you use a brand-new Honeywell Lyric Controller with encrypted sensors or a 15-year old VISTA Panel running the same hardwired sensors since day one. If that VISTA is running cellular and the Lyric is WIFI-only, then the VISTA will have the higher monitoring costs. It's as simple as that. So really what you should be doing if you are new to monitoring is finding out what services you need.
When you think about it, the main job of an alarm system is being able to send reliable outbound alerts. Everything beyond that is just used to add extra features or to improve upon the end user's experience. It doesn't matter whether your system is brand-new or 20-years old. What does matter is whether or not it can function reliably based upon today's standards.
The main reason why alarm systems ultimately become obsolete is because they cannot keep up with the latest communication technology. These days, if a system cannot support cellular communication through an LTE network, then it could be considered obsolete. Older 2G networks are already a thing of the past, and 3G networks should follow suit in the coming years. For a long-term investment, getting on an LTE network or higher is a must.
But not all alarm system cellular communicators are created equal. Older modules can only connect to older cellular networks. And when these older networks become discontinued, the communicator becomes obsolete. The alarm manufacturer needs to decide whether or not it is worth releasing a new communicator for this older system. This is more difficult than it might initially seem. Releasing a new communicator might require a major system firmware update that could be difficult to apply, and many people might have already moved on to a new system.
The reality is that sometimes it's just best for an alarm manufacturer to drop support for a panel and try to steer their customers to their newer offerings. This is how they stay competitive and move the industry forward. What can be difficult for customers is knowing when they are best reviving an older system and when it's time to just buy a new model instead.
There are many older panels that can do nearly anything a modern alarm system can. They can receive communicator upgrades to work across faster and more reliable networks. They can have smart home automation modules installed to support Z-Wave devices. Many even have touchscreen keypads available for a better end user experience! You just need to ask yourself if the system you are looking at can support a proper communication path and whether or not it can fulfill all your needs.
If you do decide that an older system is the way to go, then we think that's great! Our team will certainly help you embrace the task of helping you get your used alarm system up and running with Alarm Grid monitoring services. We even had s few tips for helping you find older equipment.
First and foremost, you should look around you. For example, you might have moved into a new home with an existing alarm system. Or maybe your friend or loved one has a system they don't use any more, and they don't mind giving it to you. Even if you just find some old sensors, they might be a start. Check around and see if you come across some older systems. You might be surprised!
If you do need to make some purchases, why not try an online auction site or your online classifieds? There is often perfectly functional security equipment available at shockingly low prices. You may be able to buy it for yourself and get it monitored. Just make sure to find out what the panel can and cannot do before you buy it! We strongly recommend getting a system that can support cellular communication and access to an interactive service platform. Used security sensors are also often a great option, since they can usually be obtained at a fraction of the price!
For users who want a quick and easy answer, they might consider buying refurbished equipment from Alarm Grid. We currently offer options for refurbished Honeywell Lyric Alarm Systems and refurbished Honeywell VISTA 21iP Systems. This equipment is sent to us directly from the manufacturer, and it is guaranteed to work just as well as a brand-new system. This way, you can get a system at an affordable cost and know that it will work just as well as a new one.

If you're looking for used alarm system equipment, you don't have to go at it alone. Alarm Grid is here to help you so that you can get monitored. We can answer your questions about used security panels and sensors and determine whether or not they are right for your needs. We recommend sending an email to support@alarmgrid.com with any questions you might have. We also offer phone support for those interested in our monitoring services. Just call (888) 818-7728 during our normal business hours of 9am to 8pm EST M-F. We look forward to helping you find the best security equipment for your needs.


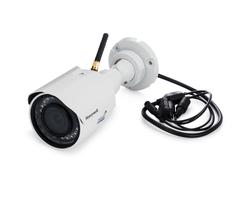 It's no secret that customer-oriented businesses and security cameras are the perfect match. A video surveillance system is great for catching theft and dishonest bait-and-switch tactics that a small number of dishonest people may try to get away with. But what you might not think of is using security cameras to protect your company in case of a lawsuit.