Wired Touchscreen Keypads Posts

Posted By

Update 12/02/21:

We have confirmed with Resideo and at least one customer that the issues regarding the syncing of Automation between all versions of the Tuxedo Keypads, and the VAM have been resolved and that remote control of Z-Wave devices has returned to normal. Users should now be able to remotely control Z-Wave Automation Devices during any Total Connect 2.0 session. Any Alarm Grid customer that notices issues like this in the future, please report it to support@alarmgrid.com.

Update 11/26/21:

On Tuesday of this week, Resideo announced an update meant to fix this issue. Apparently, it fixed the portion of the issue where all Automation Syncs were failing, but did not address the issue with being unable to control Z-Wave Devices remotely.

There is something of a workaround for this portion of the issue at this time. During the TC2 session where a successful Automation Sync occurs, you can control Z-Wave devices remotely. Once you end that TC2 session and begin another one, you will lose that ability. So, for now, if you need to control a Z-Wave device remotely, perform a sync, and once you see in the Activity Log that the Automation Sync was successful, you will be able to control Z-Wave devices until the current TC2 session ends. Stay tuned and we will provide further updates as this issue is resolved.

Original Post:

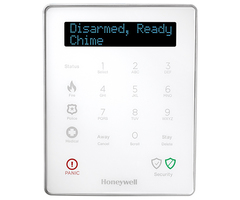
In the last couple of weeks, Alarm Grid has noticed several customers with VAM and Tuxedo Keypads (all versions) having trouble syncing Z-Wave devices with Total Connect 2.0. This prevents newly added Z-Wave devices from showing up in TC2, though local control at the device is still available.

This issue doesn't seem to affect Total Connect 2.0 accounts associated with AiO (All-in-One) panels such as the Lyric Controller and the Honeywell Home PROA7PLUS. Accounts with these panel types should be working fine. It is unknown exactly what the problem is, and there is currently no workaround available. We've been in touch with Resideo and Honeywell Home and they are aware of the problem, but there is no Estimated Time of Resolution (ETR) for a fix.

You can continue to add and remove Z-Wave devices locally at the VAM or Tuxedo. But any changes that are made locally at the Z-Wave controller will not be synced to Total Connect 2.0. This means that any device deleted locally will continue to show up in TC2, and any device added locally will not show up in Total Connect 2.0 until this issue is resolved and a successful automation sync occurs.

Any device that currently shows up in Total Connect 2.0, and still exists in the Tuxedo or VAM CANNOT be controlled remotely through TC2. When an attempt to perform an Automation Sync occurs, there is no Automation Sync Failed, or Automation Sync Successful message displayed in TC2 Activity. Status changes from the Z-Wave device to TC2 seem to be coming through fine. It's only the sync process and remote control that seem to be having issues.

Alarm Grid is working with Resideo and Honeywell Home, and as soon as this issue is resolved, we'll post about it here. We posted information earlier this year about the Tuxedo Keypads and VAM Automation Controllers not updating the weather properly. We don't know if this current issue is related to the previous one, but we hope that it will be resolved soon. Stay tuned to our blog for updates.

Tags: , , , , , , , , , , , , , , , , , ,

Comments


Posted By

You might be checking your calendar because it's Friday, and this is a video recap, and we usually save those for Mondays. Well we had four (4) videos from earlier this month that we never managed to recap, so we figured why not now? The topics today are VISTA Panels and the Tuxedo Keypad.

Honeywell VISTA System: Factory Defaulting

I show you how to Factory Default a Honeywell VISTA Security System. This process is very simple. You just get into programming with the command [Installer Code] + [8] + [00], with the default Installer Code being 4112. You can press [*97] to perform the default. The panel will beep three (3) times to confirm. You should also press [*96] to default the panel account and Computer Station ID (CSID). You can then press [*99] to exit programming. You can perform the default on an Alphanumeric Keypad, a Fixed English Keypad, or a Tuxedo Touchscreen Keypad in its Console Mode.


Honeywell Home Tuxedo: Local Scenes Using Sunrise & Sunset

I explain how you can create local smart scenes on a Honeywell Home Tuxedo Keypad to be set with time-based triggers for the local sunrise or sunset time. In the upper-right corner of the main Tuxedo screen, there is a weather display. If you click on this, then you can set the ZIP Code for the keypad. The Tuxedo will use this ZIP Code and its WIFI connection to get the daily sunrise and sunset time for any scenes set to trigger that way. If the Tuxedo loses its internet connection, it will just use the last recorded sunrise time and sunset time.


Honeywell Home Tuxedo: Setting Up Web Server & Remote Access

I show you how to set up web server access so that you can control the Tuxedo Keypad from a web browser. After setting up the feature by entering a username and password into the designated section of the Tuxedo, you can enter the Tuxedo IP Address into the web browser of an IP-connected device to access a login screen. The device used must be on the same network as the Tuxedo Keypad. Provide the username and password that you set up at the Tuxedo. This will open an interface resembling the old style Tuxedo Touch, and you can use that you control the Tuxedo and the connected VISTA.


Honeywell Home Tuxedo: Web Interface Cannot Include/Exclude Z Wave Devices

I explain that you cannot include or exclude Z-Wave devices when accessing the Tuxedo Keypad from a web browser, also known as the Tuxedo Web Interface or Tuxedo Virtual Interface. Although you can perform almost all of the same commands from the virtual Tuxedo Web Interface as you can from the Tuxedo Keypad itself, you cannot add or remove Z-Wave devices. This is because the necessary menu option for adding and removing Z-Wave devices is not present inside the Tuxedo Virtual Interface. You can only add and remove Z-Wave devices by interacting with the actual Tuxedo Keypad itself.

Tags: , , , , , , , , , , , , , , ,

Comments


Posted

Update February 2024: We Won! For now, at least. LOL. It has been confirmed by Resideo and now a customer, that the weather is now working. This is on the older style Tuxedo Touch WIFI keypads. We have been fighting this fight to keep the weather going on these keypads. It took a while for Resideo to resolve this, and we appreciate everyone's input and patience. So go and enjoy it while you can.

Update November 2023: After daylight savings time ended on 11/5/2023, we received multiple reports of the weather no longer updating. We have reported this to Resideo and they are looking into the issue. We will continue to provide the most accurate up to date information we have. We appreciate your patience in this matter.

Update Christmas 2022: It appears the weather stopped updating on Tuxedo keypads once again around Christmas, 2022. However, it appears that as of January 3, 2023, it is back up and working again. This feature has been hit or miss for a while now, and officially, it's not supposed to be working on the legacy Tux keypads. The last official word from Resideo was in September, 2021, where they said the older style Tux keypads would no longer support weather and only the newer Tuxedo keypads would. You can read that notice here.

Newer style Tuxedo Keypad:


Older Style Tuxedo Touch WIFI:


Update April 2022: Per Resideo, though this feature seems to be working again, it is not officially fixed until we receive a new Technical Bulletin from them saying that it is. For now, if your keypad is not displaying the weather, refresh the weather on the forecast page. Do this by pressing the refresh button in the lower-left corner of the forecast screen.

Update December 2021: In late December, Resideo announced that the weather display feature had been fixed and is now available on Tuxedo Touch WIFI, VAM, and original Tuxedo Touch keypads. Hopefully, this will be the end of the Weather Feature Saga, once and for all!

There is an issue affecting all versions of the Honeywell and Resideo Tuxedo Keypads and VISTA Automation Modules (VAMs). This is a server issue causing the displayed weather forecast to not update. Resideo has not provided an ETA for a fix. Alarm Grid will update when more info is made available.

Update: Alarm Grid has learned that the issue is only affecting old style Tuxedo Touch Keypads, including the Tuxedo Touch WIFI and the original Tuxedo Touch with ethernet connectivity, as well as Honeywell VAM devices when accessed through a web browser. The issue is NOT affecting newer Honeywell Home Tuxedo and Resideo Tuxedo Keypads, as was initially reported. Keep in mind that these new-style Tuxedo Keypads may only update weather once per day, so the displayed last update time might still seem off. But if you click the refresh button in the bottom-left corner of the weather display screen, then it will still update. As the issue is relatively minor and only affecting old style devices, it's possible that Resideo may put off applying a fix for a while. Again, we promise to provide an update if any new information is made available. We apologize for any inconvenience caused by the issue.

Tags: , , , , , , , , , ,

Comments


Posted By

You may have noticed recently that some new products from Resideo (formerly Honeywell) are being offered in both Resideo and Honeywell Home variants. Today, we want to clear up any confusion and explain that these are the same products, only with different labeling across the front.


To be clear, there have been three (3) instances of this varied labeling thus far, and it's likely that Resideo will continue this practice for additional products in the future. So far, the products that have been offered in both "Resideo" and "Honeywell Home" variants have included the following:

If you have a keen eye, then you'll likely notice that the "Honeywell Home" variants have the base SKU, while the "Resideo" variants have the base SKU, plus the letter C at the end. The C stands for "Commercial", as Resideo is marketing the "Resideo" variants for commercial use, while the "Honeywell Home" variant is being marketed for residential use. This situation occurred because certain alarm dealers who install in predominantly commercial locations couldn't (or in some cases, refused to) sell a product with the word "Home" on the front. In turn, Resideo made the call to accommodate these dealers.

In each of the three (3) aforementioned cases, Resideo has basically released the same product twice, with one variant being sold under the "Honeywell Home" banner for residential use, and the other being sold under the "Resideo" banner for commercial use. The only difference between variants is that one will say "Honeywell Home" across the front, and the other will say "Resideo" across the front. That's the only difference! All other aspects, such as product features, functions, compatibility, and overall use and performance is completely identical. We promise you, there is no gimmick or surprise here. Whether you get a Honeywell Home variant or a Resideo variant, it really won't matter. They're the same!

In fact, the "Residential" vs. "Commercial" wording is nothing more than a cosmetic difference. If you are buying the product for use in a home, but you like the name "Resideo" more than "Honeywell Home", then feel free to get the Resideo variant. It may be marketed for commercial use, but you can absolutely use it in a residential location. Again, the only difference is the wording. Conversely, you will have no trouble using a "Honeywell Home" variant in a commercial business or industrial location. If you prefer the "Honeywell Home" wording, then get that variant for your office or business. Just because it's marketed for residential use does not mean that you cannot use it in a commercial location!


If you're like many users, then you are likely going to wonder why Resideo would even bother doing this. Again, it's really just marketing and their response to a certain subset of commercial dealers. Resideo has the right to use Honeywell Home branding, and they will continue doing so for name recognition. But they found out that commercial and industrial locations don't want to use products labeled "Honeywell Home" because they look out of place. As a result, Resideo is offering the "Resideo"-labeled alternative to accommodate these users. You might think it's a bit silly - and maybe it is. But it's nothing more than a marketing decision. So go ahead and laugh, then decide whether you want your brand-new security system or touchscreen keypad to read "Honeywell Home" or "Resideo". Either way, you're getting a great product.

And that's really the best news here. All three (3) of these products are awesome. Resideo has really been putting out some sleek and fresh-looking security equipment lately. The three (3) products in question are known for their 7-inch touchscreen controllers and their modern designs that look tremendous in pretty much any home or office. And even if the reasoning is a bit frivolous, the end result is that you have more options to choose from. If you don't want "Home" displayed on your new office security system, then you can opt for the "Resideo" option. Alternatively, if you think "Resideo" sounds goofy and makes you cringe, then you can go with "Honeywell Home" instead. There's no judgment here!

What do you think of this "Resideo" vs. "Honeywell Home" situation? Do you think it's a bit silly, or do you think it's a smart decision by Resideo? Also, which name do you like more? And lastly, have you gotten to try out the new Tuxedo Keypad or the ProSeries 7-Inch Panels yet? Please share your thoughts in the comments below. We used the Honeywell Home variants for our personal office testing, but we're sure the Resideo ones are just as nice. Maybe we'll have both variants hanging around the Alarm Grid office someday. But for now, we hope that this cleared up any confusion or misunderstandings, and we'll be back with more news soon.

Tags: , , , , , , , , , ,

Comments


Posted By

If you are a Honeywell VISTA System user, then you have likely heard about the Honeywell Home Tuxedo Keypad. The Tuxedo serves as a touchscreen keypad controller, and also as a Z-Wave Plus hub. But one limitation for the unit is that it cannot be configured as a secondary Z-Wave controller.


Setting up a hub as a secondary Z-Wave controller involves pairing it with a separate Z-Wave hub, which will serve as the primary. When you do this, all Z-Wave devices paired with the primary controller will be automatically pushed over to the secondary, as long as they are compatible. These devices will also remain on the primary controller, meaning that you can operate them from both hubs.

If you decide to use this type of setup, it is advised that you clear all Z-Wave devices enrolled with the secondary controller, and instead enroll them with the primary controller beforehand. Then perform the process of setting up the secondary controller to the primary. This will ensure that all of the Z-Wave devices you want to use are available on both controllers.

Remember, Z-Wave devices paired with the secondary controller will not be pushed over to the primary. When you get a new Z-Wave device, you must enroll it at the primary Z-Wave controller, not the secondary. In most cases, Honeywell Z-Wave Hubs are used as secondary controllers, and Z-Wave devices paired directly with the primary controller are then shared with the Honeywell Z-Wave Controller. One of the most common primary Z-Wave hubs to use for this type of setup is Samsung SmartThings. Other popular third party Z-Wave hubs should work just as well.

Being able to set up a Z-Wave hub as a secondary controller, is technically one of the more advanced Z-Wave functions that you would ever try to perform on a smart home automation network. But while it is quite advanced, it is also very standard. It is somewhat unusual to encounter a Z-Wave automation controller with no primary and secondary configuration options. But that's exactly the case with the Honeywell Home Tuxedo. You can't set it as a secondary Z-Wave controller, which is a big letdown for anyone who wants to use the device in conjunction with a different Z-Wave hub, such as Samsung SmartThings.

According to Resideo, the ability to set the Tuxedo as a secondary Z-Wave controller will come from a future firmware update. At this time, we do not have any estimate for when such a firmware update would be made available. If you want to learn more about firmware updates for a Tuxedo Keypad, please refer to this FAQ.

However, we can speculate that once the feature is available, you will be able to configure Tuxedo primary/secondary options by starting from the main keypad screen, and choosing the Devices option, followed by the Z-Wave Setup button at the bottom of the screen, and then selecting More in the lower-right corner. If you do that now, you will notice that the "Learn Mode" option currently does not exist.


Remember to stay tuned to our blog for future updates on the Honeywell Home Tuxedo. We will be sure to let you know about any new features made available for the keypad. If you have any questions about the Tuxedo or Z-Wave home automation, please feel free to email us at support@alarmgrid.com. We check our email from 9am to 8pm ET M-F. We look forward to hearing from you!

Tags: , , , , , , ,

Comments


Posted By

Alarm Grid is here again with its latest video recap! We have a lot of videos featuring touchscreen keypads this week, though some other topics are covered as well. As usual, Jorge, Jarrett, and yours truly are all represented. Let's check out the latest Alarm Grid videos from the team!

Pairing a 2GIG SP2 with the 2GIG GC3e

Jarrett helps you pair a 2GIG SP2 Keypad with a 2GIG GC3e Security System. Adding the SP2 Keypad will provide you with a secondary on-site location for controlling your GC3e System. You might consider installing it by your front door, by your garage door, by your back door, or in your master bedroom. Remember that the SP2 is for security functions only, and it cannot perform automation commands. The wireless keypad pairs with the GC3e through WIFI or by using an Access Point (AP).


How to Tell If a Keypad Has an RF Receiver Built-In

Jorge explains how you can determine if your alarm system keypad has a built-in RF receiver. It can be easy to confuse a keypad like the Honeywell 6160RF, which has an integrated receiver, with a similar-looking keypad that does not, such as the Honeywell 6160. If you have a hardwired alarm system, then the benefit of adding a wireless receiver is that you will be able to begin pairing compatible wireless sensors with the system. And if your keypad has a built-in receiver, then you won't need to add a standalone receiver unit.


Remove a PG9914 From its Mounting Bracket

Jarrett shows you how to remove a DSC PG9914 PowerG Motion Detection Sensor from its mounting bracket. Like all motion sensors, properly positioning and mounting the PG9914 is very important for achieving the results you want. If it is positioned improperly, then it may cause false alarms, or it may not activate when movement is present in the area. Proper mounting is also crucial if you intend to use the motion sensor for pet immunity. The PG9914 supports pet immunity of up to 85 pounds.


Determining if Your Keypad is Alphanumeric

Jorge explains the difference between an Alphanumeric Keypad like the Honeywell 6160 and a Fixed English Keypad like the Honeywell 6150. Both keypad types are good for arming and disarming and bypassing sensors. But only an Alphanumeric Keypad is good for menu-driven programming. This is because an Alphanumeric Keypad will display the relevant information as you move through the menus. If you try to program on a Fixed English Keypad, you will basically be operating blindly.


Checking the ECP and RIS Address on the Tuxedo Touch

Jorge teaches you how to check the ECP Address and the RIS Address for a Honeywell Tuxedo Touch Keypad. These settings are important when you go to set up the Tuxedo Touch with a Honeywell VISTA Security System and Total Connect 2.0. The ECP Address is used for setting up the Tuxedo Touch as a keypad controller on the VISTA System, and the RIS Address is used for setting up the Tuxedo Touch as an automation controller on Total Connect 2.0.


Disarming Using the Tuxedo Touch Keypad

Jorge shows you how to disarm your Honeywell VISTA Alarm System by using a connected Honeywell Tuxedo Touch Keypad. Since the Tuxedo Touch is a wired touchscreen keypad controller for the system, it needs to be able to perform all the standard security functions. These include arming and disarming the system. When you are disarming, you are taking the system out of a secured state so that burglary/intrusion zones are unable to cause alarms on the system.

Bypassing Zones Using a Honeywell Tuxedo Touch Keypad

Jorge explains how to bypass zones using a Honeywell Tuxedo Touch Keypad. When the zone associated with a sensor is bypassed, that sensor is ignored by the system. In other words, the system will not provide any response if that sensor is faulted. You must bypass or restore any faulted zones prior to arming the system. Bypassing is often preferred over deleting a zone entirely, as you do not have to reprogram a zone after bypassing. You can just unbypass the zone later on and use it as normal.


Providing AC Power to an Alarm System

I explain how AC power is provided to an alarm system. AC power comes from a plug-in transformer that connects to an alarm panel using wire. The transformer takes the high-voltage power provided from the outlet, and it transforms it into low-voltage power that is suitable for powering a security system. The power travels down the wire and reaches the panel. This represents the primary power source for an alarm system. If AC power is lost, then a backup battery can keep the system running temporarily until AC power is restored.

Tags: , , , , , , , ,

Comments


Posted By

Alarm Grid is thrilled to offer the brand-new Resideo Tuxedo Keypad! This sleek and modern keypad serves as a touchscreen controller for your Honeywell VISTA, while also providing Z-Wave Plus home automation capabilities. This will truly bring out the full potential of your VISTA Panel!


The new Resideo Tuxedo represents the third generation in the Honeywell Tuxedo Touch Series. The original Honeywell Tuxedo Touch, the Honeywell Tuxedo Touch WIFI, and the Honeywell VAM have all been discontinued to make room for the new Resideo Tuxedo. While we are a little sad to see these classic products be sent off to the "product graveyard", we are extremely excited about this brand-new keypad and what it brings to the party.

If you are familiar with the Honeywell 6290W Touchscreen Keypad that came out last September, then you will be pleased to learn that the new Resideo Tuxedo offers the exact same look and user interface (UI). In fact, the only difference between the two is the fact that the Tuxedo offers Z-Wave Plus functionality, while the 6290W is just a keypad for controlling the VISTA. With the Tuxedo, you get all of the same security functions from the 6290W (e.g. arming, disarming, bypassing zones), as well as awesome new home automation controls.

The great thing about a touchscreen keypad like the Resideo Tuxedo is that it can make your system much less intimidating and easier to control. This can be especially important for new users who are not used to working with a security system, especially one that uses a classic numeric keypad that requires specific knowledge to operate. The Tuxedo is easy to navigate, and the full-color menus can give a new user confidence in controlling their system. Most experienced users also appreciate touchscreen keypads just due to their overall ease of use.

You certainly have a great deal of automation devices that you can pair with the Resideo Tuxedo. Nearly any Z-Wave device can integrate with the keypad. You can add Z-Wave lights so that it looks like you're home while on vacation. A Z-Wave door lock can be helpful for letting your friend inside without getting up from the couch. And a Z-Wave thermostat can help you save a ton of money in energy costs, while still keeping your home comfortable. The unit supports up to 232 Z-Wave devices, so you're highly unlikely to run out of room. We recommend using exclusively Z-Wave Plus devices to build the strongest network possible.

WIFI connectivity returns to the new Resideo Tuxedo. The keypad uses its WIFI connectivity for communicating with Total Connect 2.0. You can access TC2 to control your programmed automation devices remotely from a mobile app or web browser. The WIFI connection is also how firmware updates are applied to the Tuxedo Keypad. You can alternatively use a wired ethernet connection instead of wireless WIFI, but come on, who's gonna do that? Just be aware that the Tuxedo is not an AlarmNet Communicator. You will still need a separate alarm communicator for your VISTA System and a monitoring plan to access Total Connect 2.0.

And there are many other features and specifications that we love about the new Tuxedo. This keypad and automation controller boasts a 7-inch screen with a 480 x 640 resolution. The thin-film-transitor (TFT) LCD screen is backlit, so you will have no trouble using it at night. Other features include voice and chime, a weather display, the ability to live-stream security cameras, Console Mode, a digital picture frame, and more!

You can buy the new Resideo Tuxedo Keypad from Alarm Grid right now. We are sure that you will love using this robust and powerful keypad in your home or office. It really has a nice modern look that can fit in nicely with any decor. This is truly a great way to improve upon a VISTA System. If you have any questions about the Tuxedo, or if you want to learn more about alarm monitoring, contact us via email at support@alarmgrid.com. We check our email during our business hours of 9am to 8pm ET M-F. We look forward to hearing from you!

Tags: , , , , , , , ,

Comments


Posted By

Alarm Grid is back with another video recap, this time covering videos from July 21st thru July 24th. The highlights this week include a classic video from Jorge, as well as the start of a new video series where I teach you how to set up the DSC PowerSeries NEO. Let's check out the videos!

Connecting a Honeywell Tuxedo Touch to WIFI

Jorge shows you how to connect a Honeywell Tuxedo Touch to a local WIFI network. The Tuxedo Touch uses an internet connection for sending and receiving Z-Wave signals from Total Connect 2.0. It is important to understand that the Tuxedo Touch is not actually an AlarmNet Communicator for facilitating monitoring service. Its internet connection is merely for automation purposes and displaying the current weather forecast. Without a reliable internet connection, the current status of Z-Wave devices on TC2 cannot be updated.


Powering the DSC PowerSeries NEO Security System

I show you how to provide power to a DSC PowerSeries NEO Security System Primary power comes from a 16.5VAC, 40VA transformer. Since AC power is being used, polarity does not matter when connecting wires to the module. We recommend using 18-AWG, 2-Conductor wire for this job. But if you have existing wire lying around, then that should work fine, as long as maximum wire run limits are observed. The PowerSeries NEO also receives backup power from a connected battery.


Add Wired Keypad to DSC PowerSeries NEO Security System

I show you how to add a wired alphanumeric keypad to a DSC PowerSeries NEO Alarm System. The first keypad you add to your NEO Panel should be a wired alphanumeric model for programming purposes. In particular, we recommend using the DSC HS2LCDRF9 N for this purpose. That model includes a built-in PowerG Transceiver so that you can begin adding wireless PowerG Sensors with your system. The initial keypad allows for one-touch enrollment, while additional keypads must be added through the initial keypad.


Tags: , , , , , , , ,

Comments


Posted By

Many users consider adding keypads to their alarm systems so that they can control their systems from multiple on-site locations. And for wired panels, at least one keypad is required for on-site operation. Today, we will briefly cover some of the alarm keypads that you might encounter.

Honeywell lkp500 wireless keypad for lyric controller

First, it is important to understand that a keypad is NOT an actual alarm system. It is merely an input and output device for an alarm system. A user will input commands through the alarm keypad. The system will also provide information about security panel status through the keypad. Nearly all keypads will provide basic functionality, such as arming and disarming and bypassing zones. Some more advanced keypads may offer additional capabilities, such as system programming and performing home automation functions.

If you have a wired system, then you will absolutely need at least one keypad. This is because the panel will need some means for on-site operation. When adding your first keypad to a wired system, it is usually recommended that you get an alphanumeric keypad with a built-in wireless receiver. Alphanumeric means that the keypad will display full language text, which is important for successfully programming the system. Having a built-in wireless receiver will allow you to start pairing wireless sensors with the system, which will give you more flexible installation options. Examples of alphanumeric keypads with integrated wireless receivers include the Honeywell 6160RF for Honeywell VISTA Systems and the DSC HS2LCDRF9 N for DSC PowerSeries NEO Systems. For additional keypads, you should just use standard keypad models, without integrated wireless receiver modules.

But for a wireless system, adding a keypad is almost always optional. This is because a wireless panel is consider "all-in-one", and you can control the system directly from the panel itself. Some wireless panels like the Honeywell Lyric and the Qolsys IQ Panel 2 Plus have built-in touchscreen controllers for this purpose. Other wireless panels like the Honeywell LYNX Plus L3000 have a less fancy, but still perfectly functional, numeric touchpad for this task. Most wireless system users don't bother adding an external system keypad.

That being said, you can still choose to add a keypad to a wireless system if you want. The benefit to adding a keypad is that you will have an additional physical device for controlling your system while you are on-site. This can be very useful if you have multiple entrances for coming and going, such as a front door, back door, and garage door. You might also consider putting a keypad in an easily accessible location, such as by the bed in your master bedroom so that you can conveniently operate your security system from that location as well.

Many systems will provide you with multiple keypad options to choose from. Depending on your needs, you may be selecting between a numeric touchpad keypad and a touchscreen keypad. A numeric touchpad keypad is operated by pressing various buttons on the device to enter specific codes and command sequences. These keypads are relatively basic, but they can be convenient for performing simple system functions. On the other hand, a touchscreen keypad will provide a colorful touchscreen display with intuitive menu icons. This can be more cheerful and inviting for someone who isn't used to operating an alarm system. The downside with a touchscreen keypad is that they are often much more expensive than numeric touchpad keypads. And it's also important to understand that your selection of keypad choices may be limited based on the panel you are using.

But before you navigate our site to start purchasing new keypads for your system, you should really consider if you actually need one. The most common alternative to a secondary system keypad is an interactive service platform that can be accessed through your phone or a web browser. If your system is monitored, then there's a good chance that you already have access to one of these platforms. Most Alarm Grid monitored customers have access to either Total Connect 2.0 or Alarm.com, depending on the system they are using. Both platforms can be conveniently accessed remotely to offer the same functionality that you would get from a physical on-site keypad. So instead of going to your secondary system keypad, you might just pull up your phone to access Total Connect 2.0 or Alarm.com and control your system from there! Check out our monitoring plans to see which ones offer access to these exciting platforms.

Another option is to get a key fob for your system. A key fob is a small handheld device that enrolls with a security system wirelessly to perform various inputs and commands. You can easily carry a key fob around in your pocket or purse, or you can put it on a key ring for easy access. Then, with a press of a button, you can arm or disarm, trigger an automation device, or activate an alarm on your system. Key fobs are often more limited than fixed-location keypads, but they can be very convenient for performing quick commands. Just make sure to not lose your key fob. The devices are quite small, and they can easily become misplaced or lost. The same usually cannot be said for a keypad mounted on your wall!

If you are interested in learning more about alarm system keypads, or if you want to find out which keypads are compatible with your system, then we are happy to help! We offer a wide selection of keypads for use with many types of security systems. The best way to contact us is to email support@alarmgrid.com. If you are trying to determine system compatibility, then you may want to include a picture of your panel so that we know what brand and model you are working with. Remember that our hours for checking email run from 9am to 8pm ET M-F. We look forward to hearing from you!

Tags: , , , , , , , , , , , , , , , , , , , , , , , , ,

Comments


Posted By

Alarm Grid has learned that a firmware update for the Honeywell 6290W Touchscreen Keypad is available. Honeywell 6290W Firmware Update 2.01.028.0002 corrects an issue where the keypad Disarm screen does not automatically appear when the Honeywell VISTA System goes into its Entry Delay.


Resideo never made a public announcement about Firmware Update 2.01.028.0002, so it's possible that it may have already been out for a little while. However, we only just heard about it the other day. Although the change it makes is relatively minor, having the Disarm screen automatically appear when the system is in its Entry Delay should make things more convenient for end users. That way, you won't have to manually pull up the Disarm screen when entering the premises and disarming your system. We recommend upgrading to the latest firmware as soon as possible if you haven't already.

Firmware updates for the Honeywell 6290W are provided automatically over-the-air (OTA) from the Resideo AlarmNet360 Servers. They are not pushed down manually, so there is no need to contact us to request the update. However, you must enable WIFI and enable Remote Upgrading for the keypad in order for the update to be automatically sent down. Once the 6290W has checked-in with the AlarmNet Server, the update will be put into a queue and pushed down as soon as possible. This usually occurs within 24 to 48 hours of the keypad checking-in. Alarm Grid recently uploaded a document that shows the process for enabling WIFI and Remote Upgrading, which you can view here.

As a quick reference, WIFI is enabled by pressing the Settings icon (the gear) on the main screen, followed by "System WIFI". From there, toggle the WIFI option, and select the desired WIFI network. Enter the network's password, and click on Connect. Once the process is complete, return to the home screen by clicking on the picture of the house. Next, enable Remote Updating by clicking the Settings icon again and choosing System Info. Click on the Enable Remote Upgrade option to turn on the feature. You can then return home.

Remember, the Settings icon for the keypad looks like .

If you are monitored by Alarm Grid and you need additional assistance enabling OTA updates, please email us at support@alarmgrid.com. We check for new emails from 9am to 8pm ET M-F. We look forward to hearing from you!

Note: After the update is pushed down to the keypad, it will only be applied once the system is in a disarmed state with no faulted zones and no trouble conditions, including low battery or AC power loss. The update will also be delayed if the system is in programming mode or if there is a zone in alarm memory. The keypad will reboot as part of the update process.

Tags: , , , , , ,

Comments