Honeywell VISTA Series Posts

Posted By

You might be checking your calendar because it's Friday, and this is a video recap, and we usually save those for Mondays. Well we had four (4) videos from earlier this month that we never managed to recap, so we figured why not now? The topics today are VISTA Panels and the Tuxedo Keypad.

Honeywell VISTA System: Factory Defaulting

I show you how to Factory Default a Honeywell VISTA Security System. This process is very simple. You just get into programming with the command [Installer Code] + [8] + [00], with the default Installer Code being 4112. You can press [*97] to perform the default. The panel will beep three (3) times to confirm. You should also press [*96] to default the panel account and Computer Station ID (CSID). You can then press [*99] to exit programming. You can perform the default on an Alphanumeric Keypad, a Fixed English Keypad, or a Tuxedo Touchscreen Keypad in its Console Mode.


Honeywell Home Tuxedo: Local Scenes Using Sunrise & Sunset

I explain how you can create local smart scenes on a Honeywell Home Tuxedo Keypad to be set with time-based triggers for the local sunrise or sunset time. In the upper-right corner of the main Tuxedo screen, there is a weather display. If you click on this, then you can set the ZIP Code for the keypad. The Tuxedo will use this ZIP Code and its WIFI connection to get the daily sunrise and sunset time for any scenes set to trigger that way. If the Tuxedo loses its internet connection, it will just use the last recorded sunrise time and sunset time.


Honeywell Home Tuxedo: Setting Up Web Server & Remote Access

I show you how to set up web server access so that you can control the Tuxedo Keypad from a web browser. After setting up the feature by entering a username and password into the designated section of the Tuxedo, you can enter the Tuxedo IP Address into the web browser of an IP-connected device to access a login screen. The device used must be on the same network as the Tuxedo Keypad. Provide the username and password that you set up at the Tuxedo. This will open an interface resembling the old style Tuxedo Touch, and you can use that you control the Tuxedo and the connected VISTA.


Honeywell Home Tuxedo: Web Interface Cannot Include/Exclude Z Wave Devices

I explain that you cannot include or exclude Z-Wave devices when accessing the Tuxedo Keypad from a web browser, also known as the Tuxedo Web Interface or Tuxedo Virtual Interface. Although you can perform almost all of the same commands from the virtual Tuxedo Web Interface as you can from the Tuxedo Keypad itself, you cannot add or remove Z-Wave devices. This is because the necessary menu option for adding and removing Z-Wave devices is not present inside the Tuxedo Virtual Interface. You can only add and remove Z-Wave devices by interacting with the actual Tuxedo Keypad itself.

Tags: , , , , , , , , , , , , , , ,

Comments


Posted By

Here at Alarm Grid, we try to help as many people as possible with their alarm system. Sure, we hope it will lead folks to choose us for their alarm monitoring needs. But it's also because we're simply helpful people. An alarm in your home or business should help quell fears, not cause them.

We've begun what I think of as "Silly Season". You may be familiar with this term from Nascar, but for us in the alarm industry, this is the time when a lot of home buying and selling occurs. During this time, we get a lot of calls that go something like this, "I just moved into a home with an existing alarm. We haven't been using it, but somehow it got armed, and now it's going off, and I don't know the code to disarm it. Please help!"

Moving into a new home is exciting, but it's also stressful and can be overwhelming at times. So, I've (Ms. Manners) put together this guide to help you, the person who moved out of the home in this scenario, to leave behind your alarm system in a way that's as stress-free as possible for all parties involved.

Ms. Manners Says: Notify Your Alarm Company

If your alarm system is monitored, be sure to notify your alarm company that you are moving out and that the system is staying behind. This may seem obvious, but many people assume that if they stop paying their monitoring fees, the alarm company will know they no longer want service and will cancel it on their own. This is not the case for a number of reasons! There may be contracts involved. There could be liability issues. So for many reasons - not the least of which is it's the polite thing to do - any time you wish to stop monitoring service to a particular address, you should notify the alarm monitoring company as soon as possible.

By notifying the alarm company, you do several things. You give them an opportunity to reach out to the new homeowner and introduce themselves. Hopefully, if you've had a good experience with your monitoring company, you will also put in a good word about them to the new homeowner. Both of these things give the company a leg-up when it comes to courting a potential new customer, and it also gives the new homeowner information based on your real-life experience, not just an advertisement in a new homeowner's mailer.

By notifying the monitoring company, you can also help to prevent any unnecessary dispatching of the authorities to this address. As bad as the scenario above is for the poor, uninformed new homeowner, it's worse for the police, fire, or EMS personnel who may respond to the alarm, which we know is false.

Remember, the person who signed up for the monitoring service at the address in the scenario above no longer lives there. That means the monitoring station is going to be calling people who have no idea what may be going on at this address (which is also an annoyance for the person receiving the call). In this situation, it is likely that the monitoring station MUST dispatch because if they don't (and there is some type of emergency) there may be repercussions for them. A monitoring station is always going to adhere to the adage, "Better safe than sorry." After all, safety is their business.

Ms. Manners Says: Default Users, But Not Zones

When you sell a house and the alarm system with it, you may think it's a good idea to set the alarm system back to factory default to allow the new homeowner a chance to program it as they see fit. Resist this urge! In most cases, what was your Front Door is now going to be their Front Door. What was your Kitchen Window is now going to be their Kitchen Window. John's Bedroom Window may become Jane's Bedroom Window, but this is a pretty simple thing to change and doesn't really call for the entire system to be set back to factory default.

When it comes to user codes, though, it is best to set these back to factory defaults. This will prevent the new homeowner from finding out what codes you used. After all, we are creatures of habit, and there's a good chance you'll use those same codes in your next system. Also, if you set the codes for the Installer and Master users back to their default, the new homeowner should easily be able to find out what they are by doing a quick search online. Then, if they find themselves in the messy scenario discussed above, they'll be able to get themselves out of it. Being able to get yourself out of a jam like this one can do wonders for your self-confidence.

System Manufacturers and their Default Codes

Panel Manufacturer Installer Code Master Code
Honeywell Vista (Non-polling) 4112 1234
Honeywell All-in-One 4112 1234
2GIG GC2 1561 1111
2GIG GC3 1561 1111
Qolsys 1111 1234
Interlogix Simon XT 4321 1234
Interlogix Simon XTi & XTi-5 4321 1234
DSC Impassa 5555 1234

Use the information in the table above to set the codes in your panel back to their default values. If you don't see your panel listed, you can likely find the information you need with a quick online search. Performing this process is the single most helpful thing you can do for the new homeowner when it comes to the alarm system!

Ms. Manners Says: Leave Behind Good Notes

Any information you know about your alarm system, such as the manufacturer and model, the default installer code, and the default master code - each of which hopefully you have programmed into your panel by this time - will be helpful for the new homeowner. A list of zone numbers and their descriptions is also very much appreciated by a new homeowner. Leave them a note, tucked behind the keypad, or on a kitchen counter. Give them the sequence of keys to enter to disarm the system, or better yet, if you have the opportunity, show it to them, and then leave them a note to back up your demonstration.

If you're willing, leave them your contact information so they can contact you in the event that something unforeseen comes up. This is particularly important if your system is somewhat complex and has multiple home automation features integrated with it. I promise the last thing the new homeowner wants to do is bother you if they can avoid it. Everyone at Alarm Grid has talked with a frantic new homeowner who never even considered contacting the prior homeowner. It's usually something we suggest if we're unable to assist.

Fortunately, in most cases, we are able to assist, and we are happy to do so. This is just one of the many ways we make new friends here at Alarm Grid! I hope that anyone who is preparing to move out of a home and leave behind an alarm system will read this and use these suggestions to prepare.

If you happen to be moving into a home that already has an alarm system, and perhaps the previous homeowner didn't read this post, feel free to reach out to us. We're here Monday - Friday from 9:00 am to 8:00 pm Eastern Time. You can reach us via email, or by calling 888-818-7728.

Tags: , , , , , , , , , , , , , , , , , , , ,

Comments


Posted By

Alarm Grid has learned about issues that may arise if you attempt to use an SIA PROM Chip on a Non-SIA Honeywell VISTA Panel. Doing so may prevent connected ECP devices from working properly. Issues may also arise if you attempt to use a Non-SIA PROM Chip on an SIA-approved VISTA Panel.

Before we discuss the issue itself, we will first cover some terminology to ensure that everyone is on the same page. Many Honeywell VISTA Alarm Panels come in both SIA and non-SIA variants. For example, there is the Honeywell VISTA-20PSIA and the Honeywell VISTA-20P, the Honeywell VISTA-15PSIA and the Honeywell VISTA-15P, etc. When you see SIA in the panel's name, that indicates that the alarm panel has been configured to meet various guidelines outlined by the Security Industry Association (SIA) for false alarm prevention. For all intents and purposes, SIA-Compliant VISTA Panels are basically the exact same as non-SIA VISTA Panels, except that the SIA-approved panels have various programming restrictions put into place to prevent false alarms. For example, an SIA-compliant VISTA Panel will not allow you to disable Entry and Exit Delay periods, and they will require you to set a minimum Dialer Delay for the system. There are various other restrictions that we won't cover in this post. Just know that an SIA-compliant system will have various restrictions in programming for the purpose of preventing false alarms.

Meanwhile, the PROM Chip installed on a Honeywell VISTA System sets its firmware. You can easily locate the PROM Chip on your VISTA System's green circuit board. Just look for the small black square chip with the white sticker on it. The white sticker includes version information so the user can identify the type of VISTA System they are using and its current firmware. Users remove older PROM Chips and replace them with newer ones as a means of upgrading their VISTA Systems to support new features. Alarm Grid sells 15P PROM Chips, 20P PROM Chips, and 21iP PROM Chips for Honeywell VISTA Systems. We typically advise replacing a 15P or 20P PROM Chip with less than Firmware Version 9.12, as that is the minimum version needed to support Total Connect 2.0. Likewise, the minimum PROM Chip needed on a VISTA-21iP for Total Connect 2.0 is 3.13. For more information on replacing PROM Chips, please see this helpful FAQ.

Please note that it is only possible to replace a PROM Chip on a VISTA System with a firmware version or PROM Chip version of 2.0 or higher. If your VISTA System shows a PROM Chip version of less than 2.0, then it is not possible to replace its PROM Chip, and you must replace the panel entirely. Also note, that you should never attempt to remove or replace a PROM Chip while your VISTA Panel is powered on. Always power down the panel completely before replacing its PROM Chip.

For the longest time, it was believed that you could use an SIA PROM Chip on its non-SIA VISTA printed circuit board (PCB) without experiencing an issue. For example, if you removed the PROM Chip on a Honeywell VISTA-20P, and replaced it with a WA20PSIA PROM Chip, then it was believed that no issues would occur. The same was believed to be true if you used a non-SIA PROM Chip on an SIA-compliant VISTA board. An example there would be if you removed the PROM Chip on a Honeywell VISTA-20PSIA and replaced it with a 20P PROM Chip. Aside from determining what was allowable within programming, no other issues were believed to occur if you used an SIA PROM Chip on a non-SIA VISTA System PCB, or vice-versa.

But upon further testing, that is not the case starting with VISTA System Firmware Version 9.17 on VISTA-20P Panels. Any Honeywell VISTA-20P PCB (non-SIA) that is being upgraded to Panel Firmware Version 9.17 or higher must have a non-SIA 20P PROM Chip. Likewise, any Honeywell VISTA-20PSIA System PCB (SIA-Compliant) that is being upgraded to Panel Firmware Version 9.17 or higher must have a 20PSIA PROM Chip. If you try to use an SIA PROM Chip on a non-SIA VISTA System (or vice-versa), then it is possible that peripheral devices connected to the system's ECP bus may not work properly. ECP devices for a VISTA System include any wired keypads, any alarm monitoring communicators, and any wireless receivers. This same error is also believed to occur on any Honeywell VISTA-15P (or VISTA-15PSIA) that is being upgraded to Panel Firmware Version 9.17 or higher, though further testing is needed to verify if that is indeed the case.

You can determine whether your VISTA System is an SIA Panel PCB or a non-SIA Panel PCB by checking a sticker on the panel's terminal block. This is a small barcode sticker at the bottom of the terminal block, below the phone line terminals. Check for one of the following messages:

  • SAVS20PSIA - Regular VISTA-20P
  • SAV20P-SIAP - VISTA-20PSIA
  • SAVS15PSIA - Regular VISTA-15P
  • SAV15P-SIAP - VISTA-15PSIA

Long story short, if you are using a Honeywell VISTA-20P, VISTA-20PSIA, VISTA-15P, or VISTA-15PSIA and you wish to PROM upgrade it to System Firmware Version 9.17 or higher, then make absolutely sure to use a PROM Chip specifically designed for that particular board. Do not attempt to use an SIA-equivalent on a non-SIA board, or a non-SIA Chip on an SIA-Compliant VISTA board. Mixing an SIA Chip on a non-SIA board (or vice-versa) for 15P or 20P Systems (or SIA equivalents) when upgrading to Firmware Version 9.17 or higher can result in ECP devices not working properly. As long as you use a proper PROM Chip for your system, then no issues should arise. If you are ordering a PROM upgrade chip from Alarm Grid then place your order and be sure to specify which version you need by sending us an email using the email address listed below. If you purchase either the Honeywell LTEIA-TC2 or LTEIV-TC2 or any of our other upgrade kits for VISTA panels, then you will receive all four of the available upgrade chips. Just be sure to select the correct chip for your VISTA PCB.

If you have any further questions about Honeywell VISTA Systems and their PROM Chips, or if you want to learn more about alarm monitoring service for your Honeywell VISTA System, please send an email to support@alarmgrid.com. We're here to answer any questions or concerns you might have. Our hours for responding to emails run from 9am to 8pm ET M-F. We look forward to hearing from you!

Tags: , , , , , , , , , ,

Comments


Posted By

We have learned that there is a new firmware update available for Alarm.com Honeywell VISTA SEM Communicators. Firmware Upgrade Version 1.61 is a free over-the-air (OTA) upgrade to ensure that SEM VISTA Panels running 187h or 187i firmware and 1.60 gateway firmware have the newest features.


In order to receive Firmware Upgrade Version 1.61, it must be pushed down manually by your alarm monitoring company. Your Honeywell VISTA Alarm System must be in a disarmed state in order for the update to go through. It is recommended that the system be kept in a disarmed state while the upgrade is completed. The entire process should take roughly 20 to 40 minutes. No action is needed while the update is being performed.

If you are an Alarm Grid monitored customer with a Honeywell VISTA System using an Alarm.com SEM Communicator, then you should email us to request the update. The best email to contact us at is support@alarmgrid.com. This is also a good email to use if you have a Honeywell VISTA Security System or any other alarm system that you are hoping to get monitored. We're here to check your emails from 9am to 8pm ET M-F. We look forward to hearing from you!

Tags: , , , , , , , , , , , , , , , , ,

Comments


Posted By

Hi DIYers! Unfortunately, we have to keep this news brief, as we are currently preparing for ISC West 2019 in Las Vegas, NV. But a new dual-path communicator from Resideo for their VISTA Systems is now available. Presenting, the all-new Honeywell LTE-IV Verizon LTE Dual-Path Communicator!

The Honeywell LTE-IV uses a hardwired ethernet cable to connect a VISTA Panel to an IP network. If the internet goes down, it will have the ultra-fast and reliable Verizon LTE Cellular Network as a backup. Either way, the system will remain connected with the AlarmNet 360 Servers and the Total Connect 2.0 Service.

This release is huge, as this is currently the only dual-path communicator for a VISTA System that can connect with an LTE Network. Before this, the VISTA Panels had to rely on the Honeywell LTE-XV and Honeywell LTE-XA modules, which had no IP capabilities. Now with the Honeywell LTE-IV, VISTA owners have a dual-path LTE option that will keep their system connected for many years to come!

Note that the Honeywell LTE-IV connects with the Verizon LTE Network. We expect a similar AT&T communicator to be released at some point. You can purchase the Honeywell LTE-IV from the Alarm Grid website. If you have any question, please email support@alarmgrid.com or call (888) 818-7728 from 9am to 8pm EST M-F.

Alarm Grid will post more information about the Honeywell LTE-IV as it becomes available.

Tags: , , , , , , , , ,

Comments


Posted By

Anyone who has a Honeywell Security System knows that using and managing codes is very important for getting the most out of the system. This handy guide will show you everything you need to know about Honeywell System Codes, including how they are are used and how they are created.

Basic Information about System Codes

Note that the default Installer and Master Codes for almost any Honeywell System are 4112 and 1234 respectively. Let's start by reviewing basic concepts and information about system codes.

What is a system code?

A system code on a Honeywell Panel is a numeric password that is used to gain access to certain menus of the system and to perform various functions. The main reason that alarm systems have codes is to make sure that the person who is using the system is supposed to have access. Only the end user and any other individuals they have authorized to use their security system should know any of the system codes.

Depending on the type of code, a master user can restrict access to only specific parts of the system for other users. This makes some system codes more powerful than others. For Honeywell Systems, most codes are four-digits in length and use the digits 0-9. This allows for up to 10,000 possible combinations for any given code!

How should I choose a system code?

Any code you use on a Honeywell System should be a code that is easy for the user to remember, but difficult for others to guess. Remember, the purpose of a code is to prevent access to unauthorized users. If an unauthorized user, like an intruder, is able to provide a valid system code, it could result in a serious security breach. Likewise, if an authorized user forgets a code, it can be inconvenient or even impossible to get back in.

Most Honeywell Systems operate using delay periods. In other words, upon entering the premises, a valid code must be provided within a very limited time period to disarm the system. If a valid code is not provided within this specified time, then an alarm will occur. This will give an end user who knows a valid code enough time to disarm the system. But it will not give an intruder nearly enough time to brute force their way into the system by guessing codes.

What types of codes are used on Honeywell Systems?

There are many types of codes used with Honeywell Panels. The most common are outlined below:

  • Master Code: Each system has one Master Code. This is the main code a user will normally use for arming and disarming. It can perform all security functions, add and delete users, change the current Master Code and perform many additional system functions. This code cannot be deleted from the system entirely. Only the main user and operator of the security system should know the Master Code.
  • User Codes: Most Honeywell Systems can have multiple user codes set up. These codes can arm and disarm the system just like the Master Code. However, they cannot perform other system functions. A user code should be provided to a user who needs regular access to the building, but should not be able to adjust important settings and configurations for the alarm system.
  • Installer Code: Each system has one Installer Code. This is the main code that is used for making programming changes to the system. It is needed for adding, deleting and configuring sensors, adjusting entry and exit delay periods and more. Basically any major system setting will require the use of the Installer Code. An important note is that the Installer Code can only disarm the system if it was used to arm the system in the first place. This means that keeping the Installer Code at its default is not a security risk, as long as the code isn't used to arm the system. This code cannot be deleted from the system.
  • Guest Code: Also called a "babysitter code", a guest code is a restricted-access code that can be established on most Honeywell Systems. The important thing to remember about this code is that it can only disarm the system if it was the code used to arm in the first place. This code is best provided to users who need temporary access to the system, such as a house guest, a babysitter or a maintenance person. The main user can arm their system with the guest code so that they can access the premises. But if nobody else should be using the system, then the Master Code or a regular user code can be used to arm so that the guest code cannot gain access.
  • Duress Code: The duress code is a special code that is used to send a secret signal to a central monitoring station, letting them know that help is needed immediately. When this code is entered, it will appear to disarm the system like normal. But in reality, a distress signal will be sent out to the central monitoring station to request immediate help. This code is very rarely used, as its only purpose it to protect the user in hostage situations. Otherwise, this code should never be used. However, it is still important to remember this code, as it can save lives when used properly.
  • Arm Only: On select panels only. This code can arm the system, but it cannot disarm.
  • Partition Master: Only for systems with multiple partitions. This code is the same as a Master Code, but its authority only applies to a specific partition. This type of code is optional on a system, but it can be useful if multiple partitions have been established.

What are default codes?

When a Honeywell System is used for the first time, its Master Code and its Installer Code will be set to default values. For most Honeywell Panels, the default Master Code is 1234, and the default Installer Code is 4112. It is normally recommended that you change the Master Code for security purposes. However, the Installer Code can be left at its default so that the user can get back into programming. Keeping the Installer Code at the default does not present any type of security risk.

Now that we have covered some basic information for system codes, let's look into some specific panels to learn how codes are used.

Honeywell Lyric Controller

Honeywell lyric controller encrypted wireless security system

For the Lyric, codes are managed through the Users Menu. To access this menu, start from the main screen of the system. Choose Security > Tools > Master Code > Users. This menu will allow you to change any system code, with the exception of the Installer code.

Up to 48 unique codes can be added with the system. The code in slot 01 is the Installer Code. The code in slot 02 is the Master Code. The code in slot 47 is the Guest Code. The code in slot 48 is the duress code. All of the other 44 system codes are optional user codes.

Add New Codes

Press the "Add New" button. You can the provide a name for the code, enter in a valid four-digit code, and set whether or not the code can be used to control any Z-Wave door locks. The user number will be automatically assigned. Remember to press the "Save" button in the lower-right corner when you have finished.

Edit Existing Codes

Click on the code you want to edit to highlight it. Then press the Edit button in the lower-left corner of the screen. You can then edit the Name, the 4-digit numeric code and the Z-Wave lock settings for the code. Make sure to press "Save" when finished.

Delete Codes

Click on the code you want to delete to highlight it. Then press the Delete button in the lower-right corner of the screen. Press "Yes" when asked if you are sure. The code will be deleted.

Changing the Installer Code

The default Installer Code for the Honeywell Lyric Alarm System is 4112. We recommend keeping this code at the default to prevent the user from being locked out of programming. However, this code can be changed through programming if desired. You will need the current Installer Code to do this. You cannot do this using the Master Code.

Start from the main screen of the system. Choose Security > Tools > Installer Code (default is 4112) > Program > Installer Code. You can then change the Installer Code for the system. Press the "Done" button in the lower-right corner when finished.

Honeywell LYNX Touch Panels

Honeywell l5210 lynx touch wireless security system with 4 1 sla

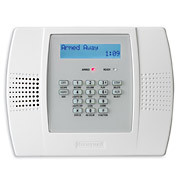
Managing user codes for a Honeywell LYNX Touch System is very similar to the process for the Honeywell Lyric Controller. Most codes can be managed through the User Codes menu. To access this menu, start from the main screen, and choose Security > More > Tools > Master Code > Users. This menu will allow you to edit any system code, except for the Installer Code.

Please note that the number of user codes that can be added depends on the type of LYNX Touch Panel that is being used. On each system, the Installer Code will be user 01, the Master Code will be user 02, the Guest Code will be the second-to-last available code, and the Duress Code will be the last.

For reference, the L7000 will support up to 48 codes, the L5210 and L5200 will support up to 32, and the L5100 and L5000 will support up to 16.

Add New Codes

Click the "Add New" button at the bottom of the screen. The following menu will let you change the Name, the four-digit code and the Z-Wave lock settings for the code. The user number for the new code will be automatically assigned. Press "Save" in the lower-right corner to finish.

Edit Codes

Click on the code you want to edit to highlight it. Then press the Edit button in the lower-left corner. From there, you can change the name, the four-digit code, and the Z-Wave lock settings. Press "Save" in the lower-right corner when finished.

Delete Codes

Click on the code you want to delete to highlight it. Then press the Delete button in the lower-right corner. The panel will ask you if you are sure. Choose "Yes". The code will be deleted.

Changing the Installer Code

All of the LYNX Touch Panels use 4112 as their default Installer Code. This code is normally left at its default to prevent the user from being locked out of programming later. But it can be changed using the current Installer Code for the system if desired. Remember, keeping the Installer Code at the default does not present any type of security risk.

To change the code, start from the main screen of the system. Choose Security > More > Tools > Installer Code (default is 4112) > Program > Installer Code. You will then be able to change the Installer Code. Please note that when exiting programming, always choose "Yes" when asked you want to allow the installer to get back into programming. Choosing "No" will lock the user out of programming, and the user will need to use the backdoor method to get back in.

Backdoor Method for Accessing Programming

If you ever get locked out of programming, either due to choosing "No" when asked if you want to allow the Installer to get back into programming, or because you lost an Installer Code that wasn't set to the default of 4112, you can use the backdoor method to get back in.

First, reboot the panel by going to Security > More > Tools > Master Code > Test > Reboot. Alternatively, if you don't know the Master Code, you can power the system down by unplugging the transformer and disconnecting the backup battery. Then power it back on by plugging the transformer in. Once the white screen on the reboot appears, immediately press and hold the Home Button (the picture of the house) on the front of the panel. Release the button once the green bar with "Ready to Arm" appears across the top. Then choose Security, followed by Arm Stay. In the number pad that appears, press Clear, followed by 00. Choose "Program" to enter the Programming Menu.

Once you are inside, you can then set the Installer Code for the system to reenter programming later. You can also restore the system to factory default settings through "Default Config" to restore the system to its factory default settings. This will reset the Master Code to its default of 1234. Please note, this will also delete all programming settings for the system.

Honeywell VISTA P-Series

Honeywell vista 21ip internet alarm control panel open

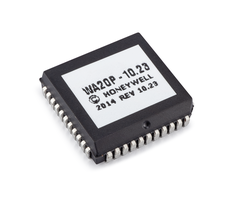
The VISTA P-Series Panels use hardwired keypads for virtually all system operations and overall access. This includes adding, editing and deleting codes. Since codes do not require deep level programming, alphanumeric keypads and fixed English keypads can be used for this purpose. The VISTA 21iP and VISTA 20P can support up to 48 system codes. The VISTA 15P can support up to 32 system codes. The VISTA 10P can support up to 16 system codes. Remember, two of these slots will go to the Installer Code (slot 01) and the Master Code (slot 02).

For these systems, each Code Type is associated with a particular Authority Level. This Authority Level is assigned when assigning attributes. Please note that since the Installer Code and Master Code are hardcoded to slots 01 and 02 respectively, they are not associated with any particular Authority Level. The table below outlines the the Authority Levels that can be assigned to system codes.

Code Type
Authority Level
Notes
User 0 Can arm and disarm the system.
Arm Only 1 Can only arm the system.
Guest 2 Can disarm if it was the code used to arm.
Duress 3 Sends secret distress signal to station.
Partition Master 4 Partitioned systems only. One per partition.

Also note the various attributes for VISTA System codes:

Attribute
Attribute Number
Assigned Value and Notes
Authority Level 1 See previous table.
Access Group 2 0-8. An entry of [0] means no group.
Active Partitions 3 Enter the partition numbers, then [#].
RF Zone Number 4 2-digit key fob number.
Open/Close Paging 5 0 for No. 1 for Yes.

Add New Codes

Enter the following command on the keypad:

[Master Code] + [8] + [2-digit User Number] + [desired 4-digit code]

The panel will beep to confirm the new code has been added. However, a long tone indicates that the process was unsuccessful, likely because the code was already taken.

Edit Codes

This is basically the same as adding a new code, only you will be working with a code that has already been programmed.

[Master Code] + [8] + [2-digit User Number] + [desired 4-digit code]

The panel will beep to confirm that the code has been changed. But if a long tone is produced, it indicates that the process was unsuccessful. This could be because the code was already taken.

Deleting Codes

Note that you cannot delete the Installer Code or the Master Code. Enter the following command:

[Master Code] + [8] + [2-digit User Number] + [#] + [0]

Assigning Attributes

Enter the following command:

[Master Code] + [8] + [2-digit User Number] + [#] + [Attribute Number] + [Attribute Value]

Backdoor Into Programming

If you don't have your Installer Code or if you have locked yourself out of programming., you can get back into programming using the backdoor method. To do this, power down the panel by unplugging the transformer and disconnecting the backup battery. Press and hold the the [*] and [#] buttons on the keypad simultaneously. With these buttons held down, power the system back on by plugging the transformer back in. The message "20" or "Installer Code 20" should appear on the keypad to indicate that programming has been accessed. Then press [*] + [20] + [4112] to set the Installer Code back to 4112. Then press [*] + [99] to exit programming. Never use [*] + [98] to exit programming, as this will lock you out!

Honeywell LYNX Plus L3000

Honeywell l3000 wireless alarm control panelThe Honeywell LYNX Plus L3000 is relatively outdated by today's standards, but it is still used in some cases. The panel can only support up to 8 different codes. Much like the other panels, slot 01 goes to the Installer Code, and slot 02 goes to the Master Code. These codes cannot be deleted from the panel. Also, slot 07 goes to the Guest Code, and slot 08 goes to the Duress Code. Only codes 03 thru 06 can be assigned to regular user codes.

Adding a Code

Enter the following command:

[Master Code] + [8] + [Code Number] + [Desired Code]

The panel will beep to confirm success. Remember that [03] thru [08] can be entered for the Code Number.

Deleting a Code

Only codes [03] thru [08] can be deleted. Codes 01 and 02 are for the Installer Code and the Master Code respectively, and they cannot be deleted from the system. Enter the following command:

[Master Code] + [8] + [Code Number]

The panel will beep to confirm that the code has been deleted.

Editing a Code

Codes cannot be truly edited. Instead, a code must be deleted, and then re-added with a new entry. Start by deleting the code:

[Master Code] + [8] + [Code Number]

Then add the new code:

[Master Code] + [8] + [Code Number] + [Desired Code]

The panel will beep to confirm the code has been added.

Change the Master Code

This process is the mostly same as adding a new code. Note that the Master Code is assigned slot 02. Enter the following command:

[Master Code] + [8] + [02] + [Desired Master Code] + [Desired Master Code Again]

The panel will beep three times after a Master Code change.

Conclusion

We hope that this guide has been informative for you in learning all about codes of Honeywell Systems. In future, we hope to expand this guide to include the commercial polling loop VISTA Systems as well. If you have any questions, please reach out to us at support@alarmgrid.com, or call us at (888) 818-7728 from 9am to 8pm EST M-F.

Tags: , , , , , , , , , , , , , ,

Comments


Posted By

This is an important message for anyone with a Honeywell VISTA System that uses an LTE-XV Verizon Cellular Communicator. Honeywell will be sending out an automatic firmware update to these communicators. This firmware update will install version 4.0.30 on the communicator. With this automatic update, users can expect a performance upgrade and an enhancement of the module's auto-detect recovery mode.


During this update process, the following messages will generate::

Action

Code
Start FW E903
Power on Reset E339
Complete FW R903

These messages are completely normal, and they are nothing to worry about. The update will take place automatically sometime in the next few days. The update will not affect the usability of your security system. You will also not need to make any changes to your panel's settings. However, we recommend keeping your system powered on and connected to the cellular network during this time. This will allow the firmware update to go through as normal.

If you have any questions about this update and what it means for your panel, please contact support@alarmgrid.com.

Tags: , , , , ,

Comments