Technology Posts

Posted By

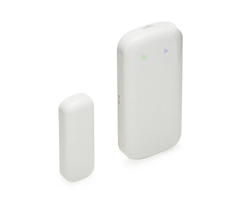
Hi DIYers! Today, we're taking a look at our best wireless recessed door contacts. These devices are great for when you want sensors that are completely hidden and not visible when the door is closed. They take a little bit of extra effort to install, but it's worth it for many users!

Honeywell 5818mnl wireless recessed door sensor and window senso

When you have a recessed contact, you actually need to drill holes into the door and its frame. The hole in the frame is larger and sized to support the main sensor. The hole in the door is smaller and designed to support the magnet. Some recessed contacts use extremely small magnets that can be mounted without drilling holes. There is also the Honeywell 5800RPS, which uses a plunger switch rather than a magnet.

The key with wireless recessed contacts is knowing which ones are compatible with your system. This depends on the wireless receiver that your system has installed. If you have a hardwired panel with no wireless receiver, then you cannot use wireless sensors. It's really no different than any other wireless sensor. You might also want to know the size of the holes you will need to drill. For your convenience, we put together a nifty table that outlines nearly all of the information you could want:

Sensor Name & Picture
Wireless Frequency
Hole Size for Sensor
Hole Size for Magnet
Notes
Honeywell 5818MNL
Honeywell 5818mnl wireless recessed door sensor and window senso
345 MHz 3/4" Diameter, 3" Deep 3/8" Diameter, 1/2" Deep Honeywell 5800 Series Sensor. Compatible with all Honeywell and 2GIG Panels and 345 MHz IQ2+
Honeywell 5800RPS
Honeywell 5800rps wireless recessed door and window plunger sens
345 MHz 3/4" Diameter, 1.25" Deep None needed! Honeywell 5800 Series Sensor. Recessed plunger switch. Needs inner 1/4" hole in center of existing hole for antenna. Compatible with all Honeywell and 2GIG Panels and 345 MHz IQ2+
2GIG DW20R
2gig dw20r wireless recessed door slash window contact
345 MHz 11/16" Diameter, 2.6" Deep 11/16" Diameter, 1/2" Deep 2GIG 345 MHz Sensor. Compatible with all 2GIG Panels, Honeywell Lyric Controller and 345 MHz IQ2+
Interlogix TX-E221
Interlogix tx e221 wireless recessed door slash window sensor
319.5 MHz 3/4" Diameter, 2.5" Deep 3/4" Diameter, 1/2" Deep Interlogix/GE Sensor. Compatible with all Interlogix/GE Systems, legacy Qolsys Systems and 319.5 MHz IQ2+
Qolsys IQ Recessed Door-S
Qolsys iq recessed door s recessed door slash window sensor for
319.5 MHz 3/4" Diameter, 2.25" Deep 3/4" Diameter, 5/8" Deep Qolsys S-Line Sensor. Compatible with all Interlogix/GE Systems, legacy Qolsys Systems and 319.5 MHz IQ2+. Encrypted when paired with Qolsys IQ2 or IQ2+.
DSC EV-DW4917

433 MHz 11/16" Diameter, 3" Deep 3/4" Diameter, 5/8" Deep Legacy DSC Sensor. Compatible with all DSC Systems and 433 MHz IQ2+. Screw mount and press fit installation options available.
DSC PG9307

915 MHz 0.75" Diameter, 2.66" Deep None needed! PowerG Sensor. Uses a 2 mm magnet that requires no hole. Uses 128-bit AES encryption. Compatible with DSC PowerSeries Neo Panels, DSC Iotega, every IQ2+.

If you're monitored with Alarm Grid, or if you're interested in monitoring, our team would be happy to help you find the best wireless recessed contact for your needs. The best way to reach us is to email support@alarmgrid.com. You may also call us at (888) 818-7728 from 9am to 8pm EST M-F. We look forward to helping you find the perfect security equipment to protect your home or business!

Tags: , , , , , , , , , , ,

Comments


Posted By

Just last week, Resideo purchased startup company Buoy Labs. This is the first acquisition from Resideo since the company completed its spin-off from Honeywell in October of last year. The purchase of Buoy Labs should greatly assist Resideo in its technology for environmental sensors.


Buoy Labs is best known for its smart home products that allow users to track the amount of water they use and quickly identify leaks. Their lineup fits in perfectly with Resideo. The company already offers many great flood detecting sensors. These include the Honeywell 5800FLOOD and the Honeywell 5821 when used with a Honeywell 470PB Probe or Honeywell FP280 Probe. Many of our monitored customers use these sensors to receive alerts in the event of a water leak. They can then take action before serious water damage occurs. This equipment works great with the wireless panels from Resideo, including the Honeywell Lyric Controller.

We believe that this acquisition will help Resideo make fantastic strides in its offering of environmental sensors, particularly for flood sensors. Buoy Labs has an impressive portfolio of smart home water management and water leak detection products. Resideo has cited industry studies claiming that homeowner's insurance companies pay more than $9 billion in water damage claims every year. The average claim is roughly $9,000. With the purchase of Buoy Labs, we expect that Resideo will achieve great success in reducing these figures and preventing house floods. And if you still don't think flood sensors are important, think again.

Alarm Grid will certainly keep you up-to-date with the latest news regarding any new environmental or flood sensors released from Resideo. This acquisition means Resideo has some big plans in store, and we are very excited to see what the future holds. Stick with Alarm Grid as we move forward in the exciting worlds of security, property protection and home automation!

Tags: , , , , , , , ,

Comments


Posted By

Hi DIYers! We have spooky good news for everyone today. We are proud to announce the unveiling of the brand-new Alarm Grid SiXTH Sensor. This is the world's first ever security system sensor that activates upon detecting any paranormal or spiritual activity. It is a must-have for all users!


As you may know, there are the five "standard" senses that we use on a daily basis. These are of course sight, smell, taste, hearing and touch. But what you might not know is that there is paranormal activity lurking among us. You cannot detect such occurrences through normal means. You need a "sixth" sense to detect any paranormal, spiritual or otherworldly activity that may be cursing you and the people in your presence. That is why we created the all-new SiXTH Sensor.

We took inspiration from Honeywell's SiX Sensor Lineup in creating the Alarm Grid SiXTH Sensor. Just like the existing SiX Sensors, the SiXTH Sensor offers 128-bit AES encryption to thwart any real-life hacking attempts. We also added Advanced Spirit Stopping encryption to stop any hacking attempts initiated from the otherworld. You can count on the SiXTH Sensor to function perfectly both in our present world and the dimensions beyond our normal reach. Please be aware that you can only see the Advanced Spirit Stopping encryption through the use of various psychonautic substances that are neither sold nor endorsed by Alarm Grid. But trust us - it's there!

Now, you might be wondering how exactly the SiXTH Sensor works. Well we are happy to explain! The sensor pairs with a wireless zone on your alarm panel much like any "present world" sensor. But you will notice a few things new. You will set the Device Type as "Paranormal Detector". The Response Type should be set to "Bruce Willis". This is a brand-new Response Type designed exclusively for use with our SiXTH Sensor. You will only get this option upon setting the Device Type, so make sure to set the options accordingly. After you save your changes, your SiXTH Sensor will be ready to go!

If your SiXTH Sensor detects any paranormal or spiritual activity that should not be present in our present world, a silent spiritual alarm will be sent to your system. Within moments, the central station will get to work sending out a response. But you can't stop spirits, ghouls and curses with police officers, firefighters or emergency medical personnel. Oh no, you need something better. Instead, you can expect Bruce Willis (not that Bruce Willis) to show up at your home or business to rid the area of any paranormal activity.

Bruce Willis (not that Bruce Willis) will come equipped with sage and various incantations to cleanse the premises and protect the spirituality of yourself and those around you. While Bruce Willis (not that Bruce Willis) might appear to be in an uncomfortable or unusual state as he performs the necessary exorcism, we can assure you that this is perfectly normal. Additionally, you can expect a call from the central station to make sure that Bruce Willis (not that Bruce Willis) arrived safely and without real-life incident. Please note that Bruce Willis (not that Bruce Willis) does not come with cab fare, and you may be responsible for ensuring his departure. Alarm Grid cannot assist with this issue, and it is up to you to make the appropriate arrangements.

Alarm Grid has already tested the SiXTH Sensor with the Honeywell Lyric Controller with great success! We easily enrolled the device to the system, and we intentionally released a safe, but other-dimensional, spirit into our headquarters. We made sure to do this at night to protect the majority of our technicians and staff members. One brave soul working the late shift was around to see the SiXTH Sensor in action. Needless to say, our expectations were more than met.


The Alarm Grid SiXTH Sensor will be coming soon, sometime within your existence. We will make sure to keep you posted about any news related to the SiXTH Sensor as it becomes available. Thanks for being an Alarm Grid customer, and we hope that you have a happy April!

Tags: , , , , ,

Comments


Posted By

Hi DIYers! We are taking a look at two very interesting products today. The DSC PG9934P and the DSC PG9944 are the ideal PowerG Image Sensors for use with the Qolsys IQ Panel 2 Plus Alarm System. They can both send quick and convenient images to Alarm.com upon activation for remote viewing.


When the original Qolsys IQ Panel 2 System was released, it required a Qolsys IQ CARD-IS to communicate with Qolsys Image Sensors. This is still the recommended image sensor option for those with a standardIQ Panel 2. However, the IQ CARD-IS actually uses the same antenna that is used by the PowerG daughtercard for the IQ Panel 2 Plus. As a result, it is not feasible to use both Qolsys Image Sensors and PowerG Wireless Sensors with an IQ Panel 2 System.

But with the DSC PG9934P and PG9944 PowerG Image Sensors, there now exist viable options for IQ Panel 2 Plus owners. Each device can auto-enroll with a Qolsys IQ Panel 2 Plus System much like any other PowerG Sensor. Remember, there is a special trick to auto-enroll PowerG Sensors with an IQ Panel 2 Plus. Knowing this technique can save you some frustration when you go to enroll the sensors!

After putting the panel into its wireless enrollment mode, press and hold the learn button on the PowerG Sensor. An LED light will appear after a brief moment, but you should not stop holding the button. Keep it held down, and the light will disappear. Then it will reappear after a brief moment. At that point, you should release the button to auto-enroll. As image sensors, you can add up to five of these devices on a single IQ Panel 2 Plus System. This can be any combination of up to five total PG9934P and PG9944 sensors.

Qolsys iq panel 2 at and t wireless security system with at and

Both motion sensors function like any standard PIR motion detecting sensor by looking for changes in infrared (IR) energy that occur with movement. But as image sensors, they will take pictures using their built-in cameras. These devices can also be configured to send images upon a panel disarm or during alarm events. Only one image will be sent out at a time with the PowerG Image Sensors.

Any resulting image is first sent to the IQ Panel 2 Plus, and the system forwards the image to Alarm.com. From there, Alarm.com will pass the image to anyone included in the notifications group. The image can be sent through text and email. You just have to configure that notification settings on Alarm.com. More information about setting up this feature can be found in this FAQ.

In order to use the PG9934P or PG9944 with an IQ Panel 2 Plus, the system must be running firmware version 2.3.0 or higher. More information on this firmware update is available here. At this time, Alarm.com recognizes the photos produced by these sensors as "Panel Camera" images. This is the same category of images that the camera on the front of the panel uses when it takes Disarm photos.

We believe that Alarm.com may change this category name during a future IQ Panel 2 firmware update. After all, we expect that users would want a different category for images produced by the panel and images produced by their image sensors. But for now that is the category to look for if you are having trouble finding the resulting images. Also keep in mind that Panel Camera Images must be enabled on Alarm.com for the feature to work. Note that you can also view the images from the panel.

You can see image upload activity in the Events Log on the Alarm.com website, which looks like this:


And below is what the resulting images look like on the Alarm.com website. Note that the image is listed as "Panel Camera", but it is actually from a PowerG Image Sensor.


And if you get the image via text message:


The major difference between the PG9934P and the PG9944 is that the PG9944 is suitable for outdoor use. It is weather-resistant and capable of surviving harsh environments. But the PG9934P is designed for indoor use only, and it will become damaged if exposed to heavy rain, wind or dust. Additionally, the motion sensor for the PG9944 is slightly more advanced than the one used on the PG9934P.

But in principle, these devices function in largely the same manner. Both feature PowerG technology, which includes an extended communication range and 128-bit AES encryption for added security. They also both offer pet immunity options, with the PG9934P being suitable for small animals weighing up to 85 pounds, and the PG9944 being suitable for small animals weighing up to 40 pounds. Keep in mind that mounting location is very important for ensuring proper pet-immunity.

If you would like to learn more about the PG9934P or PG9944, please reach out to us! The best way to contact us is to send an email to support@alarmgrid.com. Our team will review the email and get back to you as soon as possible. You may also call us at (888) 818-7728 during our normal business hours of 9am to 8pm EST M-F. We look forward to hearing from you!

Tags: , , , , , , , , ,

Comments


Posted By

Hi DIYers! Our video team was super productive over the past week, as they put up nine new videos for us all to enjoy. Jorge, Jarrett and Joe are all back and ready to help you get the most out of your system. Let's take a look at the latest content from the Alarm Grid video team.

Adding Additional User Codes to a Qolsys IQ Panel 2

Jarrett teaches users how to add additional codes to the IQ Panel 2. User codes can be assigned as a "Master", "User" or "Guest. A Master User can change system settings in addition to arming and disarming. Despite the name difference, there is actually no difference between "User" codes and "Guest" codes, as they have the same authority level. Any new system code that is added will be available on Alarm.com for further control and configuration.


Disabling Chime on a Qolsys IQ Panel 2

Jarret demonstrates how to disable the Chime function for the Qolsys IQ Panel 2 System. Normally if a zone has Chime enabled, then the panel will produce a brief Chime tone when the associated sensor is activated. However, you can disable Chimes for the entire system so that no faulted zones result in a Chime. You can also configure the Chime settings individually for each zone so that some sensors result in a chime, while others do not.


Muting the Honeywell 5828V Wireless Keypad

Jorge explains how users can mute the voice annunciation function for the Honeywell 5828V Keypad. By muting the keypad, no voice annunciations will be produced when zones are faulted. It will also not announce any changes in the current Arming state. However, this will not affect voice annunciation for the panel itself if it has the feature enabled. Additionally, muting the keypad will not stop the device from producing tones when buttons are pressed. It only affects spoken voice.


Controlling the Volume in a Honeywell 5828

Jorge demonstrates how users can adjust the volume on a Honeywell 5828. This will affect the tones produced when keypad buttons are pressed. Unlike the the Honeywell 5828V, the standard Honeywell 5828 is relatively basic it terms of volume control. The volume can only be adjusted one level at a time, and it cannot be muted entirely. The keypad can be used with any LYNX Touch Panel and any Honeywell VISTA Panel that has an added wireless transceiver.


Updating the Firmware on a Qolsys IQ Panel 2

Jarrett covers the process for updating the system firmware on a Qolsys IQ Panel 2. Performing a firmware update is often necessary for unlocking newly released system functions and capabilities. The IQ Panel 2 System will need to be connected with a local WIFI network and be running on transformer power for the update to go through. It also cannot have a low-battery condition. You can search the network for an update or apply a Patch Tag.


Basics of Alarm Keypad Operation

Jorge teaches users the basics of how to use an alarm system keypad. The main purpose of a keypad is to provide an on-site access point for controlling an alarm system. This includes Arming and Disarming. A keypad can be either a primary controller or a secondary access point depending on the system. A primary controller is used performing deep-level programming changes. If you use a keypad as a primary controller, you should make sure it is an Alphanumeric Keypad. A Fixed-English keypad cannot be used for deep-level programming.


Installing the Qolsys IQ Card-IS to the Qolsys IQ Panel 2

Joe shows users how to install the Qolsys IQ Card-IS inside the IQ Panel 2 System. The IQ Card-IS module allows you to use Qolsys Image Sensors with the system. These devices use PIR technology to detect motion. If motion is detected, the image sensor will take a photo and send it to Alarm.com. Since the IQ Card-IS uses the same antenna as the PowerG daughtercard used with the IQ Panel 2 Plus, it is only recommended to be used with the standard version of the system.


Resetting a Honeywell Tuxedo Keypad

Joe explains the different methods for resetting a Honeywell Tuxedo Touch Keypad. There are four reset options that can be performed. A Keypad Reboot Reset will simply power cycle the device. A Keypad Factory Reset will restore all settings and configurations to default, without clearing Z-Wave devices. But the Z-Wave devices will have their names reset. A Z-Wave Reboot Reset will power cycle the Z-Wave controller, without clearing devices. A Z-Wave Factory Reset will default all Z-Wave setting and clear all Z-Wave devices.


Qolsys Hardwire 16-F Overview

Joe goes through and explains how the Qolsys Hardwire 16-F functions. This is a wired to wireless converter that can support 2-wire smoke detectors on its 16th zone. It is primarily used for allowing wired sensors to communicate with wireless panels. The module works with nearly any system that accepts the 319.5 MHz frequency. Each zone terminal on the Hardwire 16-F must have a 4.7k end of line resistor, even if the zone is not used. Additionally, you must properly configure a zone as NC or NO before enrolling with the panel.

Tags: , , ,

Comments


Posted By

Hi DIYers! Today, we're presenting another basic security tip. This tip is to never Arm or Disarm your system using your Installer Code. That system code should only be used for programming, and it should be kept at its default to prevent you from being locked out of programming later.

Honeywell lyric controller encrypted wireless security system

If you go to Arm your system, you will often be prompted to enter a system code. Normally, you will use your Master Code or a standard user code to complete the Arming process. However, you will notice that your can technically Arm using your system's Installer Code. By doing this, you will make it possible for you to Disarm using that same code later on. But if you use your Master Code or a user code to arm, then you will not be able to disarm using your Installer Code.

The problem with using your Installer Code to Arm and Disarm is that an intruder may know the code and use it to gain access to the system. Default Installer Codes are usually common knowledge, and an intruder will often try one of these codes in a quick attempt to disarm. While keeping the Installer Code at its default is good practice, you will never want to use this code on a regular basis. Instead, you should only use the Installer Code to enter programming when the system is already Disarmed.

The default Installer Codes for many popular security systems are as follows:

If you are using one of these codes to Arm and Disarm your system, then you should stop this practice immediately. Instead, you should use your system's Master Code to arm and disarm. Make sure you change the Master Code from its default before using it to control your system. Set it to a unique code that is difficult for others to guess, but easy for you to remember. Then use that unique and personalized code to Arm and Disarm when needed. If you need to create any additional system codes, make sure they are not obvious for an intruder to guess. You can Arm and Disarm using a standard user code just like you would a Master Code.

If you are an Alarm Grid customer with questions about system codes, please reach out to us. We want to make sure you are using a secure code to Arm and Disarm your system and that you are not putting yourself at-risk for a security breach. Please email us at support@alarmgrid.com, or call us at (888) 818-7728 during our normal business hours of 9am to 8pm EST M-F. We look forward to hearing from you.

Tags: , ,

Comments


Posted By

Hi DIYers! Our team is back with another video recap. We have six new videos this week, as it was a dead even split between Joe, Jarrett and Jorge. Each of our talented actors had two new videos apiece. Let's take a look at the latest videos from the Alarm Grid Video Production Team!

Factory Resetting the Honeywell Lynx Touch L7000

Jarrett puts on a smile as he shows users how to perform a factory reset on a Honeywell L7000 System. This is accomplished by loading one of the Default Configurations. By performing a factory reset, the entire L7000 System will need to be reprogrammed from scratch. All sensors will need to be relearned with the panel, and all system settings will be reset to their default. Additionally, the Master Code will be reset to its default of 1234, and the Installer Code will be reset to its default of 4112.


Bypassing a Sensor in Total Connect

Jarrett happily demonstrates how to bypass zones in Total Connect 2.0. When you bypass a zone, the associated sensor will remain inactive and be unable to cause a system alarm. For example, if you bypass a door sensor when arming your system, then people will be able to open and close that door without causing an alarm. However, all other system zones will still remain active as usual. Sensors must be bypassed individually for each Arming session.


Addressing a Honeywell Alarm Keypad

Joe explains how to address a Honeywell Alarm Keypad with a Honeywell VISTA Security System. Touch-button keypads use addresses 16 thru 23 on VISTA P-Series Panels. Address 16 is always enabled, while addresses 17 thru 23 must be specifically enabled within programming. Meanwhile, an Advanced User Interface (AUI) device will use address 1, 2, 5 or 6. Touchscreen keypads are considered AUI devices and will use one of these slots. Remember that the Total Connect 2.0 platform itself takes up an AUI slot.


Using the Lynx Touch with a 3rd Party Z-Wave Controller

Joe talks about how how you can use a Honeywell LYNX Touch System as a secondary Z-Wave controller. This is done by pairing the system itself with a different Z-Wave hub. All Z-Wave devices from the primary hub will be automatically pushed over the LYNX Touch System. They can then be controlled from both the primary controller and from the LYNX Touch. However, you will need to use the primary controller to learn-in new Z-Wave devices. You must install an L5100-ZWAVE Card in the LYNX Touch System to support any Z-Wave functionality.


IP Fault Time Setting on the Lyric Alarm Panel

Jorge with his colorful hair discusses the IP Fault Time Setting on the Honeywell Lyric Controller. This setting will have the system display a trouble condition whenever the WIFI goes down for a certain period of time. That way, the user will know later that the system was unable to communicate with the AlarmNet Servers. An IP Fault Time trouble will only appear on the panel if WiFI is set as the only communication path. If the system has a cellular backup, then only the central station will receive an E350 Communication Path Failure on Zone 951.


Programming a Honeywell 5800CO Into an All-in-One Panel

Jorge walks users through the process of programming a Honeywell 5800CO with a wireless alarm system. The Honeywell 5800CO is a carbon monoxide detector that operates at 345 MHz. It is primarily used with Honeywell Systems, but it will work with nearly any panel that accepts the 345 MHz frequency. The sensor will cause an instant system alarm when activated. All building occupants should vacate the premises immediately if a CO alarm occurs. When programmed as a 24-Hour Carbon Monoxide Zone, the 5800CO Sensor cannot be bypassed.

Tags: , , ,

Comments


Posted By

Hi DIYers! We have received news that Qolsys has made the latest firmware version for the IQ Panel 2 available through downloader rather than having to apply a patch tag. The company has also refined the facial recognition feature on the IQ Panel 2 to work more effectively than before.

Qolsys iq panel 2 at and t wireless security system with at and

As you may remember, we talked about the facial recognition feature last month. We found that it worked fairly well at the time, but we're happy to hear that Qolsys has been continuing to improve the feature. Users should now find that the panel camera now recognizes suspicious faces more accurately. Once a user has properly calibrated the feature, they can receive alerts regarding any suspicious activity via text and/or email. We recommend reading our previous blog for more information about the feature and how to get started.

If you haven't already updated your IQ Panel 2 System, now is a great time to do so. Start from the main screen of the panel. Then press the small grey bar at the top. Choose Settings, followed by Advanced Settings. Then provide the system's Installer Code, which is 1111 by default. Select Upgrade Software, and then Upgrade Using Network. Then complete the on-screen instructions to perform the upgrade. Please note, your IQ Panel 2 System must be connected with a local WIFI network for the upgrade to go through successfully.

Remember, you need at least 10 saved faces before the facial recognition feature goes into effect. And the more faces you have, the more accurate the software will be. We recommend the strategy of repeatedly arming and disarming to continuously take photos until you have enough images. The images you take might not appear on Alarm.com right away. You may need to logout and then log back in before the images will appear. But if you're like us, you will soon have a surplus of images!

Then we had a different person disarm using that same code. Sure enough, we received a notification in our email!. The IQ Panel 2 was able to distinguish between the approved saved images and the different individual.


Remember, you must enable the feature in two different areas on Alarm.com. You must provide contact information in the Users tab and configure the feature:


And you must set the same recipient in Unexpected Activity within the Notifications tab:


We hope that you will enjoy using this new feature on your IQ Panel 2. Remember, you need a monitoring plan if you want to use this feature and Alarm.com. You can sign-up for monitoring by clicking the orange Alarm Monitoring button in the upper-left corner of this page. Please email support@alarmgrid.com if you have any questions.

Note: Due to privacy concerns, this feature is currently available for users in the 50 US States. We are hopeful that this feature will be made available to users in Puerto Rico and Canada in the future.

Tags: , , , , , , , , , , , , , , , ,

Comments


Posted By

Hi DIYers! Today, we're taking a closer look at the Qolsys IQ Siren. Specifically, we want to go into the details of how it is used when paired with a Honeywell Alarm System. As you may know, the IQ Siren is a Z-Wave device that pairs with most Z-Wave controllers, including Honeywell Panels.

Qolsys iq siren z wave siren for qolsys iq and iq panel 2 qz2300

What's interesting is that the Qolsys IQ Siren learns-in with Honeywell Alarm Systems not as a Z-Wave siren, but as a Z-Wave light switch. This is not the case with the Qolsys IQ Panel 2, which immediately recognizes the IQ Siren for what it is - a siren. This way, the siren automatically activates during audible alarm events, with no special automation functions required. The 2GIG GC2 and 2GIG GC3 Alarm Systems also properly recognize the IQ Siren as a siren. We even wrote an FAQ and shot a video about this.

But since Honeywell Systems view the Qolsys IQ Siren as a light switch and not a siren, things become a little bit tricky. After all, you want the siren to operate like a siren, not a light switch! Fortunately, there's a way around this problem. That is using Total Connect 2.0 to create smart scenes. These scenes will tell the siren to activate when the Honeywell System experiences an audible alarm event, and also to stop sounding when the system is disarmed and the alarm is cleared. How's that for a creative solution?

It might take a little bit of extra work to get the Qolsys IQ Siren working on a Honeywell Security Panel, but it really is worth it. This is a 105 dB siren with a built-in strobe light to provide a visual indication of an alarm. For a sound comparison, 105 dB is about as loud as a table saw. It blows the 85 dB sounder built into the Lyric and LYNX Touch Systems out of the water. It's much easier to install than a hardwired siren, and it is extremely versatile overall. This makes the IQ Siren a winning option for many DIY users.

The Qolsys IQ Siren is great for any Honeywell System with a Z-Wave controller. Remember, the Lyric already includes a built-in Z-Wave controller, while the other panels need to have one added separately. The LYNX Touch Systems need a Honeywell L5100-ZWAVE Card, while the VISTA Panels need either a Honeywell VAM or a Honeywell Tuxedo Touch Keypad. It is also helpful to have access to Total Connect 2.0. If your monitoring plan does not include TC2, now is a great time to get started!

Please note that while you can create the necessary scenes from the panel and not from TC2 (with the exception of the Lyric system) we find that using TC2 is the easiest option. You can use the TC2 website or the mobile app on Android and iOS devices. We like using the website to create scenes. But if you prefer the mobile app, that's okay too!


Once you have paired the IQ Siren and logged into your TC2 account, it's time to create the scenes! Most users will want three scenes. These are:

  • A scene to activate the siren during a burglary alarm
  • A scene to activate the siren during a fire alarm
  • A scene to deactivate the siren during a panel disarm

For our example, we will be creating a scene for the fire alarm. The other scenes will follow a similar process. Start by navigating to the Scenes Menu. Then choose Add Scene. You will then name your scene:


Then you will include the IQ Siren into the scene. It will be listed under "Others". Since we are setting it to activate during an alarm, we will set the device to On for this scene. But if you wanted to have the siren stop sounding when an alarm is cleared, then it would be set to Off.


Next, you will set when the scene should run. Since it is being controlled by either a system alarm or a system disarm, you will choose "Triggered by another device". Then choose the appropriate function.


Finally, save your scene!


And that's it! Remember, you must do this for each individual scenario (burglary alarm, fire alarm, and to turn off upon disarm) if you want the IQ Siren to provide complete functionality. Alarm Grid monitored customers can always get further assistance by emailing support@alarmgrid.com. You can also call us at (888) 818-7728 during our normal business hours of 9am to 8pm EST M-F. If you aren't already monitored with Alarm Grid, make sure to press the orange Alarm Monitoring button at the top of this page. We look forward to working with you!

Tags: , , , , , , , , ,

Comments


Posted By

Hi DIYers! We're back with another video recap today, this time covering March 4th thru 7th. We have seven new videos this time, so it really was a busy week. Our team loves making these videos and helping users learn how to use their security systems. Let's check out the new videos!

Adding a Qolsys Image Sensor to the Qolsys IQ Panel 2

Joe shows users how to pair a Qolsys Image Sensor to a Qolsys IQ Panel 2 System. The Qolsys Image Sensor is basically a motion sensor with a built-in camera. When it detects motion, the camera will take a picture and send it to Alarm.com. The end user can receive a notification from Alarm.com via text or email whenever an image comes through. They can then check the image to see if there is suspicious activity. The image sensor has a detection range of 30 feet.


Programming the 5800RP to an Alarm Panel

Joe demonstrates how to pair the Honeywell 5800RP Wireless Repeater with a Honeywell Alarm Panel. The 5800RP takes the signal from a Honeywell 5800 Series device and sends it out a second time. This effectively doubles its range. The module is technically a plug and play device, and you don't need to program it to a panel for it to repeat signals. But enrolling it is necessary if you want to receive alerts for RF supervision, low-battery and AC power loss.


Silencing the Exit Delay on a Honeywell Lyric System

Jorge the "Blue-Haired Bandit" explains how you can silence the Exit Delay on a Honeywell Lyric Alarm System. Whenever a user sets their Lyric to Arm Away, there will be continuous beeping during the Exit Delay countdown. A user can silence this countdown by selecting the Silent Exit button on the code entry screen. This option will also be available if a user selects Arm Custom. The Exit Delay period will be doubled whenever the countdown is silenced.


Using 2GIG Sensors With a Lyric System

Jorge explains how it is possible to use 2GIG 345 MHz Sensors with a Honeywell Lyric Security Panel. The Lyric System must be running firmware update MR3 or higher to support these sensors. The 2GIG Sensors operate on the same 345 MHz frequency as the Honeywell 5800 Series Sensors, only on a different channel. The Lyric can also support the Honeywell SiX Series Sensors, which utilize 128-bit AES encryption for added security. The SiX Sensors were designed exclusively for the Lyric.


Adding a Z-Wave Device to the Qolsys IQ Panel 2

Super-duper Alarm Grid Team Member Jarrett bounces into action by showing users how to pair a Z-Wave Smart Home device with the Qolsys IQ Panel 2 System. Once a Z-Wave device has been paired with an IQ Panel 2, a user will be able to control it directly from the panel and remotely from Alarm.com. Before trying to pair a Z-Wave device you should always clear it from the network first. It may have been paired with a different network for factory testing purposes.


Pairing the Qolsys IQ Remote With a Qolsys IQ Panel 2

Jorge goes through the process of pairing a Qolsys IQ Remote Keypad with a Qolsys IQ Panel 2 System. The IQ Remote provides a secondary on-site access point for an IQ Panel 2 System. It is great for users with larger properties who may want to control their system from multiple locations. The IQ Remote allows for all basic functions, including arming, disarming, bypassing sensors and controlling smart home devices. However, programming must still be completed from the main system.


Enrolling a Schlage Z-Wave Lock to a Qolsys IQ Panel 2

Jorge walks users through the steps for pairing a Schlage Z-Wave Lock with a Qolsys IQ Panel 2 System. The IQ Panel 2 includes a built-in Z-Wave controller for supporting Z-Wave devices. This includes most Z-Wave locks. Once the lock is paired, you can lock and unlock the door from both the panel and from Alarm.com. By using Alarm.com, the user can push user codes from the IQ Panel 2 to the Schlage Z-Wave Lock. This way, they can disarm their system and unlock their door by simply entering a valid panel user code into the lock.

Tags: , , , ,

Comments