Alarm Grid Video Recap: September 5th & 6th
Posted By Michael GorisHi DIYers! Welcome to another Alarm Grid Video Recap, this time covering videos published on September 5th & 6th. We have a big recap this time, with eight (8) new videos being published. Jarrett, Jorge, and Joe all make appearances. Let's get right into it and check out the new videos!
Finding the CRC on a Honeywell-Resideo Wireless Alarm System
Jarrett explains how to find the CRC code for a wireless Honeywell or Resideo System. The CRC code is a 4-digit code that is unique to the panel's IP communicator. Along with the 12-digit MAC address, the CRC code is very important when activating a system for alarm monitoring service. You should make sure to write the code down and save it in a safe place once you have obtained it. You may need this code again at a later time.
Explaining the 6F Message on an Alarm Keypad
Jorge talks about the "6F" message that can appear on a wired keypad for a Honeywell VISTA Alarm System. This code is actually "bF", which stands for "backup failure". The message indicates that there is a problem with the system's communicator. The "bF" message will only appear on a Fixed English Keypad, like a Honeywell 6150. An Alphanumeric Keypad like a Honeywell 6160 will instead display "Check 103, Long Rng Trbl", which means the same thing.
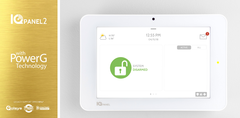
Arming-Disarming the Qolsys IQ Panel 2 From Your Phone
Jorge shows you how to arm and disarm a Qolsys IQ Panel 2 Plus System using your phone. This is done using the Alarm.com service. The Qolsys IQ Panel 2 Plus includes integrated LTE and WIFI communicators for connecting with Alarm.com. You just need to have the system activated with an alarm monitoring plan that includes access to the Alarm.com platform. You can then use the Alarm.com Mobile App on Android and iOS devices to arm and disarm remotely.
Replacing a Honeywell 1321 Transformer with a 1361 Transformer
Joe is back, and he answers the question of whether or not you can replace a Honeywell 1321 Transformer with a Honeywell 1361 Transformer. The answer is that you can always replace a 1321 with a 1361. However, you cannot always replace a 1361 with a 1321. This is because the 1361 supplies more power than the 1321. A setup that was using a Honeywell 1361 Transformer for power might not receive enough power from a 1321 Transformer used in its place.
Displaying the MAC ID On a Honeywell Wireless Alarm System
Jarrett teaches you how to find the MAC ID on a Honeywell Wireless Alarm System. This applies to any Honeywell Panel with an IP communicator. To find the MAC address, you will need to enter programming. This requires providing the Installer Code for the system. Remember that the default Installer Code on most Honeywell System is 4112. The MAC address and MAC CRC are found within the Comm Diagnostics Menu. Clicking on Communication ID Numbers will display the codes at the top of the screen.
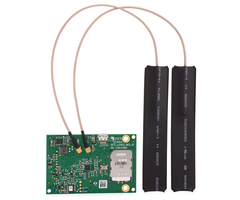
Devices Used With a 2GIG XCVR2-345 Transceiver on a Go!Control GC2
Jorge talks about the 2GIG XCVR2-345 and the devices that are used with it. The 2GIG XCVR2-345 is an add-on accessory for the 2GIG GC2 System. This communicator is what allows the system to work with bi-directional devices. These are devices that must both send and receive signals with the GC2 System. Some of the devices that require the use of a 2GIG XCVR2-345 include the 2GIG Go!Bridge IP Communicator and the 2GIG TS1 Touchscreen Keypad.
Monitoring and Controlling the Temperature On a Honeywell L5210
Jorge explains how you can monitor and control the temperature using a Honeywell L5210 Security System. For this to work, you will need a Honeywell L5100-ZWAVE Card installed inside the system. This is a Z-Wave controller that allows the system to support Z-Wave smart home devices. From there, you can enroll a Z-Wave thermostat with the system. This will allow you to monitor and control the temperature for the building directly from a Honeywell L5210 Alarm Panel.
Programming the Alarm Monitoring Account Information on a Honeywell L5210
Jorge covers the process for programming the alarm monitoring account information on a Honeywell LYNX Touch System. This is an important step for setting up a system for alarm monitoring service. Completing this process will allow the system to communicate with the central station. Normally, an end user will only complete this process themselves if they are bringing the system over to a new monitoring company. This process only needs to be completed if the communicator has not been released by the old monitoring company.