Technology Posts

Posted By

Hi DIYers! Today we're looking at three (3) smart home devices that can make a great addition to nearly any home. Half the fun of owning an alarm system is getting into the exciting world of home automation. These devices are all easy to use, and they are all available from Alarm Grid.

August Smart Lock Pro

August smart lock pro dark gray z wave deadbolt lock 3rd generat

The August Smart Lock Pro is very unique in being one of the few Z-Wave Plus Smart Locks that is also compatible with Apple HomeKit. It also works with great voice-based platforms like Google Home and Amazon Alexa, and it can be used for automatic Bluetooth unlocking. All of this makes the August Smart Lock Pro extremely versatile. It is a great choice no matter what interactive platform you are building around. The lock comes Z-Wave Plus ready right out of the box. You can also pair it with an August Connect WIFI Bridge for enhanced remote access. You can still use the lock with HomeKit without the Connect Bridge, but it will need to be within Bluetooth range of the HomeKit Hub (Apple iPad, Apple TV Gen 4 or higher, or Apple HomePod). Overall, this is a fantastic smart lock for your home and great for many scenarios.

Check out all of our fantastic smart locks here.

Honeywell T6 Pro Z-Wave Thermostat

Honeywell t6 z wave thermostat smart thermostat


The Honeywell T6 Pro is arguably our favorite Z-Wave thermostat right now. Its biggest selling point is its ability to connect to an HVAC system and remain powered on without common power from a C-wire. This is excellent for DIY installers, as it prevents them from having to work with high voltage wiring. The Honeywell T6 Pro Z-Wave version is certified Z-Wave Plus for extended wireless range and improved battery life. There is also a HomeKit-compatible T6 Pro that uses WIFI instead of Z-Wave Plus. However, most Alarm Grid customers get the Z-Wave Plus model so that they can control the thermostat through the same interactive service platform used with their security systems. Although the T6 Pro was designed with Total Connect 2.0 in mind, it will work just fine with Alarm.com and associated systems.

Check out all our smart thermostats here.

Lutron Caseta P-BDG-PKG1W Starter Kit

Lutron caseta p bdg pkg1w unboxed single in wall dimmer starter


Lutron Caseta is a great option if you are looking to establish a smart lighting network for your home or business. In order to get started, you will need a Lutron Caseta Smart Bridge to serve as the central hub for the setup. The kit linked above include the smart bridge, along with an in-wall dimmer switch and a Pico Remote for controlling the device from up to 60 feet away in open air. Other great starter kits from Lutron include the P-BDG-PKG2P with a lamp dimmer module, and the P-BDG-PKG2W with dual in-wall dimmer switches. A great aspect of Lutron Caseta devices is that you can build a network of lights without having to run traveler wires to connect load-bearing light switches to a master switch. Instead, all communication occurs wirelessly through the Lutron Caseta Smart Bridge. Lutron integrates with Apple HomeKit, Amazon Alexa, and Google Home with ease. This makes this smart lighting network perfect for many different smart home setups.

Check out all of our smart lighting options here.

Build Your Smart Home!


Alarm Grid is here to help you build your ideal smart home. Whether you're looking for locks, thermostats, or lights, we have what you need to help you get started. Remember, we offer free support for all Alarm Grid monitored customers. You can build your smart home network around one of our security systems and make your life more convenient than ever. Alarm Grid customers should email us at support@alarmgrid.com with any questions. And if you haven't joined Alarm Grid quite yet, you can get started by clicking the orange Alarm Monitoring button at the top of this page. We look forward to helping you design the perfect smart home.

Tags: , , , , , , , , , , , , , , , , ,

Comments


Posted By

Hi DIYers! We are here to announce today that we have some new products available on our site. Our new offerings include the DSC Iotega Alarm System, several new Z-Wave Plus in-wall light switches, and even some hand tools that you can use to install your security system and sensors!


First we will talk about the DSC Iotega System. The Iotega is one of the newest alarm systems from DSC. This is one of the few systems on the market with Apple HomeKit support. It is the only system that can support both HomeKit and PowerG Sensors. These wireless sensors are great, as they offer an astounding range of up to 2km in open air (4km with wireless repeater) and 128-bit AES encryption for added wireless protection.

Alarm Grid already sells the Qolsys IQ Panel 2 Plus with PowerG support, which is one of our most favorite systems. We also sell the HomeKit-ready Resideo Lyric Alarm System, an exceptional system in its own right. But if you want to use both PowerG Sensors and Apple HomeKit, then you are stuck with the DSC Iotega.

The Iotega has a major drawback in that it does not support local programming. This makes the panel a poor choice for DIY users, as they cannot complete their own programming. But if you need a HomeKit-compatible system with PowerG support, the Iotega fulfills that niche. The system is also compatible with the Alarm.com interactive platform for remote access, Z-Wave Plus control and more. Please note that cellular monitoring service is require to use Alarm.com.

In addition to the DSC Iotega With Built-In Verizon LTE Communicator, we also now sell an Iotega 3-1 System Kit (System w/ Three (3) Door and Window Contacts & One (1) Motion Sensor), an Iotega Touchscreen Keypad and a desk mount for the touchscreen keypad.


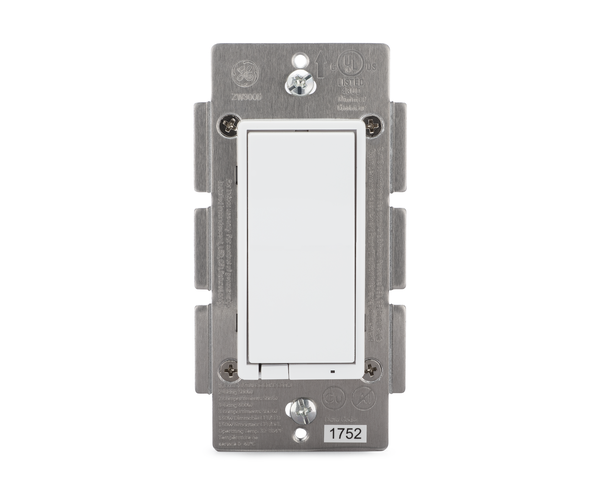
Next for our new product releases are a plethora of new in-wall Z-Wave Plus smart lighting switches from Go!Control and GE. These products are great for any homeowner who wants to take smart control over their lights for remote operation and smart scene functionality. Go!Control and GE both offer some fantastic smart lighting devices, and we are excited to add these products to our growing lineup.

Perhaps the smart lighting device we are most excited about is the Go!Control WT00Z5-1 Z-Wave 3-Way Smart Switch. This in-wall switch controls lighting loads already connected with a load-bearing switch or dimmer. The module can connect with up to five (5) load-bearing switches for 7-way operation. Fewer load-bearing devices can be used if that is all that is needed for the setup.

But what makes the Go!Control WT00Z5-1 unique is that it eliminates the need for a traveler wire. Instead, the module uses Z-Wave Plus technology to send all communication signals. All you need to do for setup is connect the 120VAC line and a neutral wire. This is great for DIY installers who may not feel comfortable running a traveler wire.

Other Z-Wave Plus devices now available from Alarm Grid include:

Unfortunately, we don't have any pictures of the new Z-Wave Plus devices quite yet. But we hope to have them on the site in the near future.

Finally, we have a few hand tools that can help new users install their systems and sensors. These new offerings include the a wire stripper tool, a digital multimeter, a 6-in-1 screwdriver, and 13-piece screwdriver set. Not only are these tools great for setting up your system, they are also perfect for using around the house or around the shop in general. They are all high quality tools that make an excellent addition to any tool set.


We hope that our new and existing customers can put these latest Alarm Grid products to good use. If you have any questions about these new products, please send an email to support@alarmgrid.com. We look forward to hearing from you and discussing these new products!

Tags: , , , , , , , , , , , , , , , , , , , , , ,

Comments


Posted By

Hi DIYers! It sure is hot out! We're right in the stretch of summer, and we know that you are looking for ways to stay cool. You can beat the heat with a new smart thermostat from Alarm Grid. These devices are easy to install, and they let you control your home's temperature remotely.


With a smart thermostat, you can ensure that your home stays cool when you need it, while also keeping energy costs to a minimum. The key is having your smart thermostat keep your HVAC system running while you are home, while having it not expend as much energy while you are away working or on vacation.

You can check your smart thermostat from anywhere using an app on your phone and make sure your home is at the temperature you need. When you are on your way back to the house, you can set your thermostat to cool so that your house is nice and comfortable by the time you get back. Or if you aren't going to be home for awhile, you can turn the temperature up so that you aren't wasting energy. It's all in your control - anywhere, anytime.

Here are four of the best smart thermostats of 2019:


Honeywell T6 Pro

Honeywell t6 z wave thermostat smart thermostat

The Honeywell T6 Pro has been one of our favorite smart thermostats for awhile. It comes in two models - a Z-Wave Plus model and a WIFI model for use with Apple HomeKit. The Z-Wave Plus model is notable, as no C-Wire is needed to setup the device. The Z-Wave version can run consistently on three (3) AA batteries. This is perfect for DIY users who don't want to mess with high-voltage wiring, as you only need to connect the device to the HVAC system in place of the old thermostat. Please note that the WIFI model does require C-Wire power. The Z-Wave Plus model was designed for use with Resideo Systems and Total Connect 2.0, but you can really use it reliably with any Z-Wave hub. It is ENERGY STAR® certified.


Alarm.com ADC-T3000


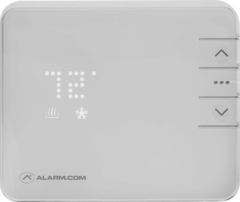
The Alarm.com ADC-T3000 is still brand-new to our site, but it has already become one of our favorite smart thermostats. This device supports Z-Wave Plus technology for extended wireless range and battery life. It was built to connect with alarm control panels that use the Alarm.com interactive platform, but you can really use it with any Z-Wave controller. This thermostat is known for its sleek, straightforward design and excellent simplicity that makes it perfect for new users. It is also ENERGY STAR® certified to ensure that you can keep your home cool, while also preventing the energy bills from racking up. The device relies on the C-Wire from the HVAC system for primary power, while two (2) AAA batteries provide backup power. It works with nearly any conventional 24V HVAC system.


iDevices Smart WIFI Thermostat

Idevices idev0005and4 smart wifi thermostat

The iDevices IDEV0005AND4 Smart WIFI Thermostat is the lowest-priced smart thermostat on our list. It is perfect for users who want to get smart functionality for their home's HVAC system at a low price. The device is designed for use with Apple HomeKit, which is great for iOS users who want ultimate control from their iPhones. In addition to Siri voice control through HomeKit, the iDevices Smart WIFI Thermostat also supports voice commands through Amazon Alexa and Google Assistant. Remote access is also possible through the iDevices Connected App on both iOS and Android devices. The thermostat has a sleek, slim profile when installed on the wall. It uses 24VAC from the HVAC system, and the C-Wire is required. It does not have a backup battery.


Carrier Côr Smart WIFI Thermostat

Carrier cor smart wifi thermostat


Last on our list is the Carrier Côr Smart WIFI Thermostat. This is a high-end thermostat that comes at a higher price tag than the other smart thermostats on our list. But it offers some great results. The Carrier Côr is HomeKit-compatible, meaning that it can be used with Siri voice commands on iOS devices. It can also be used with Amazon Alexa once you enable the Carrier Côr Thermostat Alexa Skill. The thermostat provides detailed energy reports, and it is ENERGY STAR® certified to help users better-manage their energy expenses. It also offers useful features like Humidity System Management, Hybrid Heat Management, Ideal Away Settings, and Intelligent Comfort. Users will also appreciate the 7-day programming schedule for added convenience. The thermostat uses HVAC system power. It does not have a backup power source.

If you have any questions about these smart thermostats, please reach out to us. The best way to contact us is to email support@alarmgrid.com. You can also call us at (888) 818-7728 during our regular business hours of 9am to 8pm EST M-F. We will help you find the perfect smart thermostat to keep your home cool and comfortable this summer. Our entire team looks forward to hearing from you.

Tags: , , , , , , ,

Comments


Posted By

Hi DIYers! If you have an Alarm.com 3G Cellular Communicator, the time to activate it is NOW. This is your very last chance. If you do not get your Alarm.com 3G Communicator activated by the end of Friday, June 28th, you will be unable to do so. The deadline to activate is almost here.


The actual cutoff date for Alarm.com 3G activations is Sunday, June 30th. However, Alarm Grid does not perform activations on the weekends. If you want to activate your Alarm.com 3G Communicator for use with Alarm Grid monitoring services, you must do so by the end of this Friday. Our team will get your communicator up and running for alarm monitoring service so that you can use Alarm.com.

By activating an Alarm.com Cellular Communicator and signing up for cellular alarm monitoring service, you can start using your system with the Alarm.com platform. Alarm.com allows you to arm and disarm your system, check current system status, control Z-Wave smart home devices, view the live feed for Alarm.com IP Cameras, and more. You can access this great service using the convenient Alarm.com Mobile App on your Android or iOS device.

An activated 3G communicator will provide consistent and reliable monitoring service until the 3G networks are shut down. AT&T is planning to shutdown their 3G network in February 2022, and Verizon is expected to shutdown their 3G CDMA network around this time as well. Remember, if you deactivate a 3G communicator after the cutoff date for any reason, you will not be able to reactivate it. Trying to reactivate a communicator is considered the same as an initial activation.

If you miss the deadline for activating an Alarm.com 3G Communicator, you will still be able to activate an LTE communicator for use with Alarm.com. Cellular service providers have stated that they plan to keep their LTE networks activated well into the very distant future. Getting an LTE communicator is the best way to provide long-term monitoring service for your panel.

At this point, a 3G communicator is only a temporary solution. Additionally, an LTE communicator will provide faster connection speeds than a 3G communicator. The difference isn't huge for monitoring itself, but LTE can make a big difference when it comes to home automation. Anyone looking to keep their system running for many years to come should make the jump to LTE as soon as possible.

If you need to activate an Alarm.com 3G Communicator, please reach out to us immediately. You may email us at support@alarmgrid.com, or call us at (888) 818-7728. Remember our office hours are 9am to 8pm EST M-F. We look forward to hearing from you.

Tags: , , , , , , , , , , , , , , , , , , , , , , , , , , , , , ,

Comments


Posted By

If you're looking for reliable alarm monitoring service in Canada, then Alarm Grid is here for you! We happily monitor many Canadian homes and businesses and provide people with the peace of mind that they deserve. Our company offers central station monitoring services throughout Canada.

Alarm grid inside security stickers

Many Canadians wonder if we can provide central station monitoring services for their homes and businesses. The answer to that question is yes. Not only can we connect Canadian security systems with a 24/7 central monitoring station, we can also ensure that emergency services will be sent out during break-ins, fires, carbon monoxide gas outbreaks and medical crises. We are proud to offer these important services to homes and businesses throughout Canada.

What is Central Station Monitoring?

First, it's important to understand what exactly is central station alarm monitoring. When a security system goes into alarm, the control panel sends out a distress signal using its communicator. This signal is routed to a central monitoring station that operates 24 hours per day, 7 days per week, 365 days per year (366 on leap years).

The incoming signal will be immediately received by a highly trained operator, who will take action based on the type of signal and the user's account settings. The typical protocol is to contact the end user and make sure everything is okay. If the operator is unable to reach the end user, or if the end user gives indication that they need help, the operator will then request emergency dispatch to the area. Thanks to alarm monitoring, many criminals have been successfully apprehended, and countless lives have been saved.

In order for central station monitoring to work, the security system must be able to send out various types of signals during alarm and other events. These signals must travel across an established communication network and reach the central station. Most systems send out signals across a cellular network and/or an IP network. Alarm Grid recommends using cellular communication whenever possible, as it offers superior reliability. However, IP-only communication can still serve as a viable option.

Alarm Grid central station customers in Canada receive monitoring service from Rapid Response Monitoring Services (RRMS). The company operates two (2) central stations, located in the United States (Southern California and New York State). When an alarm comes through from a Canadian security system, RRMS will have no problem contacting the end user in Canada and ensuring that emergency dispatch is sent out, when necessary.


Alarm Monitoring in Canada

Central station monitoring requires that an alarm system is capable of sending out emergency signals whenever alarm events occur. These signals must be able to successfully reach a central monitoring station. This is the only way for an end user to receive automatic emergency dispatch when they need it most.

An important consideration must be made when alarm monitoring service is conducted internationally. The security system will need to communicate across a network that is carefully designed for devices in the country where the system resides. For IP communication, this is no problem. Internet Protocol (IP) is relatively universal, and an IP device from one country should have no problem connecting with the local networks in different country. But things become a little more tricky when cellular communication is considered.

Cellular communication networks are established by service providers specific to that country of installation. Each service provider wants to ensure that only their customers are able to communicate across their networks. That is why they outfit their phones and other cellular devices with communicators that are designed to work with their unique networks. This is very important for these service providers to maintain and grow a successful business.

The cellular networks in Canada are different from those in the United States. If you bring a Canadian mobile device into the United States, it will usually need to roam to a cellular network unique to the area in which it is being used. If the device is unable to roam to a different network, then cellular communication will be impossible. The same is true if you use an American alarm monitoring communicator in Canada. The American communicator will need to roam to a Canadian cellular network.

But roaming to an international network isn't always easy. You cannot always expect a device from one country to work across a random cellular network in a different country. This is only possible if two cellular service providers from different countries have established a deal to allow their respective devices to roam to the other company's cellular networks.

Even then, this isn't always that simple. Most cellular service providers will charge roaming fees when a customer uses a device on an international network. For cellular alarm monitoring service, these fees are incurred by the company that operates the necessary communication servers. These are companies like Resideo's AlarmNet and Alarm.com. Those fees are then passed on to the alarm monitoring company.

Cellular roaming can result in high fees. As a result, many companies that operate alarm monitoring communication servers will shut down service for any security system that uses cellular roaming to connect with their servers. Only certain companies will allow alarm communicators to use roaming to connect with their networks. Fortunately, cellular communicators for alarm systems don't usually change locations once they've been installed. But, it's important to purchase a cellular communicator that is meant to work in the area of installation.

Most of the alarm monitoring communicators sold on the Alarm Grid website are designed for use in the United States. Only a small number will roam to a Canadian cellular network. And even then, some companies that operate alarm monitoring communication servers will not allow this. If you want cellular monitoring service in Canada, you will need a Canadian communicator or an American communicator that can roam to a Canadian cellular network. If you go with the latter, you must make sure the server operator won't shut down the service.

Fortunately, Alarm Grid does offer a few reliable options for Canadian users.


Qolsys IQ Panel 2 Plus AT&T LTE

Perhaps the best option for Canadian customers is the Qolsys IQ Panel 2 Plus AT&T LTE version. This is an excellent security system for both residential and commercial use. The panel features a beautiful 7-inch full-color touchscreen display, and its sleek, modern design allows it to fit-in nicely with almost any decor. The system supports 128 wireless zones and great features like automatic Bluetooth Disarming, live streaming from compatible Alarm.com Cameras, partitioning, facial recognition and built-in Z-Wave Plus control. These features help to make the IQ2+ one of the most complete and robust systems available.

But the reason why the Qolsys IQ Panel 2 Plus AT&T LTE is perfect for Canadian users is that the built-in AT&T LTE Communicator will roam to the Rogers LTE Network in Canada. Anyone living in an area covered by the Rogers LTE Network can expect the IQ Panel 2 Plus AT&T LTE to work reliably. Alarm.com won't shut down the connection, and Qolsys has informed us that there should be no issues. Please note that you will need a Gold Plan or higher (Self or Full) to use the AT&T LTE Communicator and connect with the Alarm.com Servers.

Additionally, the system also includes an integrated WIFI card. This means that a dual-path setup will be possible right out of the box. In fact, this is currently the only dual-path option that Canadian customers can purchase from our website. Each IQ Panel 2 Plus System can support PowerG Sensors that utilize 128-bit AES encryption and can communicate with the system from up to 2,000 feet away in open air. You will also have the choice of one legacy sensor frequency. These frequency options are 319.5 MHz, 345 MHz and 433 MHz. These frequencies are for Interlogix and Qolsys, Honeywell/Resideo and 2GIG, and DSC legacy RF sensors respectively.

The following IQ Panel 2 Plus Systems will work across the Rogers LTE Network in Canada:

Please note that the Verizon LTE Version will not work in Canada. This is because the communicator will not roam to a Canadian cellular network. Additionally, Qolsys also offers a Telus LTE version of the IQ Panel 2 Plus. At this time, we do not offer the Telus LTE variant on our website. However, if you are able to purchase an IQ Panel 2 Plus Telus LTE System, we will be happy to activate it and provide reliable cellular monitoring service.

Qolsys iq panel 2 at and t wireless security system with at and

Interlogix Telus LTE Communicator

The Interlogix 600-1048-XT-LTE-TL and the Alarm.com XT-511-CA-TL are both Telus LTE Communicators for the Interlogix Simon Series Systems. With the impending sunset of 3G networks, we strongly recommend purchasing an LTE communicator for your alarm system. This makes the Interlogix Telus LTE Communicators a great choice for Canadian users. If you don't need the advanced features of the IQ Panel 2 Plus, then you can certainly do well with an Interlogix Simon System and a Telus LTE Communicator.

Interlogix Systems have long been regarded as excellent budget and economical security systems. They are relatively basic in terms of functionality, and they will provide reliable and trustworthy monitoring service for the end user. The Simon lineup includes the Interlogix Simon XT, the Interlogix Simon XTi, the Interlogix Simon XTi-5, and the Interlogix Simon XTi-5i. All four systems can support the Interlogix 600-1048-XT-LTE-TL and the Alarm.com XT-511-CA-TL. But please note that the Simon XT must be running at least firmware version 1.3 to use a cellular communicator. All versions of the XTi, XTi-5, and XTi-5i can support the module. Remember though, you will need a Gold Plan or higher (Self or Full) from Alarm Grid to support the module. For more information on upgrading a Simon Panel to LTE, please see this helpful FAQ.

Most Interlogix Simon Panels support up to 40 zones, and the cellular communicator add-on also functions as a Z-Wave controller for smart home automation capabilities. The communicator will let the system connect with the Alarm.com service. This will allow you to control your system remotely using the Alarm.com Mobile App. You can also access the app to view Alarm.com Cameras and control Z-Wave devices. While there are certainly more robust systems available, an Interlogix Simon System is still more than serviceable for many homes and smaller businesses.

Please note that the Interlogix Telus LTE Communicator is a special order item for us. It may take longer than average to arrive in the mail. Keep this in mind when ordering this product.

Interlogix 600 1048 xt lte vz back of verizon lte cellular commu

IP Only Monitoring

Although cellular monitoring is recommended due to its exceptional reliability, you can still go with an IP only monitoring setup. In fact, many users prefer this because of the lower monitoring costs. If you have reliable internet service, then this can work quite well. Just remember that if your internet does go down, then your home or business will be vulnerable. Alarm Grid is not responsible for internet outages, so do this at your own risk.

The thing with IP only monitoring is that you will not be able to use Alarm.com. This is because accessing Alarm.com requires a compatible cellular communicator. For that reason, you will want to use an AlarmNet System instead. And the only systems that can access AlarmNet360 and Total Connect 2.0 are those from Resideo (formerly Honeywell). But despite those restrictions, you are free to choose from virtually any Resideo Security System from our website.

Alarm Grid recommends the Resideo Lyric Alarm System for any Canadian user looking to go the IP only route. This system comes with a 2.4 GHz WIFI communicator built-in, so you won't need any additional equipment to connect it to your local IP network. It can support 128 wireless zones, 72 Z-Wave devices and nearly all of the devices from the Honeywell 5800 Series. It can also support its own lineup of Honeywell SiX Series Sensors that offer 128-bit AES encryption and a 300-foot nominal wireless communication range.

By going with IP only monitoring service, you can save money with a Bronze or Silver Plan instead of purchasing a Gold Plan. However, you will still need to upgrade to Platinum if you want video surveillance service. All of our plans other than standard Bronze include access to Total Connect 2.0 so that you can control your system remotely. The Total Connect 2.0 Mobile App can be downloaded for free from the Google Play Store and the Apple App Store. This is an outstanding platform for Arming and Disarming, checking current system status and controlling your Z-Wave smart home devices from anywhere.

Honeywell lyric controller encrypted wireless security system

Sign-Up for Alarm Monitoring in Canada!

Alarm Grid welcomes anyone in Canada who wants dependable and trustworthy monitoring service. We already provide exceptional service and support for hundreds of Canadian customers. We would love for your home or your business to join our growing family. To get started, please visit out alarm monitoring page to learn more about the monitoring plans we offer.

And if you have any questions or concerns about alarm monitoring, we would certainly like the opportunity to speak with you. The best way to reach us is to email support@alarmgrid.com. We will check your email at our earliest convenience and respond back as quickly as possible. If you would prefer to speak on the phone, we can be reached at (888) 818-7728. Our regular office hours are 9am to 8pm EST M-F. We look forward to hearing from you and monitoring your home or business for many years to come!

Tags: , , , , , , , , , ,

Comments


Posted By

Hi DIYers! We recently learned that the Sonos Speaker integration for Alarm.com is now available. This allows users to control their Sonos Speakers and include music into scenes alongside other smart home devices. It is now easier than ever to create the perfect ambiance for your home.


There are many fantastic features available through the Alarm.com Sonos Speaker integration. You can play audio from a variety of different sources, including Spotify, iTunes, SoundCloud and more. It's also super convenient to control the audio feedback right from Alarm.com. Users can play/pause, adjust the volume, mute/un-mute and more. You can even choose to play music on all speakers or select a particular set.

But the most exciting part of this integration is the ability to include the speakers into smart scenes. This way you can have Alarm.com activate your Sonos Speakers based on a set schedule or with certain system events. For instance, you might have your music turn on as soon as you get home and Disarm your system. Or you could have your music activate when you open up a door. You can even have it activate with other devices like your lights and your smart thermostat.


In order to use the ADC Sonos Integration, you will need either an iOS device running Firmware Version 8.0 or higher or an Android device running Firmware Version 2.1 or higher. You will also need:

  • Alarm.com Mobile App Version 4.10.4 or higher
  • The latest version of the Sonos Mobile App and Speaker Software
  • The Alarm.com Audio Integration Service Package provided from your monitoring company
  • The Sonos Speakers must be connected to the internet on the same network as your iOS or Android device for initial pairing.

To get started with the Sonos integration, you should contact your monitoring company and ask them to activate the Alarm.com Audio Integration Service Package on your account. Alarm Grid customers can do this by sending an email to support@alarmgrid.com. You can complete the rest of the process from Alarm.com.

Login to your Alarm.com account on the mobile app. Press the hamburger button (three horizontal bars), followed by Audio. Select "Sonos" from the dropdown menu. Then press Start, followed by Continue. You will then need to login to your Sonos account and give Alarm.com permission to control your Sonos System. After you complete the process, you will see an Audio option in the main menu of your Alarm.com account through the mobile app. This will allow you to conveniently play audio.


If you have any questions about the Alarm.com Sonos integration, please email us, or call us at (888) 818-7728 during our business hours of 9am to 8pm EST M-F. We look forward to hearing from you.

Tags: , , ,

Comments


Posted By

Hi DIYers! We hope that you had a safe and fun Memorial Day weekend. Our video team managed to produce eight (8) new videos last week. Joe was featured in five (5) new videos, mostly covering the August Smart Lock Pro. Jorge and Jarrett both had a video apiece, and I made one as well.

Connecting an August Smart Lock Pro with the August Home App

Joe explains how to connect your August Smart Lock Pro with the August Home App. This is one of the first things you will do with the August Smart Lock Pro. The August Home App allows you to operate your lock from your smartphone. You can control the lock through Bluetooth if you are within 10 to 15 feet. You can also operate the lock remotely from almost anywhere if you have the August Connect WIFI Bridge.


Including the August Smart Lock Pro

Joe shows users how to include the August Smart Lock Pro with a Z-Wave network. This is important if you want to control the August Smart Lock Pro from an interactive service platform from Total Connect 2.0 or Alarm.com. The pairing process is completed through the August Home App. You will need to have the lock paired with the app before you can pair it with a Z-Wave network. You will also need access to your Z-Wave hub or controller.


Defaulting the August Smart Lock Pro

Joe teaches users how to perform a factory default for an August Smart Lock Pro. To perform a factory reset, you will need to access your August account through the August Home App. Doing this will clear any Z-Wave and WIFI settings for the lock. You will need to reprogram the lock from scratch using the app. You should only perform a factory reset if you plan on giving away the lock or as a final troubleshooting step.


Excluding the August Smart Lock Pro

Joe covers the process for excluding the August Smart Lock Pro from a Z-Wave network. Unlike most Z-Wave devices, you don't need to clear the August Smart Lock Pro before adding it to a Z-Wave network. Instead, you will only do this if you are clearing the device from the network so that you can add it to a new one. You can complete the exclusion process through the August Home App. If you don't have access to your Z-Wave hub, you will need to perform a Z-Wave factory reset.


Getting an Alarm or Zone Open or Close to Activate a Honeywell IP Camera

Joe talks about how you can create notifications to have your Resideo IP Cameras activate when sensors are faulted or during alarm events. Normally, these cameras will only activate when they detect motion or sound. You can create these notifications through Total Connect 2.0. It is also possible to set specific hours when a camera can initiate a recording. This way, even if a zone is faulted, the camera will only capture clips during certain predetermined hours.


Temperature Sensor Notifications from a Lyric via Apple HomeKit

Jorge explains how you cannot receive temperature sensor notifications from Apple HomeKit when used with a Resideo Lyric Alarm System. HomeKit will only provide specific alerts for intrusion zones on the Lyric. For all other zones, only a General Lyric System Alert will be displayed. This makes it impossible to determine exactly which zone was faulted. However, you can still use HomeKit alongside Total Connect 2.0. The TC2 service will provide specific alerts for any faulted zone.


Is AlarmGrid Compliant with Nationally Recognized Industry Standards?

In a very rare video appearance, I talk about how Alarm Grid is compliant with Nationally Recognized Industry Standards. Nearly all of the systems and sensors that we sell are certified by Nationally Recognized Testing Laboratories. Additionally, our central monitoring partner Criticom Monitoring Services is UL Listed and FM Approved. While we may occasionally have equipment on our site that is still in the process of being approved by a NRTL, we stand behind our manufacturers and are confident in their offerings.


Finding the Firmware Revision on a Lynx Touch

Coming through with a video at the very last minute, Jarrett teaches users how to find the Firmware Revision on a Resideo Lynx Touch System. If you want to perform a firmware update for these systems, then you will need the LYNXTOUCH-MSD Updater Tool. It is no longer possible to push an update over-the-air (OTA). Getting these systems on the latest firmware is important if you plan to use an LTE cellular communicator. Please note that you will also need an alarm monitoring plan that includes cellular connectivity.

Tags: , , , , , , , , ,

Comments


Posted By

Hi DIYers! We have many customers who wonder what happens if their security system is destroyed when an intruder breaks into their home. Fortunately, alarm manufacturers considered this possibility. They put protective measures in place to deal with this issue. Enter Crash & Smash and APL.

2gig gc3 diy wireless security system w slash 7 screenCrash and Smash (C&S) for Alarm.com and Advanced Protection Logic (APL) for Total Connect 2.0 are both features designed to provide an added layer of protection in case an alarm panel and/or its communicator are destroyed during a home invasion. These features help ensure that the police are still dispatched and that the end user receives the help they need. An intruder might think they're okay because they have destroyed the panel, but the system is smart enough to overcome this issue.

Just last week, we made a post covering Entry and Exit Delays. Well it turns out that the Entry Delay period plays a big part in C&S and APL. As we discussed last week, if an Entry/Exit Zone is faulted while the system is Armed, an Entry Delay countdown begins. This period gives the end user a chance to Disarm their system before an alarm occurs. But what if the panel gets destroyed during this countdown? After all, the panel won't be able to send out an alarm signal. But this is where Crash and Smash and APL take priority. How they do this is actually quite smart.

Whenever a system goes into Entry Delay, it immediately sends out a signal to the Alarm.com Servers (ADC) or the AlarmNet Servers (TC2). This signal just lets the server know that the system is now in an Entry Delay period. The servers are smart enough to know that since the system is now in an Entry Delay period, a Disarm or an Alarm must follow. If neither event follows, then logically the panel must have been destroyed. The server will then know to send a signal to the central station to let a trained dispatcher know that the panel has been destroyed and dispatch is needed right away.

Please note that the Alarm.com Servers and the AlarmNet Servers do not send signals to the central station as soon as the usual Entry Delay period expires. These servers also account for delays in sending signals. A little more than a minute of additional time is added beyond the normal Entry Delay period before a C&S or APL signal is sent to the central station. This is done to prevent false alarms.

Advanced Protection Logic and Crash & Smash also work during alarms that do not follow Entry Delay periods. If the system has Alarm Report Delay enabled and an intrusion alarm occurs, then the system will not actually alert the central station the very instant that the alarm occurs. The system will actually enter into a short Alarm Report Delay period that is usually less than a minute in length. This delay period gives the user a chance to Disarm the system and cancel the alarm to stop the signal from being sent out. If an intruder destroys the system during this Alarm Report Delay period, APL or C&S will ensure that emergency dispatch is still sent out. Alarm Grid encourages users to disable Alarm Report Delay on their panel if possible.

It's also worth mentioning that the Alarm.com Servers and the AlarmNet Servers send all C&S and APL signals directly to the central station. The end user does not receive an alert from Alarm.com or Total Connect 2.0 when these signals are sent out. In other words, C&S and APL do not work with self-monitored customers. You need a central station monitoring plan to use these features. Also, C&S and APL do not work with phone line monitoring. You need an IP communicator or a cellular communicator. UPDATE: Alarm.com can now alert a user directly via a Push Notification on their phone when a C&S event occurs.

If you have any questions about Crash & Smash or Advanced Protection Logic, or if you want to learn more about our monitoring service, please reach out to us! The best way to contact us is to send an email to support@alarmgrid.com. We will check the email at our earliest convenience and respond as quickly as possible. If you prefer to speak on the phone, we are available from 9am to 8pm EST M-F at (888) 818-7728. We look forward to hearing from you!

Tags: , , , ,

Comments


Posted By

Hi DIYers! We hope you had a great Mother's Day weekend. Last week, our video team put up a bunch of new videos, 9 to be exact. All were posts on Thursday and Friday. We love helping users get the most out of their alarm systems and smart home networks. Let's take a look at the new videos!

Updating the Firmware on a Lyric Alarm System's SiXFOB

Jarrett kicks things off by showing you how to update the firmware for a Honeywell SiXFOB Key Fob. This key fob is designed exclusively for use with the Honeywell Lyric Controller. Unlike most SiX Series devices, the SiXFOB needs to receive firmware updates manually. The Lyric should be running the latest firmware version before performing the update. Updating the firmware for the SiXFOB will ensure that it works as effectively as possible. Updating the firmware will affect any zones associated with the SiXFOB.


Including a Schlage Z-Wave Lock

The ever friendly and helpful Joe shows you how to include a Schlage Z-Wave Lock into your local Z-Wave network. Pairing your Z-Wave lock is necessary for getting the most out of the device. You need to do this to control the lock remotely and to use it with smart scenes. Pairing a lock with an alarm panel is often a great option. You can then use it with an interactive service platform like Total Connect 2.0 or Alarm.com. Please note that you will need a monitoring plan with access to one of these services.


Excluding a Schlage Z-Wave Lock

Joe helps you some more by showing how to exclude your Schlage Z-Wave Lock from a Z-Wave network. This is an important step if you plan to transfer the lock from one Z-Wave hub to another. You should also do this before completing the initial pairing process. Many Z-Wave smart home devices are paired with Z-Wave networks before they even leave the factory for testing purposes. Clearing the lock first will ensure that you can pair it successfully.


Adding a Siren to the Qolsys Hardwire 16-F

Joe is back again, and this time he's gonna show you how to add a siren to a Qolsys IQ Hardwire 16-F. This is a wired to wireless converter that allows you to use hardwired sensors with a wireless 319.5 MHz system. The module was specifically designed with the Qolsys IQ Panel 2 Plus in mind. What's unique about the Qolsys IQ Hardwire 16-F is that it includes siren terminals and a built-in siren relay which can be controlled wirelessly by the panel. No external relay is needed for the connected siren, as long as the Qolsys IQ Panel 2 has a hardware RF PIC version 11.1.4 G2 or higher.


Powering the Honeywell Vista-20P

If you just can't get enough of Joe, then you're in luck! He will show you how to provide power to your Honeywell VISTA 20P Hardwired Security System. The panel receives power through two sources. Its primary power source is a plug-in transformer, specifically the Honeywell 1321. If the electricity goes out, then the system can remain powered on through its backup battery. We recommend using an UltraTech 1240 for this purpose. All of this equipment can be purchased from the Alarm Grid site.


How Alarm Systems Work

Hey look, it's Jorge! He's going to explain how alarm systems work. The centerpiece of every alarm system is the control panel. This panel receives signals from sensors that are used throughout the premises. There are sensors for letting the system know if a door or window is opened, if there is movement in the area, if glass is broken, if there is a fire, or really almost any troubling condition that warrants your attention. The system then responds based on the zone configuration and its current arming state.


The Tuxedo Touch - Not An AlarmNet Communicator

If you think the Tuxedo Touch WIFI is an AlarmNet Communicator, then you are sorely mistaken. Jorge is here to set the record straight and explain that the Tuxedo Touch is not a communicator. It is just a touchscreen keypad used with VISTA Series Systems. The keypad uses WIFI connectivity to transmit Z-Wave home automation signals to and from Total Connect 2.0. But you will still need a separate communicator for connecting your system with the AlarmNet Servers.


Programming Report Codes For a Self Monitoring Plan With Alarm Grid

Let's say you sign-up for a self-monitoring plan with Alarm Grid. Great! But since you are self-monitored, you don't need your system reporting out to a central monitoring station. Jorge will show you how to disable the reporting codes for your system so that it functions properly. This process is only necessary for self-monitored systems that use Total Connect 2.0. You do not need to disable report codes for Alarm.com Systems, since Alarm Grid can do it from their end.


Defaulting a Schlage Z-Wave Lock

Joe returns to tell you how to default a Schlage Z-Wave Lock. By performing a factory reset, the lock will be restored to its factory default settings. This will clear any Z-Wave settings, as well as any codes programmed for the device. You will need to re-add the lock to your Z-Wave network. You should check the programming sticker on the lock to find the default user codes. The programming sticker is found underneath the device's main cover.

Tags: , , , , , , ,

Comments


Posted By

Hi DIYers! We're back with another Alarm Grid Tip. Today's tip is to always know your Entry and Exit Delay periods and how they are used. Nearly every alarm system has these settings, and configuring them properly is important for any DIY user. Let's take a look at Entry and Exit Delays!

Alarm grid inside security stickers

Let's start with Entry Delays. When you enter your home while your system is armed, you probably don't want an alarm to occur. After all, you've done nothing wrong. All you've done is open a door. It's not like you smashed a window or burst open a wall. But at the same time, you want your alarm system to confirm that it's you that entered your home. For example, if you forgot to lock the door, an intruder might walk right inside.

This is actually where the very premise of alarm systems comes into play. In its Armed state, your system will want you to Disarm when an Entry/Exit door is opened. But you aren't a magician or a wizard. You can't just, poof, Disarm your system instantly. You have to get inside, close the door, set your stuff down, calm down your dog or cat, walk over to your keypad, enter your code and Disarm your system. Needless to say, this might take a minute or so.

That is why Entry Delay periods are important. They give you a small period of time for you to Disarm your system before it goes into alarm. Since you know your system's code, you should be able to Disarm in a timely manner. But an intruder who doesn't know the code won't be able to provide verification in time. The Entry Delay period will expire, and the central station will come calling to make sure everything is alright. An intruder won't know the false alarm passcode, and emergency dispatch will be sent out momentarily.

Qolsys iq panel 2 at and t wireless security system with at and

But wait! We understand the stress that Entry Delay periods can present! If you have a short Entry Delay period, you might be running frantically to your keypad to avoid that awkward conversation with the central station dispatcher.

"Yeah, sorry, I didn't get to the keypad in time. My false alarm passcode is DIYer." - The person with too short of an Entry Delay period.

But fortunately, you're a DIYer! You can go into programming and adjust your Entry Delay period. That way, you can set it to a duration that allows you to comfortably and calmly reach your system's keypad and Disarm the system. But remember, the shorter you keep this delay period, the sooner dispatch will be sent out in a real emergency.

We also understand that some situations require longer Entry Delay periods than others. For example, you might enter your home from your basement door. It might take you longer to walk up those stairs and reach the keypad than if you entered from your front door. Never fear, alarm manufacturers covered that as well. This is done by having multiple Entry Delay periods on the same system. They are usually conveniently named "Entry Delay 1" and "Entry Delay 2". We know, these are very creative names.

Each delay zone can be set individually to work with either Entry Delay 1 or Entry Delay 2 based on its programmed Response Type. So if you want a longer or shorter Entry Delay period for certain zones, then you have the power! Please note that the Entry Delay 2 period should always be the longer of the two, and is also commonly associated with Garage Door Zones. Keep this in mind when system planning.

Of course, you can also Disarm your system before even entering your home using a keyfob. Or if you have Total Connect 2.0 or Alarm.com, you can just open the mobile app on your smartphone and Disarm from there. But hey, maybe you forgot your phone and keyfob inside. In that case, knowing your Entry Delay period and how long you have to Disarm your panel is important!

Some common Response Types that use Entry Delay periods: Entry Exit 1, Entry Exit 2, Interior With Delay, Garage.

Honeywell lyric controller encrypted wireless security system

Whew! That was a lot to take in. But we saved time to discuss Exit Delay periods. When you Arm your system, there is usually that brief period of time where you need to collect your belongings, say bye bye to your precious puppy, leave the premises and lock the door behind you. During this time, you don't want your system to go into alarm because you activated a sensor. You want to have a moment to safely leave without worry. That is why we have Exit Delay periods.

The Exit Delay gives you a chance to exit the premises without worrying about setting off an alarm. Once the Exit Delay period expires, your system will be Armed. However, it's also important to touch on Auto-Stay Arming here. When you Arm Away using your panel or keypad, the assumption is that you will activate an Entry/Exit Zone on the way out. If no Entry/Exit zone fault and restore is seen by the system, it will assume that someone (you) is still present inside the building. If Auto-Stay Arming is enabled, the system will prevent false alarms by switching to Arm Stay at the end of the Exit count down, even though you Armed Away. To avoid this, open an Entry/Exit Zone during the Exit Delay countdown, or disable Auto-Stay Arming.

Just like with Entry Delay periods, you, as a DIYer, can adjust your Exit Delay. Most systems only have a single Exit Delay period, but you can easily configure it based on your needs. Find a time period that allows you to comfortably leave your home without worry, and set that as your Exit Delay. That way, you won't be scrambling to rush out the door whenever you Arm your system!

And again, you can always Arm from outside your home using a keyfob or a mobile app. Doing this will tell the system to ignore any Auto-Stay Arming settings, as you may not fault an Entry/Exit Zone when using a fob or app. Using either of these methods from outside your house will eliminate any worry you have about Exit Delay periods. But if you ever find yourself Arming from your panel or keypad like many of us do, you will want to keep that Exit Delay period in the back of your mind. Make sure you get out in time!

Honeywell sixfob key fob for lyric controller

We hope that this post was helpful in explaining Entry and Exit Delay periods to you! If you have any further questions or you need help changing the Entry and/or Exit Delay periods on your panel, please reach out to us. We offer free support for Alarm Grid monitored customers! The best way to reach us is to email support@alarmgrid.com. You may also call us during our regular business hours of 9am to 8pm EST M-F. We look forward to helping you get the most out of your security system.

Tags: , , ,

Comments