Home Security Blog

Posted By

Hi DIYers! We are very happy to announce that we have some exceptional new products from Alarm.com. There is a new Z-Wave Plus smart water valve, an upgraded ethernet-to-WIFI bridge for Alarm.com PoE Cameras, and a digital doorbell adapter for use with SkyBell Video Doorbell Cameras.


The first new product we will be discussing today is the Alarm.com ADC-SWV100 Smart Water Valve. This smart water valve uses Z-Wave Plus technology to communicate with your security system or Z-Wave hub. It allows you to remotely shut-off your main water line from virtually anywhere. This can be very convenient if a flood or leak occurs while you are away. The device is perfect for pairing with flood sensors that you have enrolled with your alarm panel. You can even set up smart scenes to have the device shut-off the water automatically whenever a flood sensor detects a leak.

Although the ADC-SWV100 was built with Alarm.com in mind, the versatile device can really be used with any Z-Wave controller that supports smart water valves. This includes Honeywell Alarm Systems that use the Total Connect 2.0 platform. One important thing to note is that if you use this device with Alarm.com, then you will need to have your monitoring company enable the Water Management Add-On Package for your account. If you have monitoring service with Alarm Grid, then we will do this for no additional monthly charge.


Next up we have the Alarm.com ADC-W110 Ethernet-to-WIFI Bridge. This accessory lets you take a hardwired ethernet device and have it communicate wirelessly across a local WIFI network. The device is great for use with compatible Alarm.com Cameras that use power over ethernet, also known as PoE. By using the ADC-W110, you can eliminate the need to run an ethernet cable from the IP router to the camera.

What's super convenient is that both power and IP data are supplied from the ADC-W110. You just need to connect the PoE camera with the ADC-W110 using an ethernet cable. The ADC-W110 will then take care of the rest! This device is actually a newer version of the older ADC-W100, which as of late October 2019 is still available. Keep in mind that you will still need to connect the ADC-W110 with a wall outlet for power.

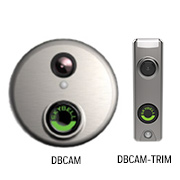
Lastly, we have the Alarm.com ADC-VACC-DB-A SkyBell Digital Doorbell Adapter. This adapter makes any SkyBell Doorbell Camera with a digital doorbell chime. Normally the SkyBell devices only work with mechanical doorbell chimes. We actually created an FAQ that will help you get started using the SkyBell Digital Doorbell Adapter with your digital doorbell chime. You can check it out right here.

If you have any questions about these new products, or if you would like to learn more about our monitoring services or Alarm.com, please reach out to us! The best way to contact us is to email support@alarmgrid.com. We will review your email at our earliest convenience and reply back as soon as possible. Remember that our support hours for responding to emails are from 9am to 8pm ET M-F. We look forward to hearing from you!

Tags: , , , , , , , , ,

Comments


Posted By

Alarm.com has reported that their service is experiencing a technical issue that may be hindering the signaling ability of customer accounts. You may have trouble accessing the Alarm.com Mobile App or website during this time. The issue is currently being worked on and should be solved soon.

Alarm Grid will provide an update once we learn more.

Update 4:45 pm ET: We have learned that Alarm.com customer interfaces have stabilized. Command and signal processing has also improved. However, some customers may still experience intermittent delays during this time. The issue should be fully resolved shortly.

Update: The issue has since been resolved.

Tags: ,

Comments


Posted By

The phone system played an integral role in early alarm systems. Each system was connected directly to a dial up phone system. If an alarm was tripped, the system would call the central station and give information. That is when high-fidelity copper lines ruled the day. In that world, analog calls were crystal clear. But the world has moved to digital, and while everything is cheaper, some things have changed, which we’ll cover in a little bit.

For those hyper-concerned with the safety of their family or possessions, skimping on security is the last thing you should do. At one time, landlines were the best thing you could use to send signals from your alarm system to the central station. Nowadays, there are simply better ways to get that signal out. And it’s time to stop skimping on the monitoring and update your system to get with the modern age. It doesn’t cost an arm and a leg, and the advantages to using new technology are out of this world.

Which is why you should...

Switch to Cellular & IP Alarm Monitoring

The advantages of switching are innumerable. In some ways it is how you breathe new life into a security system that has grown old. These new communication pathways will overtake your current system’s old, tired over-the-phone communication, and turn your system into the modern system that you want. And, most of the time, it will cost you very little.

In other words…

Save a ton of money. Most Systems Can be Retrofitted to Work with Cellular Alarms Easily

Most old systems can use a new communicator. These systems are simple units that tell you whether a zone is opened or closed. This simple function is no different in new systems. Generally the difference between an old system and a new system is in the slick design. But now, even old systems have gotten some great updates. For example, if you have an old VISTA-20P, you can bring your system up to date with a

  • PROM replacement (about $50)
  • a communicator (about $120)
  • and if you’re really concerned about the way the keypad looks on your wall, you can get one of the new Tuxedo Touch keypads to make your system look new, modern, and sleek.

Regardless of how easy it is, there is really only one great reason to switch from a landline security system to a wireless (cellular+IP) security system: IP Monitoring & Cellular Monitoring provide better security than old landlines.

Thieves Can No Longer Just Cut Your Phone Lines


When phone lines were analog, all a thief had to do was cut your phone line. This would prevent your system from calling the central station. No wire, no signal. No signal, no one will know you were robbed.

While the advantage of the analog phone lines was the crystal clear communication from the panel to the central, the disadvantage of having exposed wire is obvious. Fortunately, cutting the line doesn’t work when your system is able to communicate wirelessly.

This is why we don’t recommend IP systems exclusively. IP is great! It’s the fastest communication pathway alarms have. But, generally, IP is still connected via an exposed wire. The solution to the problem of the exposed wire is cellular monitoring. And the fact that most modern systems allow you to connect your system to both IP and cellular communication paths at the same time means that you can get all the advantages of IP monitoring (at no extra cost) with the connectivity of cellular.

The wireless, over-the-air cellular communication path means that this attack vector is something you will never have to worry about again!

Phone Lines are No Longer Analog


Phone lines don’t really work anymore like they used to. Old phone lines were made of copper. Their analog signal was extremely high fidelity. Nowadays, things are different.

First, a lot of our customers have switched to Voice Over IP (VOIP) phones. These phones are notoriously poor quality. They work pretty well, but the quality is nothing like analog. While this might not be terrible for calls to friends or family, it poses a problem in sending signals to a central station.

Second, most phone systems have digital switches. What that means is that even if you never got rid of your old copper line phone, your phone likely still uses digital signals at some point. This poses the same issue for alarm companies as VOIP.

For us, this means that wires get crossed a lot. The result is that central stations occasionally receive bad signals, these VOIP accounts are prone to false alarms, and occasionally, the bad signal will cause signals to get crossed in such a way that signals are dispatched to the wrong account. Phone lines just don’t work like they used to.

Since signals are being sent over wireless communication pathways, this is one of those instances where embracing modern technology will save you a lot of headaches. Where VOIP fails, cellular and IP monitoring pick up the slack.

Because of these issues, we think that

Cellular Monitoring Is Simply Better Than Landline Monitoring, and IP Monitoring Creates a Great Backup for When it’s Needed.

Cellular monitoring provides amazing connectivity. Because it is a wireless connection, a thief can not cut any wires to disable it. The cellular modules connect directly to the nearest cellular tower.

And most modern systems also include monitoring for any system whose signal is blocked by someone using a device that disrupts cellular signals.

Up time for these systems is as close to perfect as it can be. While an IP signal is a great way to make sure your system is able to quickly send signals, cellular monitoring enhances monitoring over the internet by making sure that your system can communicate signals even during those times that your IP provider is down (and we all know that happens occasionally).

That’s why…

Cellular Monitoring is the most reliable monitoring you can buy. And with our dual path IP + cellular monitoring options, it’s made even more reliable.

Comments


Posted By

Hi DIYers! We're here with the Alarm Grid video recap covering October 21st thru 25th. We have eight (8) new videos this time. These videos proudly feature the Alarm Grid boys Jarrett, Joe, and Jorge. We hope you're ready to learn more about security systems! Let's check out the videos!

Issues Disabling Auto-Stay Arming for a Vista-128BPT

Joe talks about issues regarding Auto-Stay Arming on a VISTA-128BPT running firmware version 10.0. This firmware version has an error where Auto-Stay Arming is not automatically disabled when arming from Total Connect 2.0. This can cause issues if you Arm Away from Total Connect 2.0 and you aren't around to fault an Entry/Exit Zone during the Exit Delay countdown. When this happens, Auto-Stay Arming will go into effect for any zone where the feature is enabled.


Connecting The Lyric Alarm System to Alexa

Jorge explains how you can connect the Resideo Lyric Security System with Amazon Alexa for spoken voice commands. In order to do this, the Lyric Alarm System must be paired with the Total Connect 2.0 platform. Any voice commands for the Lyric System sent through Alexa will pass through Total Connect 2.0 before being forwarded to the panel. You can use Alexa voice commands through TC2 to arm the system, check current status, and control smart home devices.


Why Your Vista-128BPT is Armed Stay After Choosing Arm Away from TC2

Joe explains why you might find that your VISTA-128BPT Security System has Armed Stay even though you have selected Arm Away on Total Connect 2.0. This is due to the error on Firmware Version 10.0, were the TC2 platform doesn't know to automatically ignore Auto-Stay Arming settings if they are enabled. You can overcome this issue by upgrading to Firmware Version 10.4, or by manually disabling Auto-Stay Arming for every zone on the VISTA-128BPT Alarm System.


The Honeywell Lyric Security System Will Allow for Different User Codes

Jorge explains how you can set up multiple user codes on a Honeywell Lyric Alarm Panel. You need to provide a valid code to perform various system functions such as arming and disarming. Additionally, the Master Code and Installer Code both have special privileges on the system as well. The Installer Code is particularly important, as it is needed for programming the system. However, you can only disarm using the Installer Code if it was the code used to arm originally.


Using More Than One SkyBell With Total Connect 2.0

Jarrett explains how you cannot use more than one (1) SkyBell device with a Total Connect 2.0 account. If you want to use a second SkyBell Video Doorbell, then you will need a second Total Connect 2.0 account. Alarm Grid customers can add one (1) SkyBell to any Total Connect 2.0 account, even if their plan does not technically include video surveillance. We offer a special Video-Only Plan, which is perfect if you already have an alarm monitoring plan, but you are needing a second account to add a second SkyBell device.


Why A Legacy IPCAM Won't Work With Total Connect 2.0

Jarrett explains an issue that you might encounter when trying to use a legacy Total Connect 2.0 IP Camera with the TC2 platform. The older legacy TC2 IP Cameras have default software that is not compatible with the new HTML5 version of TC2. Resideo pushed down an update to these cameras to make them compatible with the new HTML5 platform. But any legacy TC2 IP Cameras that weren't connected at the time were unable to receive the update. Those cameras can no longer be used with TC2.


How a Qolsys IQ Panel 2 Behaves When the Internet Goes Down

Jorge explains what happens when a Qolsys IQ Panel 2 Plus System loses its internet connection. When this happens, the system will remain connected with Alarm.com using its built-in LTE cellular communicator. All versions of the IQ Panel 2 Plus have an integrated cellular communicator for this exact purpose. You can choose from AT&T LTE or Verizon LTE. We recommend going with the service that works best in your area, regardless of which one you use for your personal phone.


Resetting A Qolsys IQ Panel 2 to Factory Defaults

Jorge covers the process for factory resetting a Qolsys IQ Panel 2 Plus System. This is done using the Dealer Code, which is 2222 by default. By performing a factory reset and restoring the system to factory default settings, several things will happen. Any programming settings will be restored to their default. All programmed sensors will be deleted. All Z-Wave devices will be cleared. All user codes will be deleted, with the exception of default codes. If you changed the Master, Installer, or Dealer Codes, they will all be reset to their default.

Tags: , , , , , , , ,

Comments


Posted By

Alarm.com Rogers Communicators may be experiencing connectivity issues due to a temporary issue with the carrier. No other carriers are affected. We expect the issue to be resolved relatively soon. Alarm Grid will provide further updates once we receive more information from Alarm.com.

Update: This issue has since been resolved. Please contact us at support@alarmgrid.com if you are continuing to experience issues.

Tags: ,

Comments


Posted By

Hi DIYers! Today, we're checking out the newest camera from Alarm.com, the ADC-V723. This is an outdoor security camera designed for use with the Alarm.com platform. It packs some powerful and impressive features into a compact design, making it ideal for virtually any home or business.


The ADC-V723 is an Alarm.com Security Camera that captures clear, pristine video at up to 1080P. The device is fully compatible with all of the excellent Video Analytics features from Alarm.com. This allows you to receive specific alerts regarding detected movement so that you are only notified for important events. Another great feature of the device is its High Dynamic Range (HDR) functionality to reliably capture activity when it occurs.

With its 117° field of view, you can rely on the ADC-V723 to cover a wider area than most other cameras. This increases your area of video surveillance, without having to add multiple video capture devices for adequate coverage. The camera also boasts an IR night vision range of about 40 feet, making it superb for capturing activity and movement in the darkest of settings. And its IP66 weather-resistant rating allows it to stand up to almost anything nature can dish out.

The ADC-V723 connects with a WIFI network across a 2.4 GHz or 5 GHz band. Remember that you will need an Alarm.com account with video surveillance. If you have a security system connected with Alarm.com through Alarm Grid, then you will probably want to upgrade to a Platinum Plan (Central Station or Self) if you haven't already. You can learn more about our Platinum Plan on our monitoring page. We also have a Video-Only Monitoring Plan, which is great if you want video surveillance without actually owning a security system.

If you have any questions about the new ADC-V723 or any of our products or monitoring services, you are welcome to email us at support@alarmgrid.com. Remember that our support hours for replying to emails are from 9am to 8pm ET M-F. Our team will check your email at our earliest convenience and reply back as soon as possible. We look forward to hearing from you!

Tags: , , , , , ,

Comments


Posted By

Hi DIYers! Today, we wanted to quickly discuss some of the various integrations that have been made available for Alarm.com. We will be checking out the Sonos, Legrand, Rachio, and Rain Bird integrations. They are great for any ADC user who wants to control their audio or irrigation system!


If you have a smart audio system from Sonos or Legrand, or a smart irrigation system from Rachio or Rain Bird, then it is likely that you can set it up for use with Alarm.com. This will allow you to control your audio or irrigation system conveniently from the Alarm.com Mobile App. All you need to do is have the appropriate options enabled for your Alarm.com account and complete a simple pairing process.

The Sonos and Legrand Audio Systems can also be included with Alarm.com Smart Scenes to have your music or audio play automatically based on a schedule or with certain system events. Your sound system can even be set to activate alongside other devices, including your smart lights, thermostat, door locks, and even your security system! This is perfect for creating the perfect scene for listening to music or your favorite podcast! You might also run a scene while you are away to make it appear like you are really home.

Meanwhile, the Rachio and Rain Bird Irrigation System integrations offer their own benefits. You can use the Alarm.com Mobile App to set your irrigation system to a Rain Delay, initiate watering for any irrigation zone for a set period of time, and view the last time a zone was watered. Additionally, the Irrigation Card from the main screen of the Alarm.com Mobile App will show the current status of your irrigation system.

In order to use Sonos and/or Legrand with Alarm.com, you must have the Audio Integration Service Package Add-On applied to your Alarm.com account. Likewise, you will need to have the Irrigation Service Package Add-On Applied to your Alarm.com account if you plan to use Rachio and/or Rain Bird with Alarm.com. Keep this in mind before you go to complete one of these integrations.

Alarm Grid will apply the Audio and Irrigation Add-Ons to any Alarm.com account at no additional charge. You just need to have an Alarm Grid monitoring plan with access to Alarm.com. Any customer with a Gold or Platinum Plan and a compatible Alarm.com Security System can access the Alarm.com platform. This includes any Self or Central Station Plan. We recommend checking our monitoring page for more information.

At this time, the Sonos, Legrand, and Rachio integrations can all be completed by an end user through the Alarm.com Mobile App. Just make sure that the appropriate Audio or Irrigation Add-On has been applied to your Alarm.com account. However, the Rain Bird integration must be manually performed by your alarm monitoring company. For more information on completing any of these four (4) integrations, we recommend checking out one of the following FAQs:

If you are an Alarm Grid customer and you need a service package added to your Alarm.com account or you need help setting up any of these integrations, then you should email us at support@alarmgrid.com. You are also invited to email us if you are interested in our monitoring services and you would like to learn more. Remember that our support hours for responding to emails are from 9am to 8pm ET M-F. We look forward to hearing from you!

Tags: , ,

Comments


Posted By

Hi DIYers! We have some important information that is applicable for anyone with central station monitoring service from Alarm Grid. Our alarm monitoring partner, Criticom Monitoring Services (CMS), has announced some important changes regarding their text and email notifications.


Starting December 1st, 2019, all text message notifications and automated notifications from Criticom will come from the short code 60281. We recommend marking this number with your phone service provider so that it is not blocked as part of anti-spam measures. Additionally, all automated email notifications from Criticom will come from noreply@myalarms.com. You should mark this email so that any incoming messages do not end up in your spam folder.

Additionally, CMS has alerted us that blocked calls to customers have been reported. This is due to anti-spam measures put into place by phone companies. As an Alarm Grid customer, it is crucial that you are able to receive incoming phones calls from CMS at all times. Failure to answer these calls may result in unnecessary emergency dispatch. We have actually discussed this subject at length before in a previous blog post.

We recommend saving ALL contact numbers for CMS in your contacts list. It is also recommended that you contact your phone carrier directly and ask them to allow incoming calls from these numbers. We also understand that some customers may have downloaded third party apps that will detect and block incoming toll-free and/or believed "spam" numbers. If you have one of these apps, you should delete it, or adjust its settings so that CMS phone numbers are not blocked.

As a reference, the five (5) phone numbers listed below are associated with Criticom Monitoring Services, and they should not be blocked or ignored under any circumstance:

  • Longwood, FL: (800) 432-1429
  • Manasquan, NJ: (800) 631-2299
  • Cypress, CA: (714) 373-7000; (800) 468-4640; (800) 482-9800

Keep in mind that you may not always receive incoming phone calls from the same CMS phone number. In the event that one monitoring center is temporarily taken offline for any reason, any incoming alarms will be automatically re-routed to a different monitoring center. This redundancy helps ensure that customers always get the help they need when alarm events occur. For that reason, make sure to save all five (5) of the CMS phone numbers listed above.

You may also want to sign-up for text notifications from CMS. Text messages sent from CMS are sent from the CMS secure short code that should not be blocked under any circumstance. Remember, this short code will be 60281 starting December 1st, 2019. This number should be saved as a contact in your phone so that you can quickly recognize any incoming message as being associated with your security system and/or monitoring service.

If you want to learn more about our monitoring plans that include central station service, we recommend checking out our alarm monitoring page. If you have any questions, you should email us at support@alarmgrid.com. Remember that our team responds to emails during our regular support hours of 9am to 8pm ET M-F. We look forward to hearing from you and answering any questions you have about monitoring service.

Tags: , ,

Comments


Posted By

Hi DIYers! Today, we want to discuss an unusual quirk we found with Alarm.com. It turns out that the Alarm.com platform cannot receive alerts from temperature sensors. This is important for any Alarm.com user who wants to receive remote alerts for unusually high or low temperatures.


When you use sensors with a security system, the expectation is that you will be able to receive alerts from an interactive service platform whenever the device is activated. But with Alarm.com, the platform cannot receive incoming signals from a system regarding faulted Temperature Zones. This means that you cannot use Alarm.com to receive text and/or email alerts regarding an activated temperature sensor.

We discovered this issue due to a customer using a DSC PG9905 Temperature Sensor with a Qolsys IQ Panel 2 Plus System. We quickly discovered that the issue also applied to any temperature used with an Alarm.com Security System. This is important to note, as we know that many users out there will want to know about any unusual temperatures in their homes and businesses. Many people rely on using these sensors with their security systems so that they know if their HVAC systems break before serious and expensive damage occurs.

Fortunately, there is still another way you can receive alerts from Alarm.com regarding an unusually high or low temperature. If you pair a Z-Wave thermostat with your system, then you can set up notifications to be sent out whenever the detected temperature goes outside of a set threshold. A good Z-Wave thermostat to use for this application is an Alarm.com ADC-T3000 Thermostat. This thermostat also supports the ADC-S2000 Temperature Sensor, which will allow you to monitor the temperature in a second area of the building as well.

Another option is to use the Total Connect 2.0 platform with a Resideo Security System instead. Unlike Alarm.com, the Total Connect 2.0 service can be set up to send out text and/or email notifications for any sensor type, including temperature sensors. The Resideo LYNX Touch and Lyric Systems also have designed Temperature Zones that are used with Z-Wave thermostats to end high-low temperature alerts to AlarmNet360 and TC2 whenever an unusual temperature is detected. Just make sure that any Temperature Zone is noted as such on your central station document. These zones are frequently mistaken for 24-hour auxiliary medical zones.

If you have any questions about the functionality of temperature sensors, the Alarm.com and Total Connect 2.0 platforms, or any of our other products or services, please email us at support@alarmgrid.com. Remember that our support hours are from 9am to 8pm ET M-F. We also recommend checking out our monitoring page to learn more about our monitoring services. We look forward to hearing from you and providing top-quality monitoring service for your home or business.

UPDATE: This issue was later addressed in Qolsys IQ Panel 2 Plus Firmware Update 2.5.0. Please see this post for more information.

Tags: , , , , , , , ,

Comments


Posted By

Hi DIYers! We're back with another video recap, this time covering the newest videos that were posted last Thursday and Friday. Our video team put up six (6) videos this past week, with Joe, Jarrett, and Jorge all having two (2) videos. Let's take a look at the newest Alarm Grid videos!

Alarm grid inside security stickers

Adding a Siren to a Honeywell VISTA Alarm System

Joe is enthusiastic as he teaches you how to add a hardwired siren to a Honeywell VISTA Security System. Adding a siren is important for making sure that all building occupants are alerted to an intrusion or fire. Luckily, the VISTA Systems make it very easy to add a siren, as you can just connect it to panel terminals 3 & 4. You can also daisy-chain multiple sirens together. Just make sure you do not exceed the power limit of 2A.


Changing the Date and Time on a Honeywell VISTA System

Joe shows you the very exciting task of changing the date and time on your Honeywell VISTA Security System. This is something that you will normally do when setting the panel up for the first time. You will also need to do it when Daylight Savings Time occurs, as the panel cannot update the time on its own. Powering down the panel completely at any time will remove the date and time settings and require you to readjust. You should use an Alphanumeric Keypad for this job.


Dual-path Monitoring and the VISTA-21iP

Jarrett, the nice young man you all love so much, talks about dual-path monitoring options for the VISTA-21iP System. Although the VISTA-21iP has a built-in IP communicator, you cannot simply add a cellular communicator to achieve dual-path connectivity. Instead, you must disable the internal IP communicator and add either a Honeywell LTE-IV (Verizon LTE & IP) or a Honeywell LTE-IA (AT&T LTE & IP) for dual-path service. Remember that the new VISTA-21iPLTE System supports plug-in LTE communicators for enabling dual-path functionality.


Using the Honeywell L7000 With SmartThings

Jorge shows off his automation expertise by teaching you how to pair a Honeywell L7000 System with Samsung SmartThings. In order to complete this integration, the L7000 must have a Honeywell L5100-ZWAVE module installed. We recommend pairing all your Z-Wave devices with your SmartThings Hub before adding the L7000 as a secondary controller. Any Z-Wave device that is paired with the L7000 should be excluded from the network and then paired with SmartThings. This will ensure the best possible results when the integration is complete.


Using the Honeywell L5210 With SmartThings

Jorge continues to impress by explaining how the Honeywell L5210 System can be used with Samsung SmartThings. This is done by setting the L5210 up as a secondary Z-Wave controller for your SmartThings Hub. Any Z-Wave device that is paired with your SmartThings Hub will be pushed over to the L7000. This will let you control them both from the panel and from SmartThings. Any Z-Wave Plus device that is used in this configuration will retain its Z-Wave Plus functionality, as it is still ultimately paired with the SmartThings Hub.


Monitoring Requirements for Using Total Connect 2.0

The ever-appreciated man of amazement Jarrett explains the monitoring requirements for accessing Total Connect 2.0. This interactive monitoring and automation platform is used exclusively with Honeywell and Resideo Security Systems and Total Connect 2.0 IP Cameras. Any system used with this service must be connected with the AlarmNet360 Servers for monitoring service. This will require an alarm monitoring plan, such as one offered from Alarm Grid. Only Honeywell Systems set up for IP and/or cellular service can be used in this manner.

Tags: , , ,

Comments