2GIG Posts

Posted By

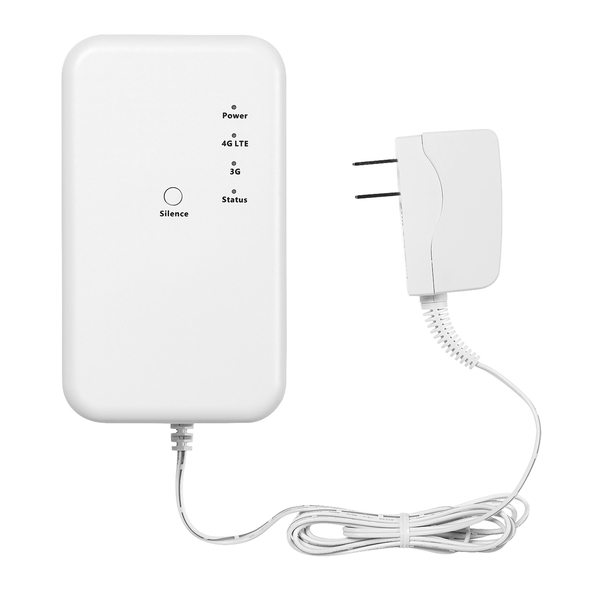
Today, February 22, 2022 is the official date for the AT&T 3G Sunset. As we've mentioned before, there isn't a big switch that gets turned off and then, "Poof!" no more 3G. If you still have an AT&T 3G communicator, it may continue to work for a while, but there is no way to know how long.

If you're just becoming aware of the AT&T 3G Sunset because you have a security panel that you haven't been paying much attention to for a while, then you probably are seeing some type of error, and possibly hearing some annoying beeping. Some of the more common error messages are shown further down in this post. The thing to keep in mind is that your alarm panel wants to be sure that you know there's a problem. So, if you just press the touchscreen, or press any button on the keypad, that should stop the beeping, at least temporarily.

If you know the arming/disarming code for the system, enter it if prompted on a touchscreen panel, or if you're on a VISTA panel, just enter your 4-digit code and then press the OFF or 1 Key. This will acknowledge the trouble condition and stop the beeping on a more permanent basis, though in some cases, it may come back after a period of time. If you don't know a valid code for the system, then you will likely need to shut down your system by unplugging the transformer and the battery. If you're interested in putting your system into service keep reading to see how Alarm Grid is helping out in this situation.

If you find yourself in the unenviable position of needing to replace an AT&T 3G communicator, but you haven't done so yet, don't panic. The AT&T 3G network is vast and complex. It's not something that you can simply turn off. The process of sunsetting 3G equipment will take a bit of time. So, if after today your 3G communicator still works, you're one of the lucky ones. You've been given a slight reprieve. However, there is no way for us to know how long that reprieve will last, so decide what you're going to do, and do it now.

One ongoing problem that we've seen recently is supply chain issues. Maybe you've been trying to upgrade for the past six (6) months, but the communicator or system you need hasn't been available. Communicator manufacturers have been rolling out LTE Cat-M1 communicators in the absence of available components for standard LTE.

LTE Cat-M1 is the cellular network that was created for Internet-of-Things (IoT) use. It has lower power consumption, better range, and the modems used for it have a smaller form factor. The trade-off is lower bandwidth. However, the amount of data being transmitted by alarm communicators is very low compared to voice and data used for a traditional phone, so the difference in bandwidth isn't noticeable. Happily, the components to make LTE Cat-M1 communicators appears to be readily available, so those communicators have been coming into stock in the past months and continue to become available.

Some of the available AlarmNet LTE Cat-M1 communicators are listed below. These communicators are all compatible with the VISTA panels. The LTEM-PA and LTEM-PV are also compatible with the DSC PC1616, DSC PC1832, and DSC PC1864 and the Interlogix NX Series panels. For the Interlogix NX Series, the PRODCM is also required:

  • LTEM-PA - Dual-path IP and AT&T LTE Cat-M1 communicator with the ability to add a traditional LTE communicator if needed. First communicator to allow non-Honeywell panels to use Total Connect 2.0.
  • LTEM-PV - Dual-path IP and Verizon LTE Cat-M1 communicator with the ability to add a traditional LTE communicator if needed. Along with the LTEM-PA can allow non-Honeywell panels to use Total Connect 2.0.
  • LTEM-XA - AT&T LTE Cat-M1 Communicator for VISTA Panels.
  • LTEMXA-TC2 - AT&T LTE Cat-M1 Communicator for VISTA Panels. Includes upgrade chips for VISTA-15P and VISTA-20P panels, allowing them to support Total Connect 2.0.
  • LTEM-XV - Verizon LTE Cat-M1 Communicator for VISTA Panels.
  • LTEMXV-TC2 - Verizon LTE Cat-M1 Communicator for VISTA Panels. Includes upgrade chips for VISTA-15P and VISTA-20P panels, allowing them to support Total Connect 2.0.
  • LTEM-IA -COMING SOON - AT&T LTE Cat-M1 Communicator with RJ45 Port for Ethernet. Currently in Beta.
  • LTEM-PIA - AT&T LTE Cat-M1 Communicator with RJ45 Ethernet port. Listed for UL-985 Household Fire.
  • LTEM-PIV - Verizon LTE Cat-M1 Communicator with RJ45 Ethernet port. Listed for UL-985 Household Fire.

Some of the available Alarm.com LTE Cat-M1 communicators are listed below. Compatibility is listed with each communicator:

  • Alarm.com ADC-SEM210-PS-AT-M - COMING SOON - Dual-path AT&T LTE Cat-M1 and ethernet capable communicator for use with legacy DSC Power Series panels (PC1616, PC1832, PC1864).
  • Alarm.com ADC-SEM210-PS-VZ-M - COMING SOON. - Dual-path Verizon LTE Cat-M1 and ethernet capable communicator for use with legacy DSC Power Series panels (PC1616, PC1832, PC1864).
  • Alarm.com ADC-SEM300-VT-AT-M - COMING SOON. - Dual-path AT&T LTE Cat-M1 and ethernet capable communicator for use with Honeywell VISTA (non-polling loop) panels (VISTA-10P, VISTA-15P, VISTA-20P, VISTA-21iP manufactured in 2005 or later).
  • Alarm.com ADC-SEM300-VT-VZ-M - Dual-path Verizon LTE Cat-M1 and ethernet capable communicator for use with Honeywell VISTA (non-polling loop) panels (VISTA-10P, VISTA-15P, VISTA-20P, VISTA-21iP manufactured in 2005 or later).

Panel Cellular Communicator Trouble Condition Messages

If you are affected immediately by the AT&T 3G shutdown, you may see one of these error messages on your system:

  • Check 103 ####: - You may see this on a non-polling VISTA panel, such as the VISTA-20P, but only if you have an Alpha Keypad like a 6160. The #### will be a 4-digit number. It may be 4005, which indicates that the communicator has lost connection with AlarmNet. The exact 4-digit code will depend on whether there are any other trouble conditions existing on the communicator at the time the message is displayed.
    *If you have a VISTA panel, choose from any of the communicators listed above for VISTA panels. The VISTA-21IPLTE can use the LTE-21V. The only way to update an original VISTA-21iP is to add an external communicator and disable the internal one. The prior link is an FAQ on how to do just that. The same rule about possibly downgrading to an IP only plan mentioned under the bF message applies here too.
  • bF, or it may look like 6F: - This is supposed to be a bF, which stands for Backup Failure, as in backup communicator. This message means the same thing as Check 103, but will be displayed on a non-alpha keypad like a 6150. If this is the only type of keypad you have, then this is all the information the panel and the communicator can give you. If you get this message after 02/22/22 and your AT&T 3G Communicator has been fine until then, you're not one of the lucky ones. You should look to upgrade your communicator ASAP. *Or, if you have a dual-path communicator and an IP connection is available near it, you could downgrade to an IP only plan for now, and upgrade to LTE at a later time. Just bear in mind, if you go IP only, when the internet is out, your panel's ability to communicate is out. This is usually the case during power outages. The above rule about upgrading the communicator under the Check 103 message also applies here.
  • Fault 103: - This may also show as a Check 103, then display as a Fault 103 after you silence the panel. This is what you see on the Honeywell L3000 panels when there is a problem with the communicator. Losing connection due to the 3G Sunset would cause this error code. There is not a good IP only option for the L3000 currently available. You can use a 7847-I, but it is a messy installation. You can also use the 7847I-L, if you can find one, they are discontinued.
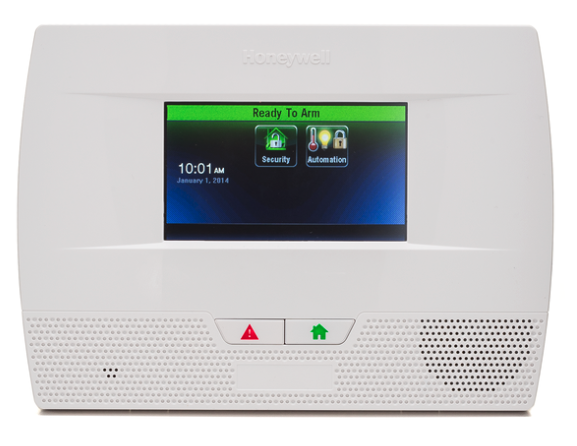
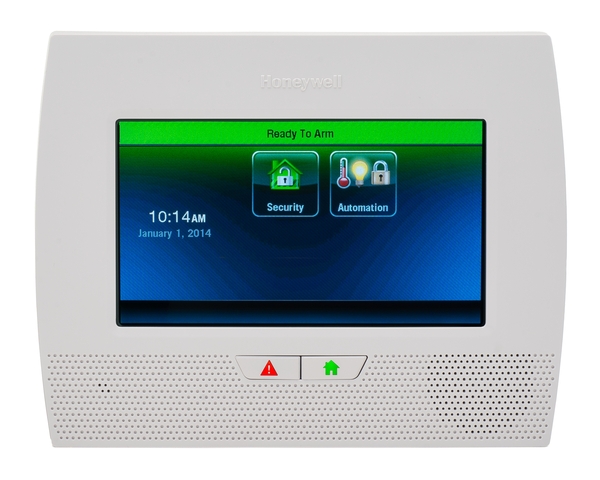
  • 103 Comm. Trouble: - The Lynx Touch Panels will display something along these lines. The icon and message may differ slightly, but the gist is the same. This is what you'll see on these panels if you're affected by the AT&T 3G shut down.
    • Honeywell LTE-L57A: - AT&T LTE Communicator for Lynx Touch panels. Important! There may be panel firmware revision restrictions with your panel and either of these communicators. Read the product description very carefully to be sure your panel is on the correct version for the communicator you choose. If you need to update the panel, you can do so with the Honeywell LYNXTOUCH-MSD Firmware Update Tool. It is compatible with the L5200, L5210, and L7000.
    • Honeywell LTE-L57V: - Verizon LTE communicator for the Lynx Touch panels. See the Important note above about panel firmware version limitations.
  • ⚠ 950 Comm. Trouble: This is the message displayed on a Lyric Controller if it has a cellular communication path, and it loses contact with AlarmNet on that path. This is what you will see if the AT&T 3G shutdown has caused your communicator to go down. There may be other messages in the status bar at the top of the screen as well, having to do with Comm Failure and potentially other conditions, depending on what's happening with your panel at the time.
    • Honeywell LYRICLTE-A - AT&T LTE Communicator for Lyric. Firmware Revision v01.03.06548.482 or higher required!
    • Honeywell LYRICLTE-V - Verizon LTE Communicator for Lyric. Firmware Revision 1.09 (aka MR9) or higher required!

  • Check 8##, ####: - You may see this message on a VISTA-128 or VISTA-250 panel. Devices connected to the keypad bus can be supervised for a connection to the panel, and for a tamper condition where applicable. The AT&T 3G Communicator can also be supervised for communicator troubles, such as a loss of connection to AlarmNet. If supervision is enabled (and it is not enabled by default) then when the 3G Sunset affects the communicator, the panel will display a Check or Trouble (based on programming) 8 + the 2-digit number of the address. So, if the communicator is assigned to address 03, and supervision is enabled, it will display as a Check or Trouble on Zone 803 plus the 4-digit communicator status code associated with the condition when you have the proper keypad to display it. If the only problem is a loss of network connection, then the 4-digit code should be 4005. Supervision is enabled by enabling the associated 800-zone with a trouble zone type, such as 05, Trouble by Day/Alarm by Night.
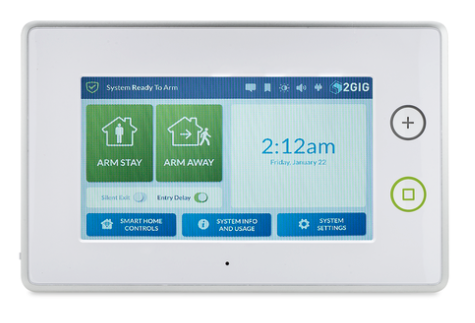
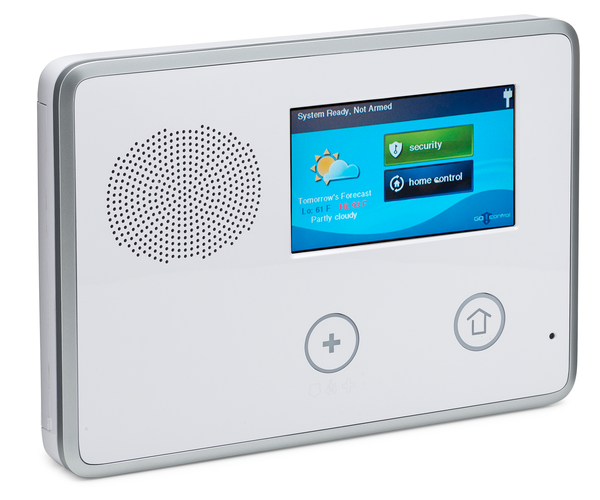
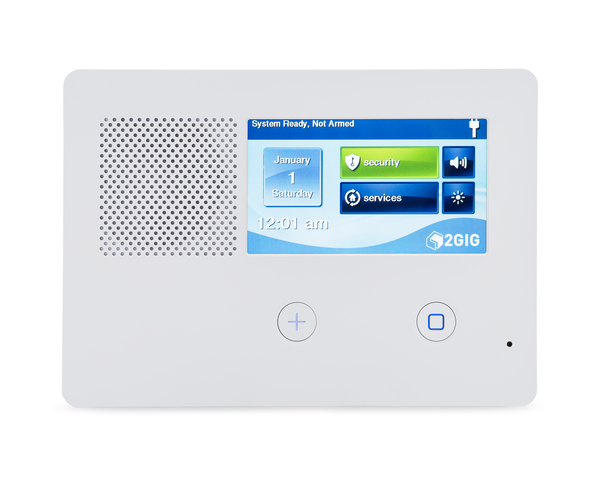
  • 2GIG GC2 and GC2e Displays Trouble Icon and beeps 6 Times per minute until the trouble condition is acknowledged: This is the behavior of the 2GIG GC2e and presumable the 2GIG GC2 as well. The Security Screen will show a Yellow button with an exclamation mark and a number. When you press the button, it will take you to the Trouble Display screen where you can scroll through the trouble conditions, and you may click on the communicator trouble then press OK. This will stop any beeping, but the display will continue to show trouble until the condition is cleared. In the case of the AT&T 3G Sunset, this means upgrading the communicator.


    • 2GIG LTEA-A-GC2: - Alarm.com compatible AT&T LTE Communicator for 2GIG GC2 and 2GIG GC2e. Important! Be sure to check for any panel firmware version requirements associated with either of these LTE communicators for the 2GIG GC2 and GC2e panels.
    • 2GIG LTEV1-A-GC2: - Alarm.com compatible Verizon LTE Communicator for 2GIG GC2 and 2GIG GC2e.
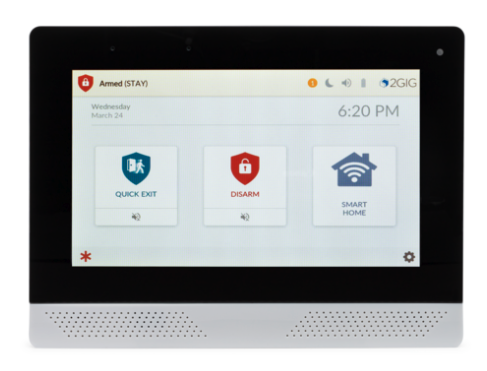
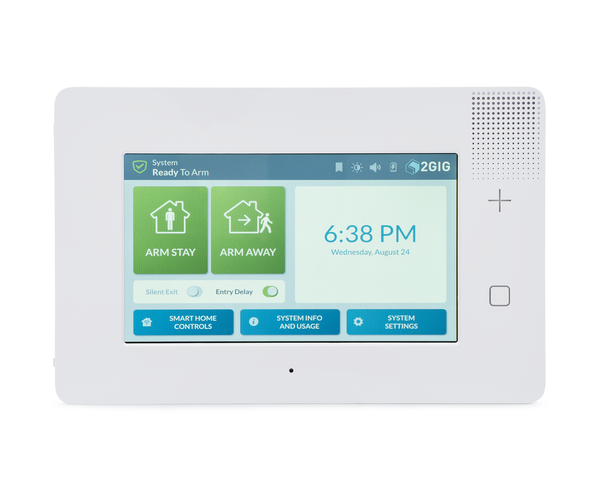
  • 2GIG GC3 and GC3e Message LED is lit and the panel chimes at ten-second intervals until the condition is acknowledged: The behavior for the cellular communicator losing connection to the AT&T 3G network on a 2GIG GC3 or GC3e depends somewhat on panel programming. In Q30, you set the amount of time that is allowed to elapse with no communication to the server before a trouble condition is indicated. The default is 30 minutes. A 0 in this field disables the supervision feature. The maximum entry is 255 minutes. Q31 also determines whether the radio network failure causes a trouble condition on the panel. This is enabled by default, but if disabled, you will have no visible indication if you are affected by the AT&T 3G sunset. Q32 is radio network failure reports. This is enabled by default and determines whether the panel reports the radio failure to the monitoring station (assuming it is able to do so with the radio down, the panel would need to be utilizing the WIFI communication path for this to be possible.)
    • 2GIG LTEA-A-GC3: AT&T LTE Communicator for the 2GIG GC3 and GC3e panels. The panel must have Firmware Version 3.2.3 or higher to support this communicator.
    • 2GIG LTEV1-A-GC3: Verizon LTE Communicator for the 2GIG GC3 and GC3e panels. The GC3 or GC3e must have Firmware Version 3.1.3 or higher to support this communicator.

Alarm Grid Is Here To Help!

If you're a current Alarm Grid customer and you have purchased an LTE communicator, but haven't switched over to it yet, please send an email to support@alarmgrid.com. In the subject line, be sure to put "I Need an LTE Upgrade". We'll reach out with further instructions and either a link to schedule your upgrade, or information as to what we need to begin your upgrade. Lyric and Lynx Touch users may be able to get upgraded with no appointment, where a VISTA user may require an appointment as those communicator swaps are a little more intricate.

If you purchase an LTE communicator or an upgrade kit from Alarm Grid, we will credit your monitoring account in the amount of the communicator or upgrade kit. If you purchase more than $150 in product, we'll also offer you free ground shipping, so if you've been thinking of adding a doorbell camera, or other products to your system, now may be a good time. The cost of products not associated with the communicator or system and communicator upgrade will not count toward free monitoring though.

If you have the ability to switch to an ethernet or WIFI connection only, you can choose to do that and your monthly monitoring fee will go down. You can purchase an IP or WIFI communicator strictly for that purpose. You may have that option with your existing panel and you just aren't using it, or maybe you were using dual-path monitoring, but now the cellular portion of your 3G communicator has stopped working. Whatever the case, if your communicator or panel supports the option for an IP-only connection, we will be glad to downgrade your service plan permanently, or until you can get the LTE upgrade. But be aware, Alarm.com customers do not have an option for IP-only monitoring.

If you're not a current Alarm Grid customer, never fear, you can get exactly the same deal as existing customers. If you purchase an LTE communicator from us or a kit with a panel and LTE communicator and you then sign up for monitoring with us, we'll give you credit toward free monitoring in the amount of the purchase for the communicator or communicator and panel. Once again, purchases over $150 will have free ground shipping, but any sensors or other devices that you purchase will not count toward free monitoring.

If you have any questions, feel free to reach out to us at support@alarmgrid.com. Our support hours are Monday - Friday from 9:00 am - 8:00 pm Eastern. We will help in any way that we can to get you through this transition. Your safety and peace of mind is our top priority.

Tags: , , , , , , , , , , , , , , ,

Comments


Posted By

Freezing and water damage accounted for 29.4% of Homeowner's Insurance losses by cause in 2019*. From 2015 - 2019, the weighted average cost per accident year was $11,000* for freezing and water damage. Only fire and lightning damage was more costly. But flood damage can often be avoided.

At this time of year, with the worst of winter still ahead of us, our thoughts always turn to incidents of flooding which are caused predominantly by freezing temperatures. In many instances, homeowner's insurance companies want proof that there is both freeze and flood protection in a dwelling as a condition of insurance, or in order to provide the best available rate. With just a few added sensors and tweaks, your existing alarm system can help you prevent freezing and flood damage. Below we'll outline some products and strategies that can help.

To properly protect against this type of damage, it is helpful to know when the temperature in a building drops low enough to cause concern. There are many sensors that can assist in this, and in many cases, a sensor may perform double duty. There are motion detectors that also have built-in freeze sensing, as well as smoke, heat, and combination sensors. Here's a list of just a few, and the systems they are compatible with:

Product Description Compatibility
Honeywell 5808W3 Smoke/Heat/Freeze Sensor.
When programmed (Loop 3), activates when temp drops below 41℉ (+5℃)
Compatible with any Honeywell 5800 Series Receiver, including VISTA panels with a separate receiver added, 2GIG panels, and Qolsys panels** with the 345 MHz SRF Receiver. Honeywell ProSeries Panels require a PROTAKEOVER module.
Honeywell 5821 Wireless temperature and water sensor.
To monitor for both Cold and Flood detection, use the integrated temp sensor plus an FP280 or 470PB.
Loop 1 = Cold (for temps below 45℉ (+7.2℃) for more than 10 minutes)
Loop 3 = Flood
Set Dips 1 = OFF and 2 = ON
Compatible with any Honeywell 5800 Series Receiver, including VISTA panels with a separate receiver added, 2GIG panels, and Qolsys panels with the 345 MHz SRF Receiver. Honeywell ProSeries Panels require a PROTAKEOVER module.
2GIG SMKT8e-345 Wireless Encrypted Smoke/Heat/Freeze sensor
Low Temp sensing = Loop 3
Senses low temperature when the temperature drops below 40℉ (+4.4℃). Restores when the temperature rises to 45℉ (+7.2℃)
Compatible with 2GIG GC2e, 2GIG GC3e, and 2GIG Edge only
2GIG SMKT8-345 Wireless Smoke/Heat/Freeze sensor
Low Temp sensing = Loop 3
Senses low temperature when the temperature drops below 40℉ (+4.4℃). Restores when the temperature rises to 45℉ (+7.2℃)
Compatible with any 2GIG panel, Qolsys 345 MHz version, and Honeywell Lyric (Version MR3+) and ProSeries with PROTAKEOVER
Winland TA-40 Wired Fixed Temperature Freeze Alert. Fixed temperature alert when the temperature drops below 39.2℉ (+4℃) Compatible with any Normally Closed wired zone input.
Qolsys IQ Temp-S Wireless S-Line Encrypted 319.5 MHz Temp Sensor.
Low Temp sensing when the temperature drops below 40℉ (+4.4℃)
High Temp sensing when the temperature rises above 100℉ (+37.7℃)
Compatible with Qolsys and Interlogix panels that support 319.5 MHz wireless sensors.
2GIG FT6e-345 Wireless encrypted Flood and Temp Sensor.
Loop 1 = Flood Sensing
Loop 2 = High Temp (95℉ (+35℃) for three (3) minutes or more.
Loop 3 = Freeze Detection (41℉ (+5℃) or lower for three (3) minutes or more.)

Compatible with 2GIG GC2e, 2GIG GC3e, and 2GIG Edge panels only.
2GIG FT6-345 Wireless Flood and Temp Sensor.
Loop 1 = Flood Sensing
Loop 2 = High Temp (95℉ (+35℃) for three (3) minutes or more.
Loop 3 = Freeze Detection (41℉ (+5℃) or lower for three (3) minutes or more.)
Compatible with all 2GIG panels, Qolsys panels that support 345 MHz sensors, Honeywell Lyric panels (Version MR3+), and ProSeries Panels with the PROTAKEOVER.
DSC PG9905 Wireless Encrypted PowerG Temp Sensor.
Temperature threshold is set in panel programming
Compatible with all Qolsys IQ Panel 2 Plus, all Qolsys IQ Panel 4, and DSC PowerSeries Neo panels and PowerSeries Pro panels with a PowerG transceiver added.
2GIG FT1-345 Wireless Flood and Temp Sensor.
Flood = Loop 1
High Temp = Loop 2
Low Temp = Loop 3
For flood, probe must be shorted by water for 3 minutes, and restores once short is removed for 3 minutes.
High Temp setpoint is 95℉ (35℃).
Low Temp setpoint is 42℉ (5.5℃)
Compatible with all 2GIG panels, Qolsys panels that support 345 MHz sensors, Honeywell Lyric panels, and ProSeries Panels with the PROTAKEOVER added.
Qolsys IQ Temp Wireless 319.5 MHz Temp Sensor.
Low Temp sensing when the temperature drops below 40℉ (+4.4℃)
High Temp sensing when the temperature rises above 100℉ (+37.7℃)
Compatible with Qolsys and Interlogix panels that support 319.5 MHz wireless sensors.

With any of the low-temperature sensing devices above, you can be alerted to dangerously low temperatures within a building. Alerts can come in the form of an email, text, or push notification from either Alarm.com or Total Connect 2.0, a call from the monitoring station, or both. With a Z-Wave or WIFI thermostat you can adjust the temperature when the HVAC system is working, or contact an HVAC service technician when it isn't.

Some of the devices listed in the table above combine freeze and flood sensing into a single unit. Of course, avoiding the presence of water in a location where it shouldn't be is optimal, but in some cases, it may not be possible. Flooding isn't always the result of freezing water pipes. With a flood sensor, you can be alerted to these situations and then take action accordingly. Alarm Grid offers a variety of both wired and wireless flood sensors. Some are listed above. Those and others can be found here.

If you can't control what's happening with the temperature in a location, then the next step in avoiding flood damage is controlling the flow of water. If you have a water shut-off valve within the building, then a Z-Wave water valve is just the thing you need to save the day (and a good deal of money). Once you receive a notification that a freeze condition is possible, or that a flood situation is underway, with Alarm.com or Total Connect 2.0 service, you can either set up a scene to automatically shut off the water within the premises, or you can manually log in and do so remotely.

Product Description
Qolsys S-Line IQ Water Valve Kit

Qolsys IQ Water Valve - Install Guide
Qolsys IQ Flood-S - Quick Install Guide
This kit comes with a Z-Wave 700 Series Water Valve and 319.5 MHz Water Sensor (Qolsys IQ Flood-S, see in table above).
The water valve is a retrofit servo that fits 1/4 turn ball valves. It can be used on pipes from 1/2" to 1 1/4". It does not require installation by a plumber.
Qolsys PowerG IQ Water Valve Kit

DSC PG9985 - Install Guide
This kit comes with a Z-Wave 700 Series Water Valve and a PowerG Encrypted Water Sensor (DSC PG9985, see in table above).
The water valve is a retrofit servo that fits 1/4 turn ball valves. It can be used on pipes from 1/2" to 1 1/4". It does not require installation by a plumber.
Alarm.com ADC-SWM150 Smart Water Valve and Meter

User Guide
In the USA can fit up to 1" water main distribution pipes.
This smart water valve, when used with Alarm.com can help you track water usage in addition to allowing you to control the flow of water.
This device should be installed by a licensed and insured plumber.
The Smart Water Valve plus Meter has a backflow preventer. It is not recommended that it be installed directly on the water heater's main suply line.
Alarm.com ADC-SWV100 Z-Wave Plus Water Valve

Install Guide
Can fit up to 1" water main distribution pipes.
Be sure to install this unit downstream from the indoor main water shut-off valve. Observe all plumbing codes and ordinances and obtain a proper permit for installation. Installation by a licensed and insured plumber is advised.
This device is made by Alarm.com, but should work with any Z-Wave Controller.
Leak Intel Leak Gopher LGZW-1

Install Guide
3/4" Z-Wave Water Shut-off Valve.
This valve should be installed downstream from the main indoor water shut-off.
It is advised to have this unit installed by a licensed and insured plumber for best results.
Should be compatible with any Z-Wave Controller.
When installed, ON may indicate that water is OFF, while a status of OFF for the water valve, may indicate that the water is ON.

With a combination of freeze and flood sensors, and a Z-Wave Water Valve, you can anticipate potential low-temperature flooding issues, be alerted to non-freeze-related flooding issues, and either automatically or manually turn off the water before damage occurs. Check with your homeowner's insurance agent to see if there are any discounts available on your policy if you add freeze and/or flood protection with an automated water shut-off option. You may be surprised at how quickly this equipment can pay for itself, even if you never have to use it.

*Statistics are taken from the Insurance Information Institute at iii.org.

**Qolsys Panels come in a variety of versions. All IQ Panel 2 Plus and IQ Panel 4 versions support PowerG wireless sensors. Then in addition, there are versions that support 319.5 MHz wireless, including S-Line Sensors. There are also versions that support 345 MHz wireless and 433 MHz wireless. When purchasing a Qolsys panel, or a sensor that will be used with a Qolsys panel, be sure to match the receiver type with the sensor type. Panels that support 319.5 MHz come in a box with a Gold stripe. Panels that support 345 MHz sensors come in a box with a Silver or Gray stripe, and those that support 433 MHz sensors have a Red stripe on the box.

Tags: , , , , , , , , , , , , , , , , , , , , , , , , , , , , , , ,

Comments


Posted By

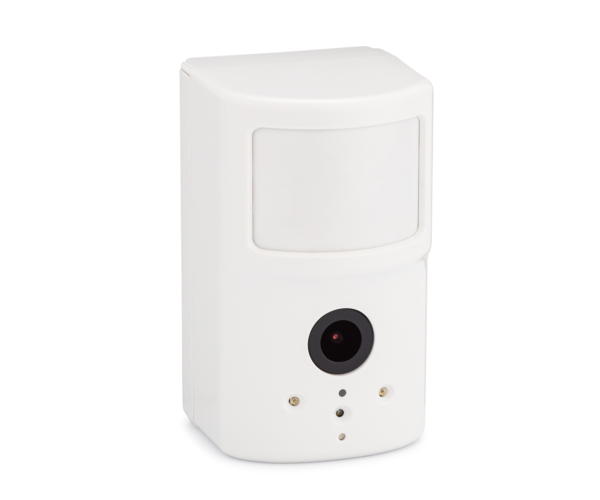
2GIG has announced the release of their first big firmware update for the 2GIG Edge. This update adds support for image sensors in the form of the 2GIG-IMAGE3. In order to support image sensors, the 2GIG XCVR3-GC3 must be installed. Image sensors can be used without losing any other features.

The 2GIG Edge is a great addition to the 2GIG panel lineup. It has built-in facial recognition, Z-Wave Plus V2 (700 Series) support, up to four (4) Smart Area partitions, Bluetooth disarming, and so much more. One of the disappointing aspects of the panel rollout, is that it didn't support image sensors at the time of its release. That problem is now rectified with the new 3.1.0.011 firmware.

If you have a 2GIG Edge, then there are a couple of ways that you can get your panel updated. Alarm.com is still in the testing phase with this firmware, so it can't be pushed remotely quite yet, but remote over-the-air (OTA) updates will be available soon. Once this form of upgrade is available, you'll need to request the update from your alarm dealer. If your panel has a WIFI connection, the update will be completely free. If your panel connects to Alarm.com via cellular only, then a small fee will be incurred when updating OTA.

If you're an Alarm Grid monitoring customer, you can request the upgrade by emailing support@alarmgrid.com. Once the update is available, we'll verify the cost, if any, and if you give the go ahead, we'll push the update to your panel, and pass the cost along to you on your next monthly monitoring bill, with no markup. Remember, there will only be a fee if your panel connects to Alarm.com via cellular only. The cost for this type of update varies, depending on the size of the file to be downloaded. It could be as little as fifty-cents, or as much as a few dollars.

The other way that your panel can be updated is via USB. There is a USB port on the top of the 2GIG Edge. You can download the firmware update files from Alarm Grid here. This is a free download. Use a standard USB drive with at least 1GB capacity, and not more than 16GB capacity. Be sure the drive is formatted using FAT32, and that it has only one (1) partition. The file you download should be saved to the root directory of the USB drive. Full instructions for downloading and upgrading can be found here.

Once the file has been downloaded to the USB drive, remove the drive and take it to the 2GIG Edge panel. The USB port is on top of the panel, covered by a rubber boot. Remove the boot, and insert the drive. A message should appear on the panel, letting you know that an update is available. Press "Update", enter either the Installer Code (default 1561) or Master Code (1111) and the update will then proceed. Be sure the panel has AC power, and that AC power is not interrupted during the update process. The panel will reboot and provide a message letting you know when the update is complete. Remove the USB drive and reinsert the rubber boot.

If you have a 2GIG Edge Remote Keypad, it will be updated by the 2GIG Edge panel, once the panel has completed updating. Be sure the keypad has AC power and that it is connected to WIFI and to the Edge panel. You can verify this by making sure the keypad shows the panel home screen, and the proper panel status. Once the panel has been updated, it should automatically update the keypad. Again, once the firmware has been installed, the keypad will reboot to complete the update process.

In addition to support for image sensors, this firmware also corrects a few known issues regarding WIFI connection problems, and both remote keypad and main panel touchscreen issues. You can read the full firmware Release Notes Here.

So, what do you think about this firmware update? Do you have a 2GIG Edge and want to share your experience with it? Have you been anxiously awaiting image sensor support? Leave a comment below and let us know your thoughts. We always look forward to hearing from you.

Tags: , , , , , , , , , , , , , , , , , , , , , , ,

Comments


Posted By

We're back again with four (4) more videos. We rejoin Jorge and Michael with videos on the 2GIG Edge and the Honeywell Home PROA7PLUS. Michael discussed the PROA7PLUS support for 5800 series sensors. Jorge provides several tutorials on the 2GIG Edge. Enjoy these videos from Alarm Grid.

Honeywell Home PROA7PLUS: Compatible with Honeywell 5800 Series Sensors

In this video, Michael from Alarm Grid discusses the Honeywell Home PROA7PLUS' support for Honeywell's legacy 5800 Series Wireless Lineup. In order for the panel to support these sensors, a Honeywell Home PROTAKEOVER module must be installed. This module allows the panel to support one (1) of five (5) legacy RF frequencies. Only one (1) PROTAKEOVER is supported per panel.


2GIG Edge: Compatibility With 2GIG Sensors

In this video, Jorge discusses the ability of the 2GIG Edge to support both encrypted and unencrypted 2GIG Sensors. It may seem as though it should go without saying that a 2GIG panel supports 2GIG Sensors, but with newer panels supporting encrypted sensors, and new sensor lineups, it's good to be 100% sure before making a purchase, particularly if you have existing 2GIG sensors installed. The 2GIG Edge supports all of the 2GIG sensors.


2GIG Edge: Z Wave Support

Jorge is back again to talk about how the 2GIG Edge supports Z-Wave devices. This panel has the most advanced version of Z-Wave currently available with the 700-Series Z-Wave Plus V2 chip onboard. When used with a commensurate 700-Series Z-Wave device, all of the great new features that are included in this latest version. Some of these features include S2 encryption for all Z-Wave Plus V2 certified devices as well as SmartStart and 128-bit AES encryption. You can see a comparison between all three Z-Wave versions here.

2GIG Edge: Default Master Code

Jorge really knows his stuff when it comes to the 2GIG Edge! Here he is talking about the default Master Code on the 2GIG Edge (1111) as well as information on how to change the Master Code and also what the default Installer Code is (1561). If you happen to be moving and leaving behind an alarm system, please check out this post that discusses proper etiquette when leaving behind an alarm system for a new home or business owner.


That's the recap, we hope these videos will help you with your alarm system. We look forward to feedback, if you have comments or suggestions drop us a comment in the space below. We're here Monday - Friday from 9 am - 8 pm Eastern. You can reach us via email at support@alarmgrid.com

Tags: , , , , , , , , , , , , ,

Comments


Posted By

We missed an opportunity to recap videos last week, but that just means we have more videos to cover this week. Six (6) today, with more to follow. Michael and Jorge share their knowledge of the 2GIG Edge and the Honeywell Home PROA7PLUS. Summer's almost over but wade in, the water's fine.

Honeywell Home PROA7PLUS: Resolve WIFI Connection Issues

In this video, Michael discusses the various reasons why the Honeywell Home PROA7PLUS might not connect to WIFI. Reasons can include range, environmental issues, and even bad equipment. In addition, there is a specific setting to watch out for on Ubiquiti Access Points. Having this setting enabled can prevent your Honeywell Home PROA7PLUS from connecting to WIFI.


2GIG Edge: What To Expect During AC Loss

During an AC Loss condition, the 2GIG Edge will go into power conservation mode. After a few seconds, the touchscreen will go dark and only illuminate when something occurs that needs to be displayed, or when a user touches the touchscreen. Jorge tells and shows users what to expect as normal behavior when an AC Loss condition occurs.


2GIG Edge: Powering Down Properly

Believe it or not, there is a right way to properly power down an alarm system. In this video Jorge will show you how to properly power down a 2GIG Edge alarm panel. Begin by removing the set screws, pulling the panel off its base then unplugging the battery. Next, unplug the transformer, either at the barrel connector on the panel side, or by unplugging the transformer from the wall. If you can't find the transformer, you can power down by turning power off at the breaker.


Qolsys IQ Remote: Behavior On a Partitioned System

In this video Michael shows you how the Qolsys IQ Remote behaves when it is used on a partitioned system. The IQ Remote will only display the status of the partition to which it is assigned. It will only allow the user to control the assigned partition as well, and only a user with a User Code that has been given access to the assigned partition will be able to interact with the system from the IQ Remote.


2GIG GC3e: Installing the XCVR3 GC3

Michael shows users how to install the 2GIG XCVR3-GC3 to the 2GIG GC3e panel. Unlike with the 2GIG GC2 panel, the installation of the 2GIG XCVR3-GC3 does not require that anything be removed from the GC3e panel first. This transceiver module simply adds 900 MHz 2-way communication capability between the GC3e and the 2GIG TS1 as well as the 2GIG Image Sensors.


Honeywell Home PROA7PLUS: Installing PROTAKEOVER

Michael shows users how to set the dial for legacy RF devices, and then properly install the Honeywell Home PROTAKEOVER module into a PROA7PLUS system. This module allows the PROA7PLUS to support one (1) of five (5) legacy RF frequencies. This allows the panel to support previously existing sensors from Honeywell or 2GIG 345 MHz sensors, existing Qolsys and/or Interlogix/GE 319.5 MHz sensors, DSC 433 MHz sensors, or Bosch 433 MHz sensors. This module allows a user to replace an older panel with the newer PROA7PLUS without having to replace all the existing wireless sensors that are still working.


Tags: , , , , , , , , , , , , , ,

Comments


Posted

Update! 2GIG has corrected this issue on the Edge panel with a Firmware Update. You can read all about it here.

We have some rather unfortunate news for anyone hoping to use an image sensor with the 2GIG Edge. 2GIG has informed us that the system's only compatible image sensor, the 2GIG IMAGE3, will only function as a motion sensor when paired with the Edge. 2GIG says that they are working on a fix.

In order to enroll the 2GIG IMAGE3 Image Sensor with the 2GIG Edge in any capacity, a 2GIG XCVR3-GC3 Module must be installed inside the panel. This unit is what makes two-way communication between the 2GIG Edge and the IMAGE3 possible. Contrary to popular belief, installing the 2GIG XCVR3-GC3 inside the 2GIG Edge will not have any impact on the system's ability to support encrypted 2GIG eSeries Sensors.

However, even after you install the 2GIG XCVR3-GC3 and enroll the 2GIG IMAGE3, you will find that the IMAGE3 does not work as an image sensor as intended. Instead, the IMAGE3 will only behave as a standard motion detection sensor, and it will not transmit any captured photographs to Alarm.com. This effectively defeats the main purpose of the device, and you would really be no better off pairing an ordinary motion sensor with the Edge.

When we reached out to 2GIG for more information, we were informed that this behavior is not intentional, and a fix is being implemented to make the 2GIG IMAGE3 operate as a true image sensor when paired with the Edge. While it is believed that the fix will be applied as a firmware update for the 2GIG Edge, this is mere speculation, and it has not been confirmed. We also do not have an expected timeframe for when such a fix will be implemented.

Alarm Grid apologizes to anyone who was hoping to use image sensors with the 2GIG Edge at this time. We are just as hopeful as you are that 2GIG will make a quick fix to the problem so that image sensors may be successfully used with the system as intended. Stay tuned to the Alarm Grid Blog for updates on when the issue is corrected. Also please leave any thoughts you have on the situation down in a comment below. We'll be back with more security updates and news coming real soon!

Tags: , , , , , , , ,

Comments


Posted By

The Security Industry Association (SIA) recently announced the winners of the 2021 SIA New Product Showcase Awards. We are pleased to say that the 2GIG Edge was named as an Honorable Mention in the field of Smart Home Solutions. Congratulations 2GIG and Nortek for your continued success!

Determined by a panel of experienced judges, the New Product Showcase Awards, also called the NPS Awards, have been presented since 1979. The purpose of these awards is to recognize innovative security products, services, and solutions that benefit the industry and end-users alike. This year, 35 judges determined the award winners in more than 25 product and service categories. 2GIG, along with their parent company of Nortek, was recognized as an Honorable Mention in the Smart Home Solutions Category for the new 2GIG Edge Panel.

It's no surprise that the 2GIG Edge would be recognized for its smart home capabilities. The alarm panel and smart home controller is a force to be reckoned with in terms of automation. It includes a built-in Z-Wave Plus V2 Controller, which is also known as a Z-Wave 700-Series Controller. This represents the latest and greatest Z-Wave technology, as the 700-Series Z-Wave devices can go at least ten (10) years between battery changes, and they support signal hops of up to (200) feet each for extended wireless range.

That's not to mention that all Z-Wave 700-Series devices support the powerful S2 Security Protocol for greater wireless protection. 2GIG has even released a 700-Series Z-Wave Smart Thermostat, the 2GIG STZ-1, that pairs perfectly with the 2GIG Edge Alarm System. To learn more about 700-Series Z-Wave in general, please check out this blog we put out on the subject when the technology was still brand-new. The blog was written before we fully understood the protocol, but it should still do a pretty decent job of explaining it if you are totally unfamiliar with the subject.

As you may know by now, the 2GIG Edge also connects with the Alarm.com platform when the system is monitored. This platform makes it possible to control connected smart devices remotely from anywhere in the world. Any smart device paired with a monitored 2GIG Edge Security System will appear on the Alarm.com platform for remote access. You can then use the Alarm.com Mobile App on your phone to control the connected devices. You can also create powerful Alarm.com Smart Scenes and automations to have the connected devices respond automatically to predetermined system events and/or operate on a set schedule. This is great for saving money on energy bills, while also making your life much more convenient. Alarm.com even allows for geo-fencing through their Geo-Services technology so that smart devices activate once you are within a predetermined radius of your home.

Alarm Grid offers congratulations to 2GIG and Nortek for the continued success of the 2GIG Edge. This system is truly exceeding expectations, and it is one that we think can be a staple in the security and automation industry for many years to come. If you have any thoughts on the 2GIG Edge, please leave them in a comment down below. We would love to hear what you have to say. And remember to stay tuned to the Alarm Grid Blog for more news and updates coming soon!

Tags: , , , , , ,

Comments


Posted By

It's time for the Alarm Grid Video Recap! There are five (5) new videos this week. For the first time in awhile, I did not appear in any videos. I'll hopefully be back next week. Instead, Jorge really took over, doing four (4) videos. Julia also made a rare video appearance. On with the show!

2GIG Edge: Pair the 2GIG PAD1-345

Jorge shows you how to pair the 2GIG PAD1-345 Keypad with the 2GIG Edge. The PAD1-345 is a very basic keypad device that has been around since the days of the 2GIG GC2. As a very limited keypad, the PAD1-345 can be used to arm/disarm and trigger system panics. The 2GIG PAD1-345 cannot be used to bypass sensors, and it also does not display system status. Additionally, the PAD1-345 can only control the system partition that is has been assigned, and it cannot "switch" to other partitions.

2GIG Edge: Finding the IMEI Number

Jorge shows you how to find the IMEI Number on a 2GIG Edge Alarm System. When working with a 2GIG Edge, the IMEI Number may also be referred to as the panel's Serial Number. This is an important piece of information that you need when activating the system for alarm monitoring service. It is associated with the panel's built-in cellular communicator, which is registered with Alarm.com as part of the activation process. All outbound signals for the 2GIG Edge are sent through Alarm.com.


2GIG Edge: Connect to WIFI

Jorge explains how to connect the 2GIG Edge to a WIFI network. The 2GIG Edge can use WIFI connectivity as a secondary pathway for communicating with Alarm.com. However, WIFI cannot be the only communication pathway, as Alarm.com requires that a cellular communication path is configured and set up with their servers. Most users will configure the WIFI pathway anyway, as most monitoring providers will not charge extra for internet monitoring, and almost all homes and offices have WIFI readily available.

2GIG Edge: Sending a Cell Test

Jorge teaches you how to perform a cell test on a 2GIG Edge Security Panel. A cell test is performed at the end of the system's activation process, as a way of verifying communication with the Alarm.com servers. You may also perform a cell test at any time after the activation to ensure that the system is still communicating properly. As part of the cell test, the system checks that it can successfully send signals to the Alarm.com servers, and also successfully receive incoming signals from Alarm.com.

2GIG GC2: Updating Firmware Using Updater Cable (UPCBL2)

Julia teaches you how to update the 2GIG GC2 using the 2GIG UPCBL2 Updater Cable. Normally, the easiest way to update a GC2 is to activate the system for monitoring service, and then push down an over-the-air (OTA) firmware update from Alarm.com. But if you have an old GC2 that is not on a high enough firmware version to get connected with Alarm.com, then you must update using the Updater Cable or the 2GIG UPDV Easy Updater Tool. Alarm Grid also has a 2GIG GC2 Firmware Updates Page that you can check out.

Tags: , , , , , ,

Comments


Posted By

We want to inform 2GIG Edge users, especially those who may install their own system, to a special warning put out by 2GIG. The warning identifies a potential wiring mistake that could result in permanent damage to the 2GIG Edge Alarm Panel. The entire warning put out by 2GIG can be seen here.


The 2GIG Edge receives primary power from the 2GIG AC1 Plug-In Transformer. This transformer is rated at 14VDC, 1.7A. You must add your own alarm wire to complete the connection. Since DC power is being used, proper polarity must be observed, both at the transformer and at the panel. At the transformer, the red wire should connect to positive (+) terminal, and the black wire should connect to the negative (-) terminal.

Then, at the panel, the red wire for positive (+) power should connect to the DC IN+ terminal. The black wire for negative (-) power should connect to the DC IN- Terminal. Or alternatively, if you are using a Honeywell LT-Cable, then you can simply plug the barrel connector in the DC IN Barrel Port. Following this process correctly will help ensure that you do not accidentally damage your 2GIG Edge.

Where the concern arises is that there are actually two (2) sets of terminal blocks on the 2GIG Edge Panel for connecting wires. And unfortunately, 2GIG didn't exactly make it super clear as to which set of labels goes with which terminal block. The best way to figure it out is in the fact that one set of terminal blocks is shorter than the other terminal block set. The set for providing power is the smaller terminal block with six (6) terminals, not the larger terminal block set with eight (8) terminals. You can see this in the image above.

The DC IN+ and DC IN- Terminals, along with the DC IN Barrel Port, are identified as the Power In Terminals. Those are the ports you want to use when providing power, whether you are using traditional alarm wire and you use DC IN+ and DC IN- (making sure to observe polarity) or you have a Honeywell LT-Cable and simply plug into the DC IN Barrel Port. If you do use DC IN+ and DC IN-, then make absolutely sure you are connecting to the terminal block with only six (6) terminals.

The potential problem arises in the other, larger terminal block with eight (8) terminals. This is known as the DCOUT+ Terminal Bock. And to make matters confusing the top two (2) wire terminals on this set have names that may make you think they are used for providing primary power to the system. But in reality, connecting primary system power here could seriously damage the system. These two (2) misleading wire terminals are labeled GND and AUX+, but these are output terminals.

Simply put, you do NOT want to use these terminals for providing system power. Again, the easiest way to avoid doing this is to make sure you are using the smaller terminal block with only six (6) wire terminals, NOT the larger terminal block with eight (8) wire terminals. Of course, if you use a Honeywell LT-Cable and the panel's DC IN Barrel Port, then this isn't really a potential hazard. There is only one barrel port and no way to mix it up.

The lesson of the day here is to be very careful when you are connecting power wires to the 2GIG Edge. Use the DC IN+ and DC IN- Terminals on the smaller block with six (6) terminals. The red positive (+) wire should go to DC IN+, and the black negative (-) wire should go to DC IN-. Or use a Honeywell LT-Cable and the DC IN Barrel Port. Do NOT use the GND and AUX+ Terminals on the larger block with eight (8) terminals. Making that mistake could potentially damage your 2GIG Edge System. Always be safe and smart, and make the correct wiring connections!

If you have any thoughts on the 2GIG Edge, or if you have any personal experience in wiring the system for power, then please feel free to share what you would like in a comment down below. We would love to hear from you! And remember to stay tuned to the Alarm Grid Blog for more tips and security news coming soon.

Tags: , , , , , , , , , , , , , , , , ,

Comments


Posted By

Alarm Grid is here with another video recap! This recap marks the return of Jorge to our videos after a long absence. Each video in this week's edition covers the 2GIG Edge, and we feel like we have some really helpful content to share with you. Anyway, let's get started with the video recap!

2GIG Edge: Activating on Alarm com

Jorge shows you how to activate the 2GIG Edge System with the Alarm.com service. Getting the 2GIG Edge set up with Alarm.com is an important part of getting the system monitored. All system alarms and other notifications are sent to the Alarm.com servers before being passed on to a central station and/or the end-user via text and/or email, depending upon the user's alarm monitoring plan. The 2GIG Edge comes ready to activate with Alarm.com using its built-in LTE cellular communicator. You can also set up optional IP connectivity using the panel's integrated WIFI card. Adding WIFI allows the use of the 2GIG Edge Remote Keypad as well as the Live Streaming feature for Alarm.com cameras.

2GIG Edge: Deleting a Zone

Jorge teaches you how to delete a zone on the 2GIG Edge. Zones are never really deleted from the 2GIG Edge. The system always has 100 wireless zones. But whether all of them are currently active or not is another story. When someone talks about "deleting" a zone, they mean clearing out the zone settings so that the zone can be used with a new sensor instead. This is normally done if you run out of zones and need to free one up, or if you simply want to stop using a sensor with the 2GIG Edge, or need to replace a sensor on the system.


2GIG Edge: Deleting Door/Window Sensors

I show you how to delete a door/window sensor from a 2GIG Edge. The process for deleting a door/window sensor from the Edge is the same as any other sensor type. You need to enter into zone programming, select the zone associated with the sensor you want to clear from the system, and then tell the Edge to reset that zone. The zone would then need to be reprogrammed from scratch in order to support the same sensor, or a new sensor programmed in its place. This could be another compatible door/window sensor, or any other type of compatible sensor.


2GIG Edge: Changing the Master Code

I show you how to change the Master Code on your 2GIG Edge Security System. The Master Code is the system's primary code for disarming, and also arming if Quick Arm is disabled. Changing this code is very important for security purposes, and it is one of the very first things you will do after getting the 2GIG Edge System. The 2GIG Edge default Master Code is 1111, and you will certainly want to change it to prevent a savvy intruder from trying that code to disarm your system.


2GIG Edge: Programming a Zone

Jorge shows you how to program a zone on your 2GIG Edge. Programming zones is an important task for setting up the system. This is the act of assigning sensors to empty system zone slots. You must configure the zone settings so that the system responds as intended when the sensor is faulted or activated. You will also set various settings for the zone, like its chime sound, whether or not RF supervision will be used, whether the system will report if the zone causes an alarm, and even the zone name.


2GIG Edge: Bypassing Zones

I teach you how to bypass zones on the 2GIG Edge. Bypassing zones is the act of telling the system to temporarily ignore specified zones so that they do not cause any system response when activated. Later, when you are ready to use the bypassed sensors again, you can then un-bypass them so that they are again used with the system like normal. This is a good alternative, and honestly much quicker and easier than having to delete zones entirely and then reprogram the zones from scratch.

Tags: , , , , , ,

Comments