Resideo Posts

Posted By

Update February 2024: We Won! For now, at least. LOL. It has been confirmed by Resideo and now a customer, that the weather is now working. This is on the older style Tuxedo Touch WIFI keypads. We have been fighting this fight to keep the weather going on these keypads. It took a while for Resideo to resolve this, and we appreciate everyone's input and patience. So go and enjoy it while you can.

For now, the weather, and hence the Sunrise/Sunset feature is working on older Tuxedo Touch WIFI keypads, but there is no guarantee that it will continue to work. Resideo never rescinded their original Technical Notice about discontinuation of this feature and if the weather feature stops working again, they will likely fall back on this notice to say that it is not meant to work.

Update November 2023: After daylight savings time ended on 11/5/2023, we received multiple reports of the weather no longer updating. We have reported this to Resideo and they are looking into the issue. We will continue to provide the most accurate information we have. We appreciate your patience in this matter.

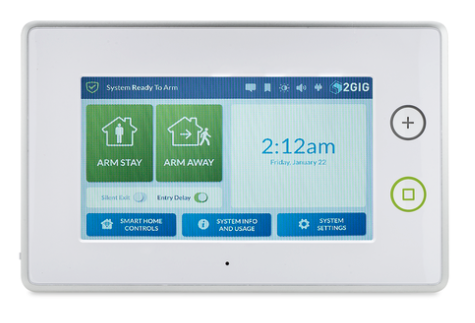
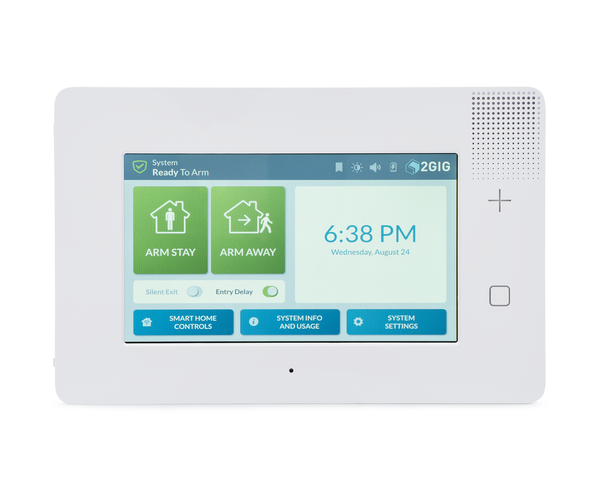
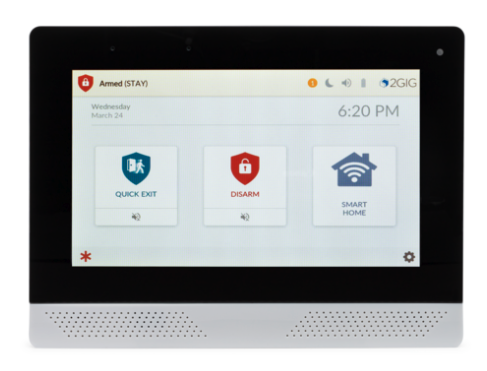
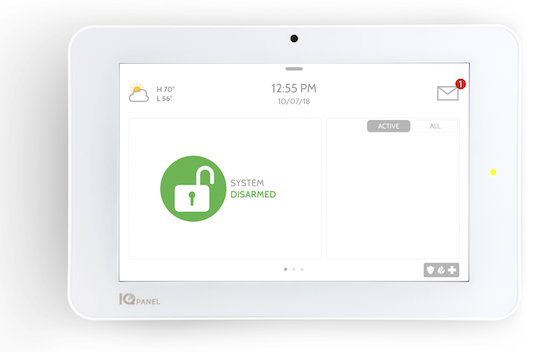
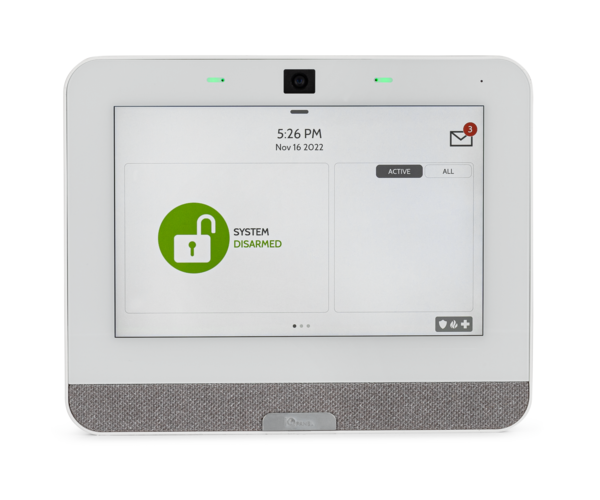
Update Christmas 2022: It appears the weather stopped updating on Tuxedo keypads once again around Christmas, 2022. However, it appears that as of January 3, 2023, it is back up and working again. This feature has been hit or miss for a while now, and officially, it's not supposed to be working. The last official word from Resideo was in September, 2021, where they said the older style Tux keypads would no longer support weather and only the newer Tuxedo keypads would support it. You can read that notice here.

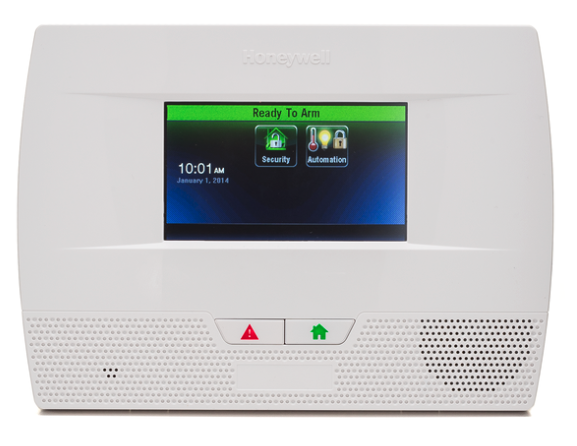
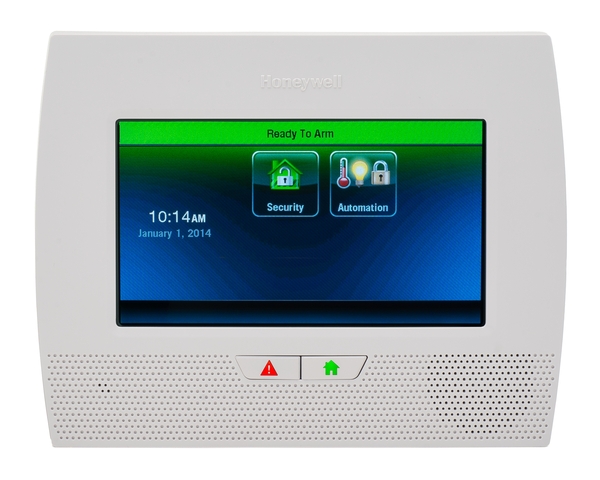
Newer style Tuxedo Keypad:


Older style Tuxedo Touch WIFI:


Update April 2022: Per Resideo, though this feature seems to be working again, it is not officially fixed until we receive a new Technical Bulletin from them saying that it is. For now, if your keypad is not displaying the weather, refresh the weather on the forecast page. Do this by pressing the refresh button in the lower-left corner of the forecast screen.

Update December 2021: This issue has been resolved and the weather feature is now working as expected again.

Original Post 09/09/21: For some time customers have been reporting issues with the weather feature on the TUXWIFI products from Resideo. Either the weather is blank, or it doesn't update properly. This week, Resideo released a technical bulletin advising that the TUXWIFI product line no longer supports weather.

Alarm Grid first reported on this issue in a blog back in April of this year. At that time, there was some hope that the issue would be resolved, but it appears that is not the case. The older Tuxedo Touch line, the TUXWIFIW the TUXWIFIS, and the VAM no longer support the weather feature or the Sunrise/Sunset programming feature as of October 31, 2021. Any scenes that were previously created using Sunrise or Sunset as a triggering event will no longer work. According to the notice, the issue has to do with the weather information provider that was originally used.

It should also be noted that these products have been discontinued by Resideo as of July 2020. That means that once stock of these items is depleted, they will no longer be available for sale. Customers interested in a new Tuxedo keypad should look to the Honeywell Home Tuxedo or the Resideo Tuxedo instead. The only difference between these two products is the branding on the front. The new, redesigned Tuxedo will continue to support the Weather Feature, including the Sunrise and Sunset scheduling option.

We know this is probably not the news those of you with one of these keypads, and who uses these features, wanted to hear. You can read the full technical notice from Resideo here. Tell us what you think in a comment below. One good thing is that pricing is much more reasonable on the newer Honeywell Home Tuxedo, than it was on the original TUXWIFI. So replacing an older model with a newer version won't be as painful as it would otherwise have been.

Tags: , , , , , , , ,

Comments


Posted By

Today, Resideo and Honeywell Home released Technical Notification #63. This bulletin describes a compatibility issue between some 6160RF keypads and the 5800WAVE and/or 5800RL. Keypad Date Codes D147 - E049 may be affected. Customers with the issue can return the keypad for a replacement.

The 6160RF is one of our most recommended products for those using a VISTA system. It solves two potential problems by providing both a programming (Alpha-Numeric) keypad, and a high-capacity transceiver. High-capacity means that as a receiver it can support as many wireless zones as the panel allows. Depending on the panel, this equates to as many as 249 wireless zones. As a transceiver, it can support all bi-directional 5800 Series devices. It does this using a House ID protocol in most instances.

The Honeywell 5800RL and the Honeywell 5800WAVE are two devices that receive status information from the panel through a transceiver using a House ID. The 5800RL is a wireless relay module with two relays. Relay A activates following the siren output of the panel. Any activity that causes the siren to sound will also cause the relay to activate. When the siren stops sounding, either because bell timeout has been reached, or because someone has disarmed, the relay goes back to its OFF position. The 5800RL is customarily used to add a high-current siren in a location where it is impossible to wire from the desired location all the way back to the panel. Relay B on the 5800RL follows the panel's arming state. This can be used to externally show the panel's armed status using an LED.

The 5800WAVE is a wireless siren. It also follows the panel's siren output. It provides an 85 dB alarm sounder in a location where a wired siren cannot be installed for any reason. It plugs into an AC outlet, and has its own battery for backup power. The problem described in the bulletin exists with only certain 6160RF keypads. These keypads fall within a particular date code range, and have a specific firmware version.

For the affected 6160RF keypads when used with the wireless siren or relay, the 5800RL Armed Status Relay (Relay B) may not provide the proper status. It may show Armed when the system is actually Disarmed, or vice versa. The 5800WAVE siren may also behave improperly, with the siren either continuing to sound when it should shut off or not sounding when it should. Remember, the issue is not with the 5800RL or the 5800WAVE, but with the 6160RF keypad.

To determine if you have a 6160RF keypad that is affected by this issue you need to check two (2) things. The date code of the 6160RF, and its firmware version. To check the date code you must open the keypad. Press in the two (2) locking tabs on the bottom edge of the keypad, then pull the front toward you. The Date Code should be either printed on the circuit board in black ink, or may be on a small white sticker on the board. It will be a letter followed by a 3-digit number. With the letter indicating the year of manufacture, and the number indicating the day of that year. The Date Codes to look for are: D147 - E049. This equates to May 26, 2020 through February 18, 2021. This is a date code range, so if your date code shows D226, then it is within the range. If it shows E037, it is within the range. If it shows D025 or E059, that is not within the affected range.

If you are using a 5800RL and/or a 5800WAVE with a 6160RF, and you are having issues like those described above, and you confirm that you have a keypad within the affected date code range, then you need to confirm the firmware version. Only keypads that fit the date code criteria and have Firmware Version 1.06 are affected by this particular issue. If you are having issues but with different products or with the same products within a different date code range, then you should troubleshoot with your alarm dealer or with Resideo technical support as a separate, unique issue.

However, if you need to confirm the firmware version of your 6160RF keypad, power down and back up. You can either power down the entire system (preferred), or just the keypad. In order to power down the keypad, you would need to remove the power wires at the keypad. To remove the wires at the keypad, you must remove the front as described above. Once the keypad has been taken apart, unscrew the red wire and remove it from the terminal. It is very important that the only thing this wire touches is the terminal you remove it from. Touching anything else with this wire could cause damage as it is a "live" wire. If you choose to power down the entire panel, you may need one person to perform the power cycle while the other person watches the 6160RF, depending on how far the keypad is from the transformer. Upon powering up, the keypad will display its version information. If it displays KeyPad Ver. 1.06, and all the other criteria above have also been met, then the keypad should be replaced.


If any of the criteria mentioned above are not met, if you aren't using a 5800WAVE and/or 5800RL, for example. If your keypad doesn't fall within the date code range, or if it does fall within the date code range, but the keypad firmware version is NOT version 1.06, then you do not need to replace the 6160RF. Only 6160RF devices that meet all of the above criteria should be replaced. In all other ways, the 6160RF keypad should behave as expected. If you would like to read the full Technical Notification, click here.

If you purchased a 6160RF from Alarm Grid and you are affected by this compatibility issue, please reach out to us by emailing support@alarmgrid.com. We will be happy to arrange a warranty replacement of your product once we confirm that the criteria are met. Remember that our support hours are Monday - Friday from 9 am - 8 pm Eastern Time.

Tags: , , , , , , , ,

Comments


Posted By

We're back again with four (4) more videos. We rejoin Jorge and Michael with videos on the 2GIG Edge and the Honeywell Home PROA7PLUS. Michael discussed the PROA7PLUS support for 5800 series sensors. Jorge provides several tutorials on the 2GIG Edge. Enjoy these videos from Alarm Grid.

Honeywell Home PROA7PLUS: Compatible with Honeywell 5800 Series Sensors

In this video, Michael from Alarm Grid discusses the Honeywell Home PROA7PLUS' support for Honeywell's legacy 5800 Series Wireless Lineup. In order for the panel to support these sensors, a Honeywell Home PROTAKEOVER module must be installed. This module allows the panel to support one (1) of five (5) legacy RF frequencies. Only one (1) PROTAKEOVER is supported per panel.


2GIG Edge: Compatibility With 2GIG Sensors

In this video, Jorge discusses the ability of the 2GIG Edge to support both encrypted and unencrypted 2GIG Sensors. It may seem as though it should go without saying that a 2GIG panel supports 2GIG Sensors, but with newer panels supporting encrypted sensors, and new sensor lineups, it's good to be 100% sure before making a purchase, particularly if you have existing 2GIG sensors installed. The 2GIG Edge supports all of the 2GIG sensors.


2GIG Edge: Z Wave Support

Jorge is back again to talk about how the 2GIG Edge supports Z-Wave devices. This panel has the most advanced version of Z-Wave currently available with the 700-Series Z-Wave Plus V2 chip onboard. When used with a commensurate 700-Series Z-Wave device, all of the great new features that are included in this latest version. Some of these features include S2 encryption for all Z-Wave Plus V2 certified devices as well as SmartStart and 128-bit AES encryption. You can see a comparison between all three Z-Wave versions here.

2GIG Edge: Default Master Code

Jorge really knows his stuff when it comes to the 2GIG Edge! Here he is talking about the default Master Code on the 2GIG Edge (1111) as well as information on how to change the Master Code and also what the default Installer Code is (1561). If you happen to be moving and leaving behind an alarm system, please check out this post that discusses proper etiquette when leaving behind an alarm system for a new home or business owner.


That's the recap, we hope these videos will help you with your alarm system. We look forward to feedback, if you have comments or suggestions drop us a comment in the space below. We're here Monday - Friday from 9 am - 8 pm Eastern. You can reach us via email at support@alarmgrid.com

Tags: , , , , , , , , , , , , ,

Comments


Posted By

We missed an opportunity to recap videos last week, but that just means we have more videos to cover this week. Six (6) today, with more to follow. Michael and Jorge share their knowledge of the 2GIG Edge and the Honeywell Home PROA7PLUS. Summer's almost over but wade in, the water's fine.

Honeywell Home PROA7PLUS: Resolve WIFI Connection Issues

In this video, Michael discusses the various reasons why the Honeywell Home PROA7PLUS might not connect to WIFI. Reasons can include range, environmental issues, and even bad equipment. In addition, there is a specific setting to watch out for on Ubiquiti Access Points. Having this setting enabled can prevent your Honeywell Home PROA7PLUS from connecting to WIFI.


2GIG Edge: What To Expect During AC Loss

During an AC Loss condition, the 2GIG Edge will go into power conservation mode. After a few seconds, the touchscreen will go dark and only illuminate when something occurs that needs to be displayed, or when a user touches the touchscreen. Jorge tells and shows users what to expect as normal behavior when an AC Loss condition occurs.


2GIG Edge: Powering Down Properly

Believe it or not, there is a right way to properly power down an alarm system. In this video Jorge will show you how to properly power down a 2GIG Edge alarm panel. Begin by removing the set screws, pulling the panel off its base then unplugging the battery. Next, unplug the transformer, either at the barrel connector on the panel side, or by unplugging the transformer from the wall. If you can't find the transformer, you can power down by turning power off at the breaker.


Qolsys IQ Remote: Behavior On a Partitioned System

In this video Michael shows you how the Qolsys IQ Remote behaves when it is used on a partitioned system. The IQ Remote will only display the status of the partition to which it is assigned. It will only allow the user to control the assigned partition as well, and only a user with a User Code that has been given access to the assigned partition will be able to interact with the system from the IQ Remote.


2GIG GC3e: Installing the XCVR3 GC3

Michael shows users how to install the 2GIG XCVR3-GC3 to the 2GIG GC3e panel. Unlike with the 2GIG GC2 panel, the installation of the 2GIG XCVR3-GC3 does not require that anything be removed from the GC3e panel first. This transceiver module simply adds 900 MHz 2-way communication capability between the GC3e and the 2GIG TS1 as well as the 2GIG Image Sensors.


Honeywell Home PROA7PLUS: Installing PROTAKEOVER

Michael shows users how to set the dial for legacy RF devices, and then properly install the Honeywell Home PROTAKEOVER module into a PROA7PLUS system. This module allows the PROA7PLUS to support one (1) of five (5) legacy RF frequencies. This allows the panel to support previously existing sensors from Honeywell or 2GIG 345 MHz sensors, existing Qolsys and/or Interlogix/GE 319.5 MHz sensors, DSC 433 MHz sensors, or Bosch 433 MHz sensors. This module allows a user to replace an older panel with the newer PROA7PLUS without having to replace all the existing wireless sensors that are still working.


Tags: , , , , , , , , , , , , , ,

Comments


Posted By

Frequent readers of our blog may remember from back in late March of this year that the Honeywell IPCAM-WOC1, also called the Lyric OC1, was discontinued without replacement. However, we may soon be reversing that statement, as we have heard that the outdoor camera may soon return!

If you are not familiar with the Honeywell IPCAM-WOC1, it is an outdoor security camera that is used with the Total Connect 2.0 interactive security notification and automation platform. It was quite shocking to us when the camera was discontinued, as it left no outdoor camera available for use with the TC2 platform. Nevertheless, we reported the news, and we even mentioned that it left the door open for a new camera to be revealed at ISC West 2021.

However, Resideo experts have stated that the Honeywell IPCAM-WOC1 was never really discontinued completely, and it was actually just being made temporarily unavailable due to supply issues. Once Resideo resolves the supply issues, the Honeywell IPCAM-WOC1 will supposedly be making a triumphant return. According to insider sources, such a return would not happen until September. It's still a couple months away, but a return might be a reality!

Please understand though, this is just a rumor at this time, albeit one with some very credible sources. We have also heard from our inside sources that it's possible that the Honeywell IPCAM-WOC1 may return as an updated model, with perhaps even a different part number. This would make sense, as the IPCAM-WOC1 was known for being a somewhat quirky device. An update to improve its performance upon return would certainly be appreciated.

We don't have much else to say about a possible return of the Honeywell IPCAM-WOC1. But we absolutely want a marketable and reliable outdoor camera for use with Total Connect 2.0. On that ground, we will be totally thrilled with a resurrection of the IPCAM-WOC1 Camera, especially if it comes as an updated model with more reliable performance. Resideo needs every resource they can get to complete with the Alarm.com Cameras, so this would be a good start.

Of course, we will keep you updated as we learn more about the Honeywell IPCAM-WOC1, so make sure to keep checking our blog for more information. And don't forget to leave a comment down below with your thoughts. We would love to know what you think of the Honeywell IPCAM-WOC1 Outdoor Camera and whether or not you would be interested in buying one if it makes its return. As always, we will return soon with more security news and updates, so make sure to stay posted!

Tags: , , , , ,

Comments


Posted By

It's time for our weekly video recap, this time covering releases from Monday and Tuesday of last week. We only have four (4) new videos for now, but we promise there are many more on the way. This week's releases all feature myself, and they cover the Honeywell Home PROA7PLUS. Let's begin!

Honeywell Home PROA7PLUS: Add a Z-Wave Device

I show you how to add a Z-Wave device to a Honeywell Home PROA7PLUS. The PROA7PLUS has a built-in module called the PROWIFIZW that provides the system with both WIFI and Z-Wave control. Paired Z-Wave devices can be controlled from the panel, and remotely from Total Connect 2.0 if the system is monitored with a plan that includes automation services. You can also use TC2 to create smart scenes for your Z-Wave devices so that they activate automatically based on a schedule or with system events.

Honeywell Home PROA7PLUS: Remove a Z-Wave Device

I show you how to remove a Z-Wave device from a Honeywell Home PROA7PLUS. Removing a device clears out its Z-Wave network data so that it can be paired with a new network. That is why you typically remove, or clear, a Z-Wave device before you attempt the pairing process when adding it to the network. This is done even if a Z-Wave device is brand-new, as many Z-Wave devices have residual network data leftover from factory testing.


Honeywell Home PROA7PLUS: Adding a Z-Wave Lock

I show you how to pair a Z-Wave door lock with a Honeywell Home PROA7PLUS. Like all other Z-Wave devices, a Z-Wave lock is paired with the PROA7PLUS by putting the system into its Z-Wave pairing mode and then activating the inclusion/exclusion function on the lock. For best results, it is advised that you clear the lock from the network before attempting to pair it. Most Z-Wave locks have a button that is used for inclusion/exclusion, or they require you to enter in a specific pairing command code using a push-button or touchscreen keypad.

Honeywell Home PROA7PLUS: Resolve WIFI Connection Issues

I explain some of the reasons why a Honeywell Home PROA7PLUS may be experiencing WIFI connection issues. One reason is that the password for the WIFI network may have been entered incorrectly. Another reason is that you are using a Ubiquiti Access Point (AP) with the PROA7PLUS, and you have the Auto-Optimize feature turned ON for the Ubiquiti device. Lastly, there could be something wrong with the PROWIFIZW module inside the PROA7PLUS, and it may need to be replaced.

Tags: , , , , , , , , ,

Comments


Posted By

We have a quick and easy tip for those using Z-Wave locks with Honeywell and Resideo ProSeries Panels like the Honeywell Home PROA7PLUS. You can have your panel user code pushed down to your Z-Wave lock, and you can also have your system automatically disarm when you enter that code into the lock.

Setting this feature up will offer some great convenience in your life. You can imagine walking up to your home, entering your panel code into your Z-Wave lock, the door unlocking, and then your system disarming, without you needing to interact with the panel at all, and then going about your day. We'll show you how to make it happen.

You can set this feature up for any panel code that you have programmed on your ProSeries System. Begin from the main screen, and choose the three (3) horizontal bars button at the bottom, followed by Settings, then User Management. Enter your Master Code (default 1234, but usually changed) or your Installer Code (default 4112) to get in. Then select the user with the code you want to use at the lock. Scroll down to Z-Wave Lock Control, and you can choose one of the following three (3) options:

  • None - Turns the feature off
  • Sync User Code to Lock - The code will be pushed to the lock so that you can unlock using the code.
  • Sync User Code to Lock & Disarm - The "money" option! The code will be pushed to the lock so that you can unlock using the code, AND the ProSeries System will disarm when you enter the code and unlock the lock!

Just choose the option that you want for that code (you know which one we recommend), and then press the black Save button in the upper-right corner. You will need to provide the system's Master Code to confirm the change, and then you're all set! We can't state enough how cool this feature is, so take advantage of it!


But before you go and make your life more convenient, why not make your life more EXCITING by leaving a comment on the Alarm Grid Blog? Let us know what you think of the feature. Have you tried it out before? Are you going to test it now. Do you need to buy a Z-Wave lock first? How about the Yale YRD226? We think that's a handsome lock, and it will look great in your residence. We promise! Anyway, stay tuned for more great content like this on the Alarm Grid Blog, coming soon!

Tags: , , , , , , , , , , ,

Comments


Posted By

We have a quick tip today for users setting up Notifications on Total Connect 2.0, specifically regarding Notification Triggers for IP cameras. The HD cameras offer a much more diverse selection of Notification Triggers than legacy cameras, which have "Video Events" as their only option.

If you are not familiar with Total Connect 2.0 Text and Email Notifications, then the term "Notification Triggers" is used to identify the action(s) that cause text and/or email alerts to be sent to designated users. In the case of security cameras, you will likely want to be notified if your camera records a video clip. That way, you will know to check out the clip and make sure that everything is alright.

However, the selection of Notification Triggers is much wider if you are working with an HD camera versus and older legacy camera. For an HD camera, you can choose specific types of video captures for notifications, while leaving other types of video captures off the trigger list so that you aren't necessarily notified for every type of camera recording. For instance, you might want to be notified if your camera records a clip for an alarm event or due to detecting motion, but not if your camera begins recording due to sound-based detection.

Note the available selections in the list below. You can pick and choose which of these notifications you want to use with your Total Connect 2.0 HD camera, and which ones you do not. If you choose all eight (8), then it will essentially serve as the greyed out "Video Events" option, which is the only viable option when using legacy cameras.


But as you will notice for legacy cameras, only "Video Events" can be selected as the Notification Trigger. This is pretty much a cover-all option that includes all the individually selectable options that you would have for an HD camera. In other words, if you want to set up Notifications for any legacy cameras, then you will have to make it so that any and all camera activity will trigger a notification. For that reason, it is extra important that you adjust the sensitivity levels for your legacy cameras so that you aren't bombarded by alerts!


For reference, the only HD cameras used with Total Connect 2.0 are the Honeywell IPCAM-WIC1, the Honeywell IPCAM-WIC2, and the discontinued Honeywell IPCAM-WOC1. All other IP cameras used with TC2 are legacy devices. There is hope and speculation that Resideo (formerly Honeywell) will unveil some new HD cameras at upcoming ISC West 2021, but that is a story for another time.

This doesn't mean that if you mix and match legacy and HD cameras on a single TC2 account that you are restricted to "Video Events" for your Notification Triggers. You can create separate sets of notifications as needed so that you have fully customized alerts for your HD cameras, plus the "Video Events" Notifications set up for your legacy cameras.

Don't forget that Total Connect 2.0 allows you to have up to eight (8) HD cameras per account, plus a maximum of six (6) legacy cameras. You may want to refer to this helpful FAQ for more information on Total Connect 2.0 Clip Limits. We know that it can be a bit confusing regarding all the separate rules for HD vs legacy cameras on Total Connect 2.0, so definitely refer to that guide if you need a refresher!

Also, make sure to read our complete guide to setting up Total Connect 2.0 Notifications. That will show you exactly how to create TC2 Notifications the way you want so that you and those around you are properly alerted to events and activity on your security system, which includes any security cameras you have set up. Don't forget to leave a comment down below with your thoughts on Total Connect 2.0 Notifications and Alerts. We're very interested to hear what you have to say. And remember to stay tuned to the Alarm Grid Blog for more security content, news, and tips coming soon!

Tags: , , , , , , , , , , , , , , , , , , , , , ,

Comments


Posted By

Alarm Grid is happy to announce that the Honeywell Home PROSIXRPTR Wireless Repeater is now available for purchase. The wireless repeater works with Honeywell Home and Resideo PROSIX Sensors and Honeywell SiX Sensors used with the ProSeries Security Panels, including the PROA7PLUS.

If you aren't familiar with wireless repeaters, these devices effectively double the range of compatible wireless sensors. This works by taking the wireless signal sent out from a wireless sensor and sending it out a second time, thereby effectively repeating the signal and doubling the sensor's range, assuming that the repeater module is placed strategically. The PROSIXRPTR is the first wireless repeater released from Resideo since the Honeywell 5800RP Wireless Repeater which is used to repeat the wireless signals of Honeywell 5800 Sensors. The new PROSIXRPTR is also the first-ever encrypted wireless repeater released by Resideo. Up to two (2) PROSIXRPTR devices can be used with a ProSeries System, with each repeater being placed in a different direction from a centralized ProSeries Panel.

There's a lot to take in with the PROSIXRPTR, so we'll do our best to cover everything here. The first thing we want to note is that the PROSIXRPTR is not a "plug-and-play" device, as you may be accustomed to with most wireless repeaters. In other words, the PROSIXRPTR will not begin repeating wireless signals until it is enrolled with a ProSeries Panel. These panels include the aforementioned PROA7PLUS, the Resideo PROA7PLUSC, the Resideo PROA7C, and the Honeywell Home PROA7. Any ProSeries Alarm System in need of a PROSIXRPTR Wireless Repeater must be on at least Firmware Version 3.591.92.0, which you can read about in greater detail here. The reason why the PROSIXRPTR needs to be enrolled with the alarm panel is because it is interacting with encrypted signals, and it needs to know sensitive network information to do its job successfully. Although you can have two (2) different PROSIXRPTR modules paired with a single ProSeries Panel, the two units will not communicate or "talk with" each other in anyway, and you cannot use a "series" setup to "triple" the range by having a sensor signal bounce off of one PROSIXRPTR to another PROSIXRPTR on its way to the panel. The PROSIX or SiX wireless signal will only be recognized by a single PROSIXRPTR, it will get repeated once, and will then end up at the ProSeries alarm panel.

There are other limitations affecting the PROSIXRPTR Repeater that should be discussed. While the unit can repeat SiX Sensors used with a ProSeries Alarm Panel on a high enough firmware version, the PROSIXRPTR cannot repeat the signals for SiX Series Sensors used on a Honeywell Lyric Security System. Remember, the PROSIXRPTR must enroll with the panel it is being used with. The unit has no way of integrating with the Lyric, and it cannot repeat wireless SiX Series signals used with that system. Unfortunately, Resideo never released a repeater for the Lyric and SiX Sensors, so that is just a limitation that Lyric users will have to live with, at least for now. The PROSIXRPTR also cannot repeat the signals of any legacy sensors that are being used with the Honeywell Home PROTAKEOVER Module. There are various legacy wireless repeaters available, so please reach out to us at support@alarmgrid.com during our usual 9am to 8pm ET M-F business hours if you need help figuring out which one to get for your alarm system.

One other thing we want to note with the PROSIXRPTR is that while it comes with its own transformer and backup battery, it does not come with any cabling for connecting the transformer. Make sure you have some around when you go to set it up. The unit supports a wire run of up to fifty (50) feet (~15.2 meters) when using 18 AWG cabling, and the maximum distance goes down if thinner cabling is used, so make sure to observe the permitted wire runs. Alarm Grid offers alarm wiring on its website if you need some. We even offer 10 ft., 15 ft., and 25 ft., pre-cut lengths of 22 gauge, 4-conductor wire. Or, you should be able to find some at your local hardware store. You can also use a Honeywell LT-Cable if you don't want to prepare your own wiring.

The PROSIXRPTR can be purchased on our website now! Please email us if you have any questions. Also, don't forget to leave a comment down below to share your thoughts on this new unit. We would love to hear what you have to say. And of course, keep paying close attention to the Alarm Grid Blog if you want to hear the latest security news, tips, and product releases. We'll be back soon, so stay posted!

Tags: , , , , , , , , , , , , , , , ,

Comments


Posted By

Alarm Grid is proud to offer a pair of new accessories for Honeywell Home PROSIXMINI2 Door and Window Sensors. We have 10-packs of replacement covers available in Brown (MINIBRNPK) and Black (MINIBLKPK), and 10-packs of replacement magnets, also in Brown (MINIMAGBRN) and Black (MINIMAGBLK).

If you aren't familiar with the Honeywell Home PROSIXMINI2, it is one of the leading door and window sensors for the Honeywell Home and Resideo ProSeries Alarm Panels. The sensor is known for its compact size of 2.9"L x 1.15"W x 0.75"D (73.66mm x 29.21mm x 19.05mm), its long-lasting battery life of at least 7 years, and its extended wireless range of more than 500 feet in an open-air environment. Like all PROSIX Series Sensors, the PROSIXMINI2 uses 128-bit AES encryption for advanced wireless security and protection.

Normally, the PROSIXMINI2 is only available in a White color option. Many users find this a bit disappointing, as the surface-mounted sensor will stick out very noticeably on darker brown or black doors and windows. With these replaceable covers and magnets, you can make a PROSIXMINI2 Sensor and its accompanying magnet Brown or Black in color. This can be very nice for achieving a more aesthetically pleasing installation. Just keep in mind that these replacement covers and magnets do not include any actual PROSIXMINI2 Sensors. These are just Brown and Black covers for existing PROSIXMINI2 devices and replacement magnets that can be used instead of the stock White magnets that are bundled with PROSIXMINI2 Door and Window Sensors.

Each replacement cover includes three (3) parts. These are the front cover for the sensor, the front cover of the magnet, and the back casing for the magnet. The back casing is basically the magnet's "backplate", as it is the portion that you mount to the door or window frame using either screws or some double-sided foam tape adhesive. All you have to do is remove the existing stock White front sensor, and replace it with the new Brown or Black cover. Then just do the same for the magnet's front cover and back casing.

Meanwhile, the replacement magnets are just like the original White stock magnets, only in a different color option. They can be split into three (3) components, those being the mounted backplate, the actual magnet inside, and the front cover that makes up most of the magnet's appearance. For best results, the magnet should be placed on the moving portion of the door or window, directly next to the main sensor on the door or window frame. When the door or window is opened, the magnet will separate from the sensor, thereby releasing the sensor's internal reed switch. This will cause the sensor to send a fault signal to the ProSeries Alarm Panel and trigger a system response. When installing, remember to observe the sensor's maximum magnet spacing gap of 1.15" (29.21mm) on non-metal surfaces. Please note that while the magnet is specifically designed for use with PROSIXMINI2 Sensors, it could really be used with any surface-mounted door and window sensor that is of a similar size. To see all the replacement magnets offered by Alarm Grid, please check out this page.

At this time, we are only offering 10-packs of the Brown and Black replacement covers, as well as 10-packs of the Brown and Black replacement magnets. We are not offering single PROSIXMINI2 Replacement Covers or single PROSIXMINI2 Replacement Magnets at this time. This may be something we would consider offering in the future, but for now, these accessories can only be purchased in quantities of ten (10). Additionally, we are also not offering Brown or Black variants of the PROSIXMINI2 Sensor at this time. If you want one of these sensors in a Brown or Black color option, the best solution we can currently offer is to get a PROSIXMINI2 in the regular White variant, and then get a 10-pack of replacement covers in the desired color. Of course, this will leave you with nine (9) extra sets of covers, so it may not be exactly ideal, but it is still a viable option nonetheless.

Do you think you will use these Brown and Black sensor covers and magnets in your home or business. And what do you think of the PROSIXMINI2 Sensor in general? Please share your thoughts in a comment down below. And don't forget to keep checking the Alarm Grid Blog for more security news, product updates, and helpful tips and tricks for getting the most out of your alarm system coming soon!

Tags: , , , , , , , ,

Comments