Alarm Grid Tips : Keypad Lockout Feature on Lyric System
PostedIf you own a Lyric system and have not already done so, please read this important update regarding AlarmNet360 changes that affect your panel. It may be time for an update!
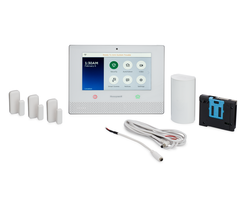
Hi DIYers! Today, we're going to present a helpful tip for Lyric users. Some of our customers have inadvertently discovered the Keypad Tamper Lockout feature on their Resideo Lyric Systems. We want to tell you about this feature and help prevent you from being locked out of your system.

We actually just released an FAQ the other day that explains this feature in full detail. You can read it at this link if you want to. But for now, we will cover some of the basics of the feature and how it applies to you. The Lyric Keypad Tamper Lockout feature stops the system from accepting any numeric key inputs (0-9) for 15 minutes whenever thirty (30) numeric keys are entered in a 15 minute period, without ever executing a valid command. Any further numeric key inputs during this 15 minute period will result in a long error tone.
Basically, if you are at your Lyric System, and you repeatedly try (unsuccessfully) to enter a valid code, then the Lyric will no longer allow you to keep trying. The purpose of this feature is to prevent someone from using brute force to try and access the system. While the feature can lead to frustration if you ever accidentally lock yourself out, it is an important safety measure to prevent an intruder from ever getting into your system.
Obviously, locking out an intruder is a good thing. But unfortunately, some users may find themselves in the same boat. This often happens because a user swears that they remember their code, when they really do not. They will keep trying to enter the same incorrect code. And once they reach 30 incorrect inputs without entering a valid command, they will become locked out. The user will not be able to try again until 15 minutes have passed. Or until the system has been reset via a complete power cycle.
Another common reason for this to happen is because of a misunderstanding of the Guest Code. The Guest Code is only able to disarm the system when it was the code used to arm the system in the first place. A user may give the Guest Code to someone, arm the system with their usual Master Code, and then expect that individual to disarm the system with the Guest Code later. The visitor will try (repeatedly) to disarm using the Guest Code, without success. And they will inevitably find themselves locked out with the tell-tale long error tone.
Unfortunately, there is no way to disable the feature. It's just something you have to accept with the Lyric System. How can you prevent yourself from being locked out? It's simple. Just make sure you remember your code! If you enter the correct code within 30 inputs, then you won't become locked out. And if you think that you might have trouble remembering a code, you can always use a key fob or Total Connect 2.0 to disarm your system instead. It's also worth mentioning that key fobs and TC2 will STILL WORK if you have activated the Keypad Lockout feature.
If you want to learn more about this feature, you can always check out the FAQ we mentioned earlier. We also invite you to email us at support@alarmgrid.com with any further questions you might have. Remember, we offer free support for all monitored customers. We look forward to hearing from you!