One feature on the Qolsys IQ Panel 2 Plus that we have never discussed before is the Smart Start feature. This feature is used for conveniently enrolling compatible smart home automation devices by scanning a QR code. It is a nice alternative to the traditional inclusion process.

The Smart Start feature was quietly included back in Qolsys IQ Panel 2 System Firmware Version 2.4.0. As it is a relatively minor feature, it was largely overlooked, and we never covered it in great detail. If your Qolsys IQ Panel 2 Plus had System Firmware Version 2.4.0 or higher installed when it was brand-new, then it already has the Smart Start feature. If the system was running a lower firmware version when brand-new, then you need to upgrade the Z-Wave firmware for the system to unlock the feature. Upgrading the system firmware will not automatically update the Z-Wave firmware and provide access to the Smart Start feature. We wrote a comprehensive FAQ on upgrading the Z-Wave firmware on a Qolsys IQ Panel 2 Plus, which you can view here.
The required Z-Wave firmware version for using the Smart Start feature on the Qolsys IQ Panel 2 is Z-Wave Firmware Version 6.81.03. In addition to providing access to the Smart Start feature, upgrading to this Z-Wave firmware version will also upgrade the Z-Wave security protocol for the system to S2. This protocol is more advanced and offers better security than the Z-Wave security protocol previously used with the system. You won't notice any real changes with the S2 protocol, but it is still a nice addition.
UPDATE: Qolsys has identified issues affecting IQ Panel 2 Z-Wave Firmware Version 6.81.03. They are currently working on a new Z-Wave firmware version to fix these issues. But as of July 2020, the new Z-Wave firmware version is not yet available.
Before we continue any further, we do want to stress that updating the Z-Wave firmware for an IQ Panel 2 System is completely, 100%, optional. This isn't nearly as important as updating the system firmware to the latest version. We mention this fact because updating the system's Z-Wave firmware often requires clearing all of the Z-Wave devices from the network and then re-adding them once the update is complete. This can be extremely inconvenient if you have a large Z-Wave network. And since all you're really doing here is gaining access to the Smart Start feature and making a slight improvement to the security for your automation network, we totally understand if you just decide to skip this process. Also note that you can attempt the updating process without clearing your Z-Wave network first. It's just that this may result in errors that can only be solved by ultimately clearing the network and then re-adding the devices. You should only clear the network and re-add the devices if devices that were working fine previously are later giving you issues after the update.
Note: We have noticed issues when using the August Smart Lock Pro with a Qolsys IQ Panel 2 System running a Z-Wave Firmware Version of 6.81.03. If you intend on using the August Smart Lock Pro with a Qolsys IQ Panel 2, then do NOT upgrade the panel Z-Wave firmware! This is expected to be fixed in a future Z-Wave firmware release.
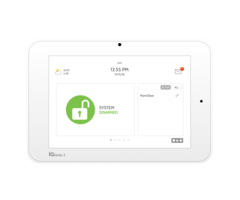
If we haven't scared you away yet, let's take a look at the feature! Once your IQ Panel 2 is running a high enough Z-Wave firmware version, you will find the SMART START icon within the Z-Wave Devices Menu of Installer Programming. This menu is accessed by clicking the small grey bar at the top of the main screen and choosing Settings > Advanced Settings > enter Installer Code (default 1111) > Installation > Devices > Z-Wave Devices > SMART START.
Choosing SMART START will cause the panel to pull up the front camera for the IQ Panel 2. There will be a red square inside which you will position the QR code for the device. The QR code can be found either on the device itself or on its packaging. Simply position the QR code inside the red box, and the system will begin scanning.

Once the scan is successful, powering up the Z-Wave device will complete the setup process automatically. And just like that, you have saved yourself the trouble of performing the traditional exclusion/inclusion process for adding a new Z-Wave device. Petty cool!
At this time, the list of devices that can be added in this way is still very small. Here is the current list of devices that we know work with the feature:
For even more information regarding the Qolsys IQ Panel 2 Plus Smart Start feature, we strongly recommend checking out this comprehensive FAQ we wrote on the feature. It will tell you pretty much everything you would want to know about using Smart Start on the IQ Panel 2.
If you have any additional questions about the Smart Start feature or the Qolsys IQ Panel 2 Plus, including the system's Z-Wave firmware version, please email us at support@alarmgrid.com. This email is also great if you want to contact us about starting monitoring service. Our team checks email from 9am to 8pm ET M-F. We look forward to hearing from you!

 If you aren't familiar with the FF345, it is a


 There are many names for this rising practice. Some companies will call it "Do-It-Together" or "Do-It-With-Me" as an alternative to "Do-It-Yourself". But it's all the same principle. And it isn't anything new, even if other companies want you to believe that they are being innovative. Alarm Grid has been proudly offering DIY monitoring solutions since 2012. And only a very small handful of other companies have been providing similar solutions for the past several years. It wasn't until this "new normal" that DIY security even became the standard model.


 In the revised TSB, Qolsys suggests first changing the system