August 2019 Archives

Posted By

Back in February, a tragedy occurred. A man accidentally left his vehicle running in his garage. He went to bed with his dog by his side. The next morning, the man was found dead in his bed. His dog was seizing on the floor and later died. The cause of death was carbon monoxide poisoning.

2gig co3 wireless carbon monoxide co detector

Carbon monoxide (CO) is an odorless and tasteless gas that kills hundreds of people every single year. Most casualties caused by carbon monoxide occur without the individual realizing they are being affected before it is too late. The gas can render people and pets unconscious without them even realizing what is happening. If no help is provided, then it is likely that they will never wake up.

When people think of carbon monoxide deaths, they usually think of incidents that occur during the winter months when heaters are commonly used to heat buildings. But not every CO-related death is caused by a faulty heating system. Incidents like the one that occurred in February happen more often then they should. And they can be easily prevented with carbon monoxide detectors.

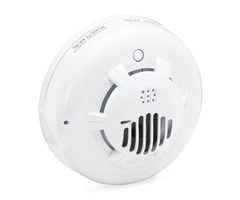
A CO detector will activate upon detecting unusually high levels of carbon monoxide gas. This is typically before CO concentrations reach lethal levels. At Alarm Grid, we specialize in carbon monoxide detectors that will alert a security system upon activation. Once activated, the system will immediately go into a carbon monoxide alarm. This will involve activating the system's sounder or siren so that everyone inside the building is alerted.

If you have alarm monitoring service, then action will be taken as soon as a carbon monoxide alarm is received. A central station operator is required to request emergency dispatch for any CO alarm that comes through. In addition, they attempt to contact the premises to make certain any occupants are aware that a Carbon Monoxide alarm has been triggered. Rescuers will be on the way to save anyone inside the building. With a quick response, most CO-related deaths can be prevented.

Users with self-monitoring service will receive text, email, and/or push notifications from Total Connect 2.0 or Alarm.com to let them know that a carbon monoxide alarm has occurred. This way, they will know not to enter the building and to request help from the local fire department. To learn more about alarm monitoring, check our alarm monitoring page.

It never hurts to be proactive and get your home or business prepared for a carbon monoxide outbreak. The decision may ultimately save your life and the lives of others. If you need help choosing carbon monoxide sensors, we encourage you to reach out to us. The best way to contact us is to email support@alarmgrid.com with any questions you might have. You can also call us at (888) 818-7728 during our normal business hours of 9am to 8pm EST M-F. We look forward to hearing from you.

Tags: , , , ,

Comments


Posted By

Hi DIYers! Resideo has updated the Total Connect 2.0 Mobile App for Android devices. The update fixes the time and date issues that some users were experiencing with SkyBell devices. It also improves the registration process for SkyBell Doorbells and provides general stability improvements.

Skybell dbcam hd video doorbell

The latest TC2 Android update is Version 5.9.3.304. With this update, the time and date for any SkyBell video should now be correct when accessed using the TC2 Mobile App for Android. Before, some users were reporting that SkyBell videos showed the incorrect time and date when accessed from an Android device. This issue has since been resolved.

Additionally, the latest update now makes it possible to register new and existing SkyBell devices from within the Android app. Users should now find it easier to register their SkyBell devices using the TC2 Mobile App for Android. The update also includes various stability fixes to make the app run smoother.

SkyBell Video Doorbell Cameras make for a great addition to any Total Connect 2.0 account. These are high-definition doorbell cameras that allow you to see exactly what is going on in front of your house at any time. You can easily access your SkyBell device and the rest of your security system through your TC2 account. Any SkyBell Clip can be viewed for up to seven (7) days from TC2, and you can store up to 400 clips per month. Check this FAQ for more information.

It is also possible to have TC2 send you an alert any time your SkyBell detects movement, or when someone rings your doorbell. This is great for knowing exactly who is at your door so that you only get up if it is important. For example, you might want to know if your unexpected visitor is your friend, or just some door-to-door sales person who isn't worth your attention. You can also use it to scare off a potential intruder who is standing outside your door. This can be done from anywhere using the app!

You do not even need a video monitoring plan to get started with a SkyBell Video DoorBell. You can use it with any monitoring plan that supports Total Connect 2.0. Getting started is super easy. Just follow the integration guide we have posted on our website. Remember that you can only have one (1) SkyBell device per TC2 account. More information can be found here.

You can easily apply this update from the Google Play Store on your Android device. Just open the Google Play Store App, and search "Total Connect 2.0". Find the TC2 app, and click "Update". You will then begin downloading the updated version. If you have any questions about this update or about SkyBell or TC2 in general, please email us at support@alarmgrid.com. We look forward to hearing from you!

Tags: , , , , , , ,

Comments


Posted By

Hi DIYers! We are happy to announce that the first 2GIG Encrypted Sensors are available on our site. The lineup includes two contacts, a motion, a key fob, and a glass break. Anyone with a 2GIG GC2e or 2GIG GC3e System will absolutely want to make use of these powerful new sensors.


The new 2GIG eSeries Encrypted Sensors represent perhaps the biggest selling point of the new 2GIG Alarm Systems. These sensors are designed exclusively for use with the 2GIG GC2e and 2GIG GC3e. When enrolled, they will make use of encryption in all their wireless communication. This makes these sensors virtually impervious to any wireless hacking or takeover attempts. This is the best way to ensure that your system is always protected.

It is important to note that you cannot bring these sensors over to the older 2GIG Go!Control GC2 and 2GIG GC3 Systems and expect them to work as non-encrypted wireless sensors. These new sensors can only be utilized as encrypted devices on the GC2e and GC3e Systems. However, you can bring over the older 2GIG Sensors and the Honeywell 5800 Sensors and use them with the GC2e and GC3e as standard 345 MHz sensors.

With that out of the way, let's start checking out the new encrypted sensors!

2GIG DW10e


The 2GIG DW10e is a surface-mounted door and window contact sensor. It offers a super thin profile, with dimensions of 2.59"L x 1.03"W x 0.49"D. This makes the sensor practically invisible when mounted flat on a white surface. There are two programmable loops for the DW10e. One loop will have the sensor operate as a standard contact with a reed switch. The other loop allows you to connect a single Normally Closed (NC) hardwired contact to the DW10e and have it communicate with the panel wirelessly.

2GIG DW20e


The 2GIG DW20e is a recessed door and window contact that is perfect for users who want to achieve a more aesthetically pleasing installation. The sensor and its accompanying magnet need to be inserted into holes that are drilled into the door or window and its frame. The only way to see the sensor after installation is to look at the door or window frame from the side when the door or window is already opened. The DW20e has an impressive 450-foot wireless range when used with direct line of sight.

2GIG PIR1e


The 2GIG PIR1e is a wireless PIR motion detection sensor. The device works by looking for the changes in IR energy that occur with movement. It uses a quad-element PIR sensor for superb reliability. The trustworthy and reliable motion detecting sensor offers a coverage area of 30' by 50'. This is perfect for a home or small business. There are three different sensitivity settings you can choose from. When used on low sensitivity, the device will provide pet immunity for small animals weighing up to 55 pounds.

2GIG GB1e


The 2GIG GB1e is a wireless glass break sensor. The device will effectively monitor plate, tempered, and sealed insulating glass that measures between 1/8 and 1/4 of an inch thick. The sensor listens for both the low-pitched "thud" of an object striking the glass and the higher-pitched "shattering" of the glass itself. This dual-detection process helps to ensure that false alarms do not occur. It is great for monitoring windows for forced entry, but it can also be used with protective glass casings that display products.

2GIG KEY2e


The 2GIG KEY2e is a wireless 4-button key fob that gives you a convenient way to control your GC2e or GC3e while you are on-site. There are dedicated buttons for Arming Away, Arming Stay, Disarming, and activating a relay device. You can also program a dual-button press of the top two buttons (Arm Away and Disarm) to trigger an instant panic. Any button must be held down for a full 2 seconds for the command to go through. This helps to prevent accidental inputs. It has a wireless range of 350 feet.

If you have questions about any of these new 2GIG eSeries Sensors or the 2GIG GC2e and GC3e, or if you just want to learn more about our monitoring service, please reach out to us! We are here to make sure you get the perfect equipment for your needs. The best way to contact us is always to email support@alarmgrid.com. If you want to speak by phone, you can reach us at (888) 818-7728 during our regular business hours of 9am to 8pm EST. We look forward to hearing from you!

Tags: , , , , , , , , , , , , , , ,

Comments


Posted By

Hi DIYers! We are happy to announce that there are new firmware updates available for the Qolsys IQ Panel 2 Plus and the 2GIG GC3e & GC3 Systems. Qolsys users can apply the firmware update locally at the panel. 2GIG users can apply from USB or have it pushed from Alarm.com for a small fee.

Qolsys iq panel 2 at and t wireless security system with at and

2gig gc3 diy wireless security system w slash 7 screen

Qolsys IQ Panel 2 Plus Version 2.3.4

Starting with the Qolsys IQ Panel 2 Plus, Firmware Update 2.3.4 is now available. This is a relatively minor upgrade to the system that improves recognition of the PowerG daughterboard for supporting wireless PowerG Sensors. Although you can technically apply this update to an original Qolsys IQ Panel 2 System, it won't make a difference, because that system does not have a PowerG daughtercard. Since you can apply this update locally at the panel, there is no fee required to receive this update. Remember, your system must be actively monitored and connected with Alarm.com for the update to go through.

In order to apply this update, you must have your Qolsys IQ Panel 2 Plus connected to WIFI. The panel should be plugged into AC power, and it should not have a low-battery condition. To begin, start from the main screen of the system. Press the small grey bar at the top of the screen. Choose Settings > Advanced Settings> Installer Code (default 1111) > Upgrade Software > Patch Tag > enter iqpanel2.3.4 > OK > Upgrade Using Network. The system should begin downloading the update. Once the download is complete, the update will be applied. This process should take about five (5) minutes. The panel will reboot at this time. The process is complete after the reboot finishes.


2GIG GC3e & GC3 Firmware Version 3.2.3

The 2GIG GC3e System just became available very recently. This Firmware Update Version 3.2.3 is a great way to get your new GC3e System up and running. Additionally, existing users of the original 2GIG GC3 System can also apply this same update. The update provides support for the new AT&T LTE Communicator (coming soon!) and allows for 6-digit user codes with both the panel and compatible Z-Wave locks. It also provides various fixes and helps the system run smoother overall. It is recommended that every GC3e and GC3 user receives this update so that they can continue to get the most out of their system.

The easiest way to receive Firmware Version 3.2.3 is to simply have it pushed down from Alarm.com. To do this, the system must have an Alarm.com Cellular Communicator installed and activated. You must contact your alarm company and ask them to push the update. There will be a small fee for this service. If you don't have Alarm.com, you can get more information on our monitoring page. The latest update can also be applied directly at the panel. To do this, you must download the update file onto a USB flash drive and insert the drive into the panel. You will then be able to apply the update locally at no cost. More information on this process can be found in this helpful FAQ. Although that FAQ is specific to the original 2GIG GC3 System, the 2GIG GC3e will follow the same process. Remember, there is no cost required to update via USB.


Alarm grid inside security stickers

If you have questions about either of these firmware updates, or if you would like to learn more about our monitoring services, please reach out to us! The best way to contact us is always to email support@alarmgrid.com. We will check your email at our earliest convenience and reply back as soon as possible. You may also call us at (888) 818-7728 during our normal business hours of 9am to 8pm EST M-F. We look forward to hearing from you and answering your questions!

Tags: , , , , , , , , , , , ,

Comments


Posted By

Hi DIYers! We have a small video recap this week. Our video team was on vacation for most of the week, but we put up three (3) new videos on Tuesday, August 6th. We have two (2) from Joe and one (1) from Jorge. We hope you are excited to check them out! Let's take a look our newest videos!

Carbon Monoxide Detector Functionality

Joe explains how carbon monoxide sensors for security systems are used. These life-safety devices will alert the alarm control panel whenever there is an outbreak of potentially lethal CO gas. This gas is odorless and tasteless, and it kills hundreds of people every single year. We recommend placing carbon monoxide sensors outside of bedrooms, in hallways, and in large central areas like living rooms. You should have at least one (1) CO detector on each floor of the building.


Features Included With an Alarm.com Video Plan

Jorge talks about the features that come included with an Alarm.com video plan. By using Alarm.com for video monitoring, you can view clips from Alarm.com and download them for permanent use. Alarm Grid provides 3,000 monthly clips and 3,000 total clips for any customer with Alarm.com video monitoring. We also provide complimentary Video Analytics at no extra charge. Additional monthly and total clips are available for an added fee. To use video monitoring with Alarm.com, you need a Platinum Plan or a Video-Only Plan.


Error Code 103 On a VISTA Alarm System

Joe discusses the Check 103 Error Code on a Honeywell VISTA System. The Check 103 message will be displayed on an Alphanumeric Keypad when there is a problem with the system's cellular communicator. There are many reasons why a Check 103 error might be displayed. Some possible causes can be a loose tamper cover on the communicator, the panel being unable to recognize the communicator, or the communicator not being registered with AlarmNet. Please note that a Fixed-English Keypad will display the message bF instead for "backup failure".

Tags: , , , ,

Comments


Posted By

It can be very suspicious if a salesperson comes to your home. They might be up to no good and possibly misrepresenting a company. One Maryland woman experienced this first-hand when a mysterious individual claiming to represent a smart home company knocked on her door late at night.


Thankfully, the woman in that situation knew not to trust a suspicious character. But if she hadn't been vigilant and on her toes, things could have ended a lot differently. We're not saying that every person who comes to your home is there to cause trouble. But this is a good reminder that there is danger lurking out there. Always use common sense, and don't trust anyone who you aren't sure about. If something rubs you the wrong way or you feel uncomfortable, report your findings to the local authorities.

We cannot speak for other security and smart home companies, but Alarm Grid will never send anyone out to your home. We do not have any field technicians or door-to-door sales representatives. If anyone ever visits your home unsolicited claiming to represent Alarm Grid, it is a scam. And you should always be cautious if anyone from any company comes to your home without prior notice. We want to make sure that you stay protected at all times, but you must do your part as well.

If you want added security for your home, you might look into getting a doorbell camera or general security cameras for your alarm system. We offer monitoring plans for all situations and needs. You can always email us at support@alarmgrid.com if you have any questions. Our team is here to help you every step of the way. We look forward to hearing from you and helping you keep your home safe.

Tags:

Comments


Posted By

Hi DIYers! We have exciting news today, as the Honeywell LTE-IA for VISTA Series Panels is now available! This has been eagerly anticipated by VISTA users with strong service from the AT&T LTE Network. We are sure that many of you will want to take advantage of this great new communicator!

Honeywell vista 20p wired alarm control panel

As a dual-path communicator, the Honeywell LTE-IA can send signals thorough both a local IP network and a cellular network. It uses a hardwired ethernet connection for IP service, and it works across the AT&T LTE Network for cellular service. The communicator will use IP as its primary path, and cellular will serve as the backup.

Being able to connect with the AT&T LTE Network is the best feature of this communicator. AT&T has stated that they will support their LTE network well into the very distant future. The network will remain in-service even as newer networks like 5G are made available many years from now. AT&T invested huge amounts of money into their LTE infrastructure. Their LTE network is not going anywhere anytime soon. The result is that this communicator will keep your VISTA Panel monitored in the long-run.

The importance of reliable cellular backup cannot be stressed enough. Internet outages, and it is highly likely that your system will need to rely on its cellular connection at some point or another. As long as the cellular path is still available, your VISTA System will remain connected with the AlarmNet360 Servers. This means that you will still be able to take advantage of all the great features from Total Connect 2.0.

Speaking of Total Connect 2.0, a proper AlarmNet Communicator like the Honeywell LTE-IA is required if you want to use this service. If you didn't know, TC2 is an interactive monitoring and automation platform that you can access from anywhere. This is possible using the Total Connect 2.0 Mobile App on Android and iOS devices.

By accessing TC2, you can arm and disarm your system, check its status, control Z-Wave devices (Tuxedo Touch or VAM required), view TC2 Cameras (video plan needed), and more. All you need is a compatible Honeywell System with an AlarmNet Communicator, and an appropriate alarm monitoring plan.

For the VISTA P-Series Panels, the VISTA 15P, VISTA 20P, and VISTA 21iP can all support TC2. There are just some firmware requirements you need to keep in mind. A 15P or 20P must be running firmware 9.12 or higher. A 21iP must be running firmware 3.13 or higher. If you aren't sure of the firmware, just check the PROM Chip. This is a small black chip on the panel's main board. It will have a code that begins with the letters "WA". This code will tell you the firmware version.

If you find that the PROM Chip is not high enough, don't worry! We sell new 15P PROM Chips, 20P PROM Chips, and 21iP PROM Chips. Just be aware that a 15P or 20P System will need to be at least firmware 2.0 or higher to receive a PROM Chip upgrade. Any VISTA 21iP can receive a PROM Chip upgrade.

To replace the PROM Chip, start by powering down the panel by disconnecting the backup battery and unplugging the transformer. Carefully pry off the old PROM Chip with the metal end of a binder clip. Then apply the new one by putting it in the same place and pressing it down until it clicks. Just be careful not to bend the metal prongs on the new PROM Chip! You can then power up your system by plugging the transformer back in and reconnecting the backup battery.

If you actually have better service from the Verizon LTE Network than the AT&T LTE Network, you should also know that a similar Verizon LTE Dual-Path Communicator called the Honeywell LTE-IV has been available for quite some time. Remember, the service provider for your alarm system has nothing to do with the service provider for your phone. Just go with whichever service works best in your area, regardless of which service you use for your smartphone.

If you have any questions about the Honeywell LTE-IA, please reach out to us. The best way to contact us is to email support@alarmgrid.com. Another option is to call us during our normal business hours of 9am to 8pm EST M-F at (888) 818-7728. We look forward to hearing from you!

Tags: , , , , , , ,

Comments


Posted By

Hi DIYers! We are pleased to announce that the Interlogix Simon XTi-5i is now available for purchase from the Alarm Grid website. This is a capable wireless panel, all available at an affordable price. It is perfect for homes and small businesses looking for an effective security solution.


Although the Simon XTi-5i is considered a "budget" alarm system, it still offers the same great performance you would expect out of any modern alarm system. The system is essentially an upgrade over the current Simon XTi-5, but it has been revamped to enhance the end user experience. The 5" full-color touchscreen has been improved from the older models, and it feels more satisfying to control. We tested the touchscreen at ISC West 2019, and we gotta say, it's a major improvement.

New to the Simon XTi-5i is the ability to adjust the user interface (UI). You can have the color schemes for the system menus match those from Alarm.com. You will get the same great orange and white color scheme for the Simon XTi-5i as what you have on Alarm.com. This should help you feel more comfortable, whether you are controlling your system from the panel or from the Alarm.com Mobile App on Android and iOS devices. By using the mobile app, you can access your system from almost anywhere!

In order to access Alarm.com, you will need an Alarm.com Communicator. Both LTE cellular and dual-path options are available. Getting your Simon XTi-5i connected with Alarm.com will provide you with the most reliable alarm monitoring service possible. You will also be able to access Alarm.com through the mobile app to control your system in a variety of ways. This includes arming and disarming, checking system status, controlling Z-Wave devices, viewing Alarm.com Cameras, and more. Please note that you will need a Self Gold Plan or higher from Alarm Grid to access Alarm.com, and a Self Platinum level plan or higher is required for remote viewing of Alarm.com cameras. More information can be found on our alarm monitoring page.

The Simon XTi-5i will actually support the same communicators as all of the previous Simon Panels. We recommend using one of the following communicators:

Each of these communicators also doubles as a perfectly functional Z-Wave controller. This will allow you to start building a complete smart home network of Z-Wave devices. You can create scenes to have your Z-Wave devices activate automatically with certain system events or on a set schedule. This can definitely help you save money on energy costs and make your life more convenient. There are all sorts of Z-Wave devices you can add, including lights, locks, thermostats, water valves, and more!

In addition to a better touchscreen and revamped menus, the Interlogix Simon XTi-5i also packs some more power under the cover. The zone count has doubled up to 80 wireless zones. This is perfect for virtually any home or any small to medium sized business. You can even use two (2) hardwired Normally Closed (NC) contacts with the system and connect them to the main board. Just be aware that these hardwired contact sensors will still cut into the maximum 80 zone limit.

As far as sensor support goes, the Simon XTi-5i facilitates the same great 319.5 MHz sensors that its predecessors supported. This includes the wireless sensors from Interlogix and Qolsys. You can also use the Qolsys S-Line Sensors with the system, though they will not utilize encryption with the Simon XTi-5i. If you want encrypted sensors for the system, you will have to wait for the exclusive lineup of Interlogix Encrypted Sensors, which should be made available soon. It is unknown which form of encryption these sensors will utilize, but it is expected that they will work exclusively with the Interlogix Simon XTi-5i System.

You can now purchase the Interlogix Simon XTi-5i from Alarm Grid! If you have any questions about this exciting new system, please reach out to us! The best way to contact us is to email support@alarmgrid.com. We will check your email at our earliest convenience and respond back as soon as possible. If you prefer to call us, you can reach us at (888) 818-7728 during our regular business hours of 9am to 8pm EST M-F. We look forward to hearing from you and telling you all about this great new panel!

Tags: , , , , , , , , , , , , ,

Comments


Posted By

Hi DIYers! We have learned about a super convenient feature for Total Connect 2.0. You can now set smart scenes on Total Connect 2.0 to have your Lyric Arm or Disarm automatically based on a set schedule. This was previously only possible for Alarm.com users. TC2 users rejoice!

Honeywell lyric controller encrypted wireless security system

This feature is extremely convenient if you want to have your Resideo Lyric Panel Arm or Disarm at a set time on a regular basis. You can select both the day(s) of the week and the time of the day when the Arm or Disarm will occur. If your system is already Armed or Disarmed accordingly, then no change will occur. Otherwise, the scene will go through automatically, with no code being required.

Please note that this feature is only available for the Lyric Controller. It will not work with other Honeywell Panels that can use Total Connect 2.0 like the VISTA Panels or the LYNX Touch Panels. If you want to use this feature with TC2, then you will need to upgrade to the Lyric System. This is a great system anyway with its increased zone support and HomeKit compatibility. You might also consider going with an Alarm.com System, as the Alarm.com platform supports this feature for all their compatible panels. A great option is the 345 MHz version of the IQ Panel 2 Plus, which can support the same great 5800 Series Sensors that are commonly used with LYNX and VISTA Panels.

Users who follow a set routine every day should find that this feature is extremely useful. For example, if you go to work at the same time Monday thru Friday, you can set the system to Arm automatically shortly after the time you leave every day. You won't have to remember to Arm your system before you leave. Likewise, you can also have your system automatically Disarm a little before you normally return home. No more racing to beat your system's Entry Delay! Another example is if your kids leave the house after you do, and they sometimes forget to arm the system, you can set an arming schedule to run just after they are set to leave to be sure the system arms.

And if you ever want to make sure that your system Armed or Disarmed like it was supposed to, you can always check the Total Connect 2.0 Mobile App on your Android or iOS device. The app is also a great way to Arm and Disarm your system, and you can use it from pretty much anywhere. Another option available to make sure the system is Armed or Disarmed is to create Open (Disarm) and Close (Arm) notifications that will be sent via text, email, or push notification any time the system is armed or disarmed. We are sure that many of you will love automatic Arming and Disarming for your Lyric from Total Connect 2.0.

For our example, we will show you how to set up automatic Arming and Disarming from a web browser. But you should also have no problem doing this from the mobile app. To get started, login to your TC2 account on the website. Once you have logged-in, click "Scenes" on the left side of the page.


Then click the "Add Scene" button at the top of the screen.


Then give a name for your scene. We recommend choosing something easy to remember, like "Automatic Arm Away" or "Automatic Disarm". In our example, we just went with "Test Arm Stay". Then press the blue Continue button in the lower-right corner. When asked what you want the scene to do, choose Security. Then choose the status you want to put your system in when the scene activates. In our example, we choose "Arm Stay". Then press the blue Continue button in the lower-right corner.


Assuming that you only want the scene to Arm or Disarm your system, press the blue Continue button again. You will then be able to set the schedule for the scene. Start by pressing the "On a recurring schedule" button near the top.


And now you will set the schedule. You can choose multiple days of the week and the time. You can also choose to have the scene occur at Sunrise and/or Sunset on the selected days. For our test example, we set the scene to occur Monday thru Friday at 11:00am. Press the blue Continue button after making your selection.


Finally, press the blue Save button in the lower-right corner to save your new scene!


If you ever want to run the scene manually, you can press the Play button next to the scene. Otherwise, in our example, the scene will run automatically at 11:00am M-F if the system is Disarmed at the time. Once the scene runs, the system will automatically go into Arm Stay mode. If the system is already Armed at 11:00am M-F, then nothing will happen. The picture below shows the play button if you wanted to run the scene manually.


Remember that you will need to create separate scenes if you want to have your Lyric System both Arm and Disarm automatically at separate times. Also keep in mind that you can only do this on TC2 if you have a Resideo Lyric Controller. If you don't have a Lyric yet, now is a great time to upgrade to this powerful wireless security system.

If you have any questions about this feature, please reach out to us! We are happy to provide technical support for Alarm Grid monitored customers. The best way to reach us is to email support@alarmgrid.com. If you would prefer to call us, you can reach us at (888) 818-7728 during our regular business hours of 9am to 8pm Monday thru Friday. We look forward to hearing from you!

Tags: , , , , ,

Comments


Posted By

Hi DIYers! It's time for our weekly video recap. We have a great batch of videos for you all today. Our technicians Joe, Jarrett, and Jorge will all help you learn how to use your alarm systems and get the most out of your equipment. Let's check out the latest videos from the team.

Alarm grid inside security stickers

Adding Wired Motion Detectors to the VISTA 20P

Joe teaches users how to add wired motion detection sensors to a Resideo VISTA 20P System. Hardwired motion sensors will use a 4-wire connection, with two (2) wires being used for the zone input, and two (2) wires being used for power. Most hardwired motion sensors use a Normally Closed (NC) wiring configuration, meaning that they are wired in Series. However, there are some Form C motion sensors that can use a Normally Open (NO) wiring configuration for wiring in parallel.


Troubleshooting a Low Battery Condition on a VISTA Panel

Joe explains how to troubleshoot a low battery condition on a Resideo VISTA Alarm Panel. You will need a voltmeter to do this. The first step is to check the AC voltage. You should expect to see about 18 to 19 volts on a 16.5VAC transformer. Next, check the Auxiliary Power. You should see a reading of 13 volts or higher. Finally, you should check the charging voltage. This should be the same as the auxiliary power voltage.


Adding a 2-Wire Smoke to the Qolsys Hardwire 16-F

Joe teaches users how to add 2-wire smoke detectors to a Qolsys Hardwire 16-F. Any 2-wire smoke detectors used with the Hardwire 16-F must be connected at Zone 16. You must wire the smoke detector(s), plus any other sensors used with the module, before enrolling the Hardwire 16-F with the panel. This lets the module know the proper configuration for each zone. The 2-wire smoke detectors will use Normally Open (NO) wiring. Most burglary devices use Normally Closed (NC) wiring. CO detectors cannot be used with the Hardwire 16-F. You will also need 4.7k resistors at each zone.


Turning Off "Arm Confirm" in a Qolsys IQ Panel 2 Plus

Jorge explains how you cannot turn off the Arm Confirm feature on a Qolsys IQ Panel 2 Plus System. The Arm Confirm feature has the panel produce a loud tone when the system is Armed Away using a key fob or wireless keypad. The purpose of this tone is to make sure that the user knows that they have set their system to Arm Away and that they should exit the premises. Unfortunately, you cannot turn off the Arm Confirm feature on the IQ Panel 2 Plus System because it does not exist.


Arm Away Vs. Arm Maximum

Jarrett discusses the difference between the Arm Away and Arm Maximum modes. When you Arm Maximum, you are telling your system to ignore all of the Entry Delay Periods on your system. This means that if you open an Entry/Exit Zone while the system is set to Arm Maximum, then an immediate alarm will occur. If you are outside the building, you will need to disarm using a key fob or an interactive platform like Total Connect 2.0 or Alarm.com.

Tags: , , , , ,

Comments