Honeywell 5834-4 Posts

Posted By

A great way to build out your Honeywell Lyric is with Honeywell 5800 Sensors. These are simple, 345 MHz wireless sensors that you can easily enroll with the system for security, life-safety, and environmental monitoring. They are perfect for expanding your system and making it more robust.

Honeywell lyric controller encrypted wireless security system

When you want to pair a Honeywell 5800 Sensor with the Lyric, the process is very straightforward. Put the Lyric in its auto-enrollment mode by choosing Security > Tools > enter Installer Code (default 4112) > Program > Zones > Add New > Serial Number. Make sure the RF Type on the right-hand side is set to 5800. Then activate the sensor either by faulting it or triggering its cover tamper switch. The Lyric should beep to confirm that it received a signal transmission. Then activate the sensor a second time to have the Lyric display the Serial Number. The third activation will confirm the Serial Number and return you to the screen where you can configure the zone settings.


Programming the zone settings for the sensor is actually quite simple. Depending on how you enrolled the sensor, you may need to adjust the Loop Number. This is almost always the case if you enrolled the sensor by activating its tamper switch. Refer to the instruction manual for the 5800 Sensor to determine which Loop Number to use.

The two (2) Zone Descriptors and the Device Type serve as the name for the sensor. You should choose a name that will help you identify the sensor, e.g. "Front Bedroom Motion Sensor", "South Hallway Door", etc. The Response Type determines how the system responds when the sensor is faulted. See our list of Lyric Response Types for more info.

Alarm Report should be set to Yes if you want the system to report out through AlarmNet to a Central Station if the zone causes an alarm on the system. That is an essential component of alarm monitoring services. Chime is optional, and it has the panel emit any one of several available sounds when the zone is faulted. Supervision tells the panel to look for an RF check-in signal from the sensor periodically to ensure that it is online. Click Save in the bottom-right after you finish adjusting the settings.


Keep in mind that only uni-directional (one-way) sensors from the Honeywell 5800 Series can be used with the Lyric. This leaves out bi-directional devices like the Honeywell 5800WAVE Siren, the Honeywell 5828 Keypad, and the Honeywell 5800RL Relay Module, so make sure you do not buy those for the Lyric. But you still have a lot of excellent sensors and security devices to choose from.

Below is a list of the Honeywell 5800 Sensors that you can use with the Honeywell Lyric:

Sensor Name
Notes
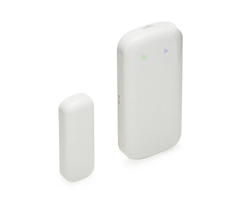
Honeywell 5800MINI
Honeywell 5800mini interior wireless door and window sensor
Door/Window sensor. Uses Loop 1.
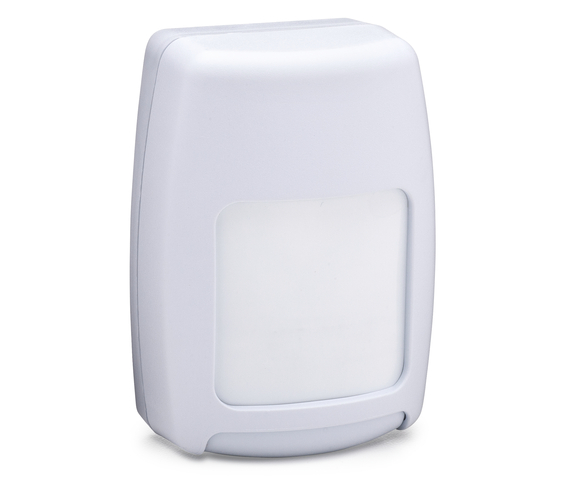
Honeywell 5800PIR-RES
Honeywell 5800pir res wireless pet immune motion detector close up
PIR motion sensor. Uses Loop 1.
Coverage Area: 35' x 40'
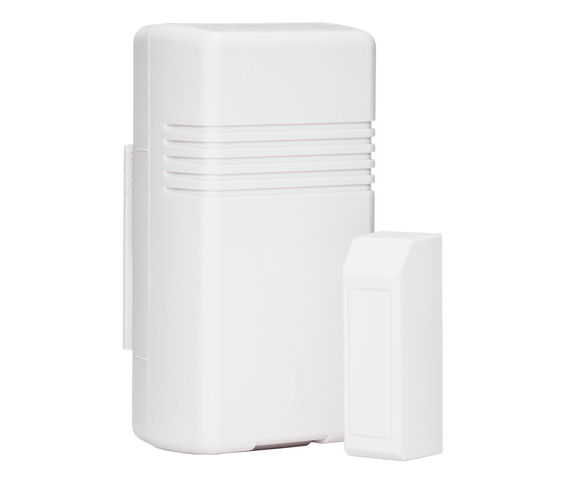
Honeywell 5816
Honeywell 5816 wireless door window sensor
Door and window sensor.
Loop 1 = Terminal Block for NC Contact
Loop 2 = Reed Switch
Honeywell 5811
Honeywell 5811 wireless wafer thin door and window sensor
Door and window sensor. Uses Loop 1.
Honeywell 5800C2W
Honeywell 5800c2w hardwire to wireless system 9 zone conversion module
9-zone wired to wireless converter. Allows hardwired sensors to communicate with the Lyric as wireless devices. All zones use Loop 1 and a unique Serial Number ID.
Honeywell 5800CO
Honeywell 5800co wireless carbon monoxide detector
Carbon monoxide sensor.
Loop 1 = CO Detection
Loop 2 = End of Sensor Life (separate programming only required on TURBO and other V-Plex panels)
Honeywell 5800COMBO
Honeywell 5800combo smoke heat and co detector
Combination, smoke, heat, CO, and low-temperature sensor. Uses up to five (5) zones on the Lyric Panel. Has two (2) Serial Numbers for enrollment purposes.
Loop 1, SN 1 = Smoke/Heat Detection
Loop 2, SN 1 = Smoke/Heat Maintenance
Loop 3, SN 1 = Low Temperature Detection
Loop 1, SN 2 = CO Detection
Loop 2, SN 2 = End of Sensor Life (separate programming required only on TURBO and other V-Plex panels)
Honeywell 5800FLOOD
Honeywell 5800flood wireless flood and temperature sensor
Flood and temperature sensor.
Loop 1 = Low Temperature Detection
Loop 2 = High Temperature Detection
Loop 3 = Flood Detection
Honeywell 5800MICRA
Honeywell 5800micra wireless recessed window contact
Recessed window sensor. Uses Loop 1.
Honeywell 5800PIR
Honeywell 5800pir exterior of wireless motion detector
PIR motion sensor.
Loop 1 = Low Sensitivity Motion.
Loop 2 = High Sensitivity Motion.
Loop 3 = Low Temperature Detection
Coverage Area: 35' x 40'
Honeywell 5800PIR-COM
Honeywell 5800pir com exterior of wireless long range motion det
Commercial PIR motion sensor.
Loop 1 = Low Sensitivity Motion
Loop 2 = High Sensitivity Motion
Loop 3 = Low Temperature Detection
Coverage Area: 60' x 80'
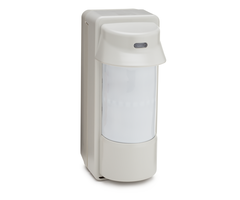
Honeywell 5800PIR-OD
Honeywell 5800pir od wireless outdoor motion detector exterior
Outdoor PIR motion sensor. Uses Loop 1.
Honeywell 5800PIR-OD2
Outdoor PIR motion sensor. Uses Loop 1.
Honeywell 5800RP
Honeywell 5800rp wireless repeater
Wireless repeater for Honeywell 5800 Sensors. Does not require enrollment, but can be assigned a single zone for RF supervision, low-battery, AC loss, and RF jam detection. This is done using Serial Number 1 with Loop 1, with DIP Switch 2 set in the OFF position. Can also use up to four (4) separate zones for supervision when DIP Switch 2 is set to ON. This is required for UL installations.
Honeywell 5800RPS
Honeywell 5800rps wireless recessed door and window plunger sens
Recessed door/window sensor. Uses Loop 1.
Honeywell 5800SS1
Honeywell 5800ss1 exterior of wireless shock sensor
Shock sensor. Uses Loop 1.
Honeywell 5802MN
Honeywell 5802 wireless panic button
Medical alert button. Uses Loop 1.
Honeywell 5802MN2
Honeywell 5802mn2 wireless dual button medical alert
Medical alert button. Uses Loop 1.
Honeywell 5802WXT
Honeywell 5802wxt wireless panic button
Panic button. Uses Loop 1.
Honeywell 5802WXT-2
Honeywell 5802wxt 2 wireless dual button medical alert
Panic button. Uses Loop 1.
Honeywell 5806W3
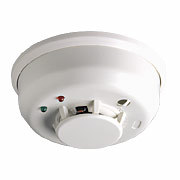
Honeywell 5806w3 wireless smoke detector
Smoke detector. Uses Loop 1.
Honeywell 5808W3
Honeywell 5808w3 wireless smoke and heat detector
Smoke and heat detector.
Loop 1 = Smoke & Heat Detection
Loop 3 = Low Temperature Detection
Honeywell 5809
Honeywell 5809 wireless heat detector
Fixed temperature and rate-of-rise heat detector. Uses Loop 1. Alarm occurs when the temperature exceeds 135 degrees Fahrenheit, or when the temperature rises more than 15 degrees Fahrenheit per minute.
Honeywell 5809FXT
Honeywell 5809 wireless heat detector
Fixed temperature heat detector. Uses Loop 1. Alarm occurs when the temperature exceeds 135 degrees Fahrenheit.
Honeywell 5809SS
Honeywell 5809ss wireless fixed temperature slash ror heat detec
Fixed temperature and rate-of-rise heat detector. Uses Loop 1. Alarm occurs at 135 degrees Fahrenheit or when the temperature rises more than 15 degrees Fahrenheit per minute.
Honeywell 5814
Honeywell 5814 wireless small door sensor and window sensor
Door and window sensor. Uses Loop 1.
Honeywell 5815
Honeywell 5815 white wireless aesthetic door sensor and window s
Door and window sensor.
Loop 1 = Terminal Block for NC Contact
Loop 2 = Reed Switch
Honeywell 5816MN
Honeywell 5816mn wireless mini door sensor and window sensor
Door and window sensor.
Loop 1 = Terminal Block for NC Contact
Loop 2 = Reed Switches
Honeywell 5816OD
Honeywell 5816od wireless outdoor door and window sensor top
Outdoor door and window sensor.
Loop 1 = Terminal Block for NC Contact
Loop 2 = Reed Switch
Honeywell 5817
Honeywell 5817 wireless three zone sensor
Three (3) zone door and window sensor & transmitter.
Loop 1 = NC or NO (DIP Switch Selectable) unsupervised. It does not use an End of Line Resistor (EOLR)
Loop 2, 3 = NC Only. Both are unsupervised with no EOLR used
Honeywell 5817CBXT
Honeywell 5817cb wireless commercial sensor
Three (3) zone commercial transmitter.
Loop 1 = Two (2) Terminals; Primary Loop supervised by 470k Ohm (yellow, purple, yellow, gold) EOLR. Resistor must ALWAYS be installed, even if Loop 1 is not programmed. If Loop 1 is used as a burglary zone, then Loop 4 must be programmed as a separate zone for Cover Tamper protection.
Loop 2 = NC Reed Switch
Loop 3 = Two (2) Terminals; NC Loop unsupervised, no EOLR required
Honeywell 5817XT
Honeywell 5817xt three zone universal transmitter
Three (3) zone door and window sensor & transmitter.
Loop 1 = NC or NO (DIP Switch Selectable) unsupervised with no EOLR required
Loop 2, 3 = Two (2) Terminal Blocks, NC Only
Honeywell 5818MNL
Honeywell 5818mnl wireless recessed door sensor and window senso
Recessed door and window sensor. Uses Loop 1. Not suitable for use in metal doors
Honeywell 5819
Honeywell 5819 wireless shock processor and sensor
Three (3) zone shock processor.
Loop 1 = NC for Inertia Style External Shock Sensor. This input provides a suitable fast loop response of from 1ms to 20ms, based on dip switch setting
Loop 2 = Reed Switch
Loop 3 = NC for Wired Contact, unsupervised with no EOLR required
Honeywell 5819S
Honeywell 5819s wireless shock sensor and transmitter
Shock sensor and contact sensor.
Loop 1 = Built-in Inertia Style Shock Sensor
Loop 2 = Reed Switch
Loop 3 = NC for Wired Contact
Honeywell 5819WHS
Honeywell 5819whs wireless transmitter with integrated shock sen
Three (3) zone shock processor.
Loop 1 = NC, Built-in Inertia Style Shock Sensor
Loop 2 = Reed Switch
Loop 3 = NC for Wired Contact
Honeywell 5820L
Honeywell 5820l super slim wireless door and window sensor
Slimline door and window sensor. Uses Loop 1.
Honeywell 5822T
Honeywell 5822t wireless garage tilt sensor
Garage tilt sensor.
Loop 1 = NC for Wired Contact, unsupervised, no EOLR used
Loop 3 = Tilt Switch
Honeywell 5834-2
Honeywell 5834 2 wireless 2 button security key fob
Two (2) button key fob. Dual-button inputs allowed. Uses three (3) loops total, for a possible three (3) inputs. Can only be used with the Lyric in Low-Security Mode (Green LED)
Honeywell 5834-4
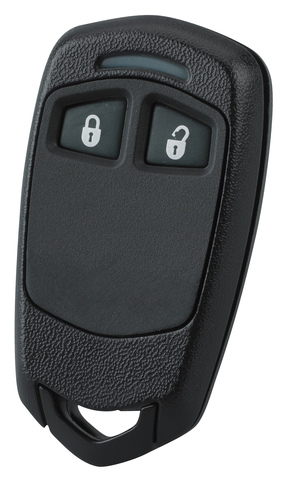
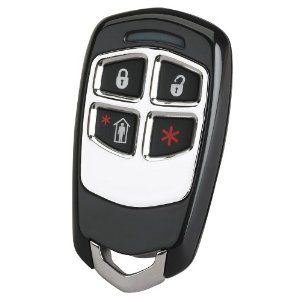
Honeywell 5834 4 wireless 4 button security key fob for honeywell security systems
Four (4) button key fob. Dual-button inputs allowed. Uses two (2) Serial Numbers, which both use Loops 1, 2, 3, 4. Up to eight (8) inputs possible. Can only be used with the Lyric in Low-Security Mode (Green LED)
Honeywell 5834-4EN
Honeywell 5834 4en wireless enhanced 4 button security key fob
Four (4) button key fob. Dual-button inputs allowed. Uses two (2) Serial Numbers, which both use Loops 1, 2, 3, 4. Up to eight (8) inputs possible. Can only be used with the Lyric in Low-Security Mode (Green LED)
Honeywell 5853
Honeywell 5853 wireless glass break detector exterior
Glass break sensor. Uses Loop 1.
Honeywell 5869
Honeywell 5869 wireless commercial panic switch
Commercial panic switch. Uses Loop 1. Latches when tripped, key (provided) needed to reset it after it is tripped
Honeywell 5878
Honeywell 5878 wireless remote alarm keypad
Six (6) button key fob. Uses two (2) Serial Numbers, which both use Loops 1, 2, 3, 4. Up to eight (8) inputs possible.
Honeywell 5898
Honeywell 5898 wireless dual tec motion detector
Dual-tec motion sensor.
Loop 1 = Low Sensitivity Motion Sensor. Pet immunity is available for this loop. 50lb or 100lb pet immunity, selectable via DIP Switch 1
Loop 2 = High Sensitivity Motion Sensor.
Loop 3 = Temperature Sensor (High or Low, DIP Switch Selectable)
Tags: , , , , , , , , , , , , , , , , , , , , , , , , , , , , , , , , , , , , , , , , , , , , , , , , , , , , , , , , , ,

Comments


Posted By

Hi DIYers! We have a simple, yet effective tip for you today. The tip is to keep a second key fob device by your bed for easy access. This can be a great way to trigger a panic and scare off an intruder if you hear a break-in. You can also use this key fob as a backup for your main one.

Dsc pg9929 powerg 915mhz slimline 4 button key

Being woken up in the middle of the night due to a break-in can be a very scary feeling. Most users will arm their systems to stay mode at night so that an alarm will occur if someone tries to break-in. But maybe you forgot to arm your system, or maybe you want to activate a siren to try and scare off the intruder. In that case, having a key fob next to your bed can be very helpful.

Most key fobs have a designated panic button that you can use to activate an immediate intrusion alarm. By pressing and holding this button, you are telling your system that you are in danger and that help is needed immediately. It's a great resource to have in these rare, but extremely scary, situations. Just be aware that some panels may require you to specially enroll the panic zone. Additionally, some key fobs may require dual-button presses to activate panics.

Once you activate the panic button, your system will immediately go into alarm. This can involve triggering a siren to scare off any intruders. Alternatively, you could set up a silent alarm so that the police show up without the intruder knowing. However, a loud, audible alarm will be much more effective in scaring away an intruder. You might even set up on input for an audible alarm and another for a silent alarm. It's up to you.

But keeping a key fob next to your bed is more for than just having an option for triggering a panic in the middle of the night. It's also good to have a second key fob as a backup option in case you lose or misplace your first one. You can always grab the other key fob by your bed if you need to quickly grab a fob. You can also use it to set your system to arm stay from your bed if you forgot to do so while you were by your panel or keypad earlier.

Remember, a key fob isn't the only way to access your system remotely. You can always access your system from your Android or iOS device through Total Connect 2.0 or Alarm.com. Both of these platforms offer mobile apps allow you to arm and disarm your system from anywhere. Just keep in mind that you will need a monitoring plan to use TC2 or ADC. And of course, you can always dial 911 if you believe you are in a dangerous situation. But a key fob panic can still be useful in certain situations.

And if you just want a simple device for triggering panic alarms without having arming and disarming functions, we offer standalone panic buttons as well. These are convenient devices that you can activate if you hear something suspicious to trigger an immediate system alarm. You might also consider getting outdoor sirens that you can activate to try and scare away anyone lurking outside your home. And remember that if you have monitoring service, you can set up how your system responds during alarm events. This includes what action(s) the central station will take and when you receive text, email, and/or push notifications regarding any triggered panics.

If you do decide to get additional key fob devices or a panic button for your system, you will need to make sure they are compatible. Our team can help you with that. Remember that we offer free support for all our monitored customers. We can help you determine the perfect key fob option for your needs so that you can your family can feel safe at home. The best way to contact us is to email support@alarmgrid.com. We will check your email at our earliest convenience and reply back as soon as possible. We look forward to hearing from you!

Tags: , , , , , , , , , , , , , , , ,

Comments


Posted By

When most people think of a home alarm system, they picture burglary protection. They might also think of fire protection through the use of connected smoke sensors. But medical monitoring is also a big part of alarm monitoring. This can help the elderly and disabled live more independently

Honeywell lyricpk10 lte enc encrypted at and t lte alarm system There is a unique challenge that comes with configuring an alarm system for use by a person who is elderly or disabled. The goal is to respect their dignity and privacy, while also ensuring that they will be properly taken care of in the event of an accident. Using a home security system is one of the best ways to achieve this delicate balance. This is largely because of the great features an alarm system offers. Some of these features include the ability for the user to request help, the ability for their loved ones to monitor them and their caretakers, and the overall ease-of-use of these systems.
The type of sensors and equipment that is used with a medical alert alarm system will be slightly different from a standard security system. Sure, you can still have regular security sensors, such as door and window contacts and motion detectors. You will probably also want to set up some life-safety sensors as well. But you will need to add some key devices so that the system achieves medical functionality as well. The key accessor in this care is often a panic switch.

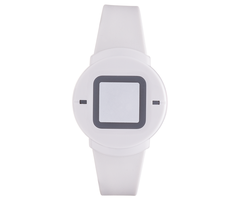
Interlogix tx 4200 01 1 white wireless personal panic device

A panic switch is a button that a user can press in the event of a medical emergency. This could be due to a bad fall or a stroke. These devices can certainly mean the difference between life and death in certain situations. Each minute of waiting for help reduces a person's chances of surviving. By keeping a convenient medical alert button on their person at all times, they will be able to call for help quickly in the event that something goes wrong. And when they are doing okay, they will still be able to maintain their privacy.

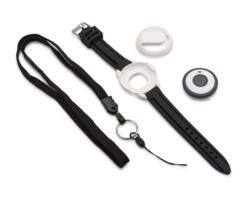
Many panic switches are wearable, and they can be conveniently kept on the user's person at all times. This is very helpful in the event that the accident occurs in a location where they couldn't otherwise reach the phone or call out to anyone else. Some are even water-resistant so that they can be brought into the bath or shower. Of course, any wireless panic button you use will need to communicate at a wireless frequency that is compatible with the alarm system that is being used. Some of the best personal panic switch available include the Honeywell 5802WXT-2 Dual Button Medical Alert, the Interlogix TX-4200-01-1 Wireless Personal Panic Device and the DSC PG9938 PowerG Wireless Panic Key.

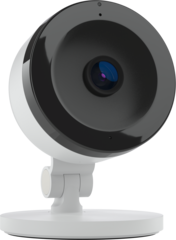
Honeywell 5802wxt 2 wireless dual button medical alertAnother great option is to install security cameras. These devices are used for more than just detecting criminal activity. They are also excellent for keeping an eye on your loved ones. This way, you can discretely check-in at any time and make sure they are doing alright. If they are unresponsive or in danger, you can call 911 immediately so that they get the help they need. One of the best aspects of security cameras is the fact that they can be accessed from essentially anywhere. This is possible using the mobile app for an interactive service on an Android or iOS device, including a smart phone. Two of the most popular interactive services available are Total Connect 2.0 and Alarm.com.

Alarm dot com adc v522ir indoor 1080p fixed camera with night vi

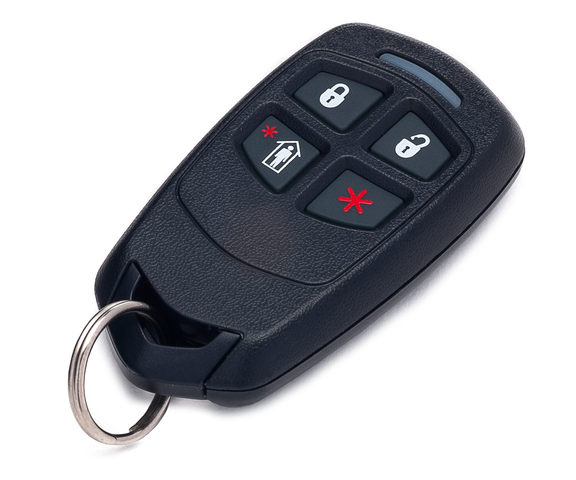
Finally, you should make sure that your loved ones and their caretakers know how to use the security system. Not knowing how to use the panel should never be an excuse for not being able to seek out help if it is needed. Make sure your loved one and their caretaker remember a valid user code that they can use to get in and out if needed. If remembering a code is a problem, you can provide them with a personal key fob for arming and disarming. These devices are great because they can often double as a panic switch. You can even assign a key fob to a guest user code to limit the access that a caretaker has to the property when they are off-duty. The Honeywell 5834-4 is a great key fob for this purpose.

Also make sure that your loved one knows how to activate their personal panic switch in the event of an emergency. There are many cases where elderly or disabled are unable to seek help because they don't know or forget how their medical alert button works. If you are afraid that your loved one might activate the button accidentally, you can ask a central monitoring station to try and call you or your loved one first before sending out automatic emergency medical dispatch. Taking just a few moments to review the proper operation of a key fob can be very important for keeping your loved one safe and sound.

Honeywell 5834 4 wireless 4 button security key fob for honeywell security systems

Keep your loved one safe with a medical alert home security system from Alarm Grid. We are proud to help many people live more independent and fulfilling lives. If you have any questions, please email us at support@alarmgrid.com. You may also call us during normal business hours, which are 9am to 8pm EST M-F. We also invite you to check out our monitoring page for more information about our services.

Tags: , , , , , , , , ,

Comments


Posted By

One of the most versatile security key fobs on the market today is the Honeywell 5834-4. This is a wireless four button key fob with up to eight different programmable functions. The device will function from up to 50 feet away from the system. This makes the 5834-4 a convenient tool for quickly arming and disarming your system and performing other useful functions. This helpful guide will tell you everything you need to know about the 5834-4 key fob so that you can fully integrate it into your security setup.


Overview of the 5834-4 and Other 5800 Series Key Fobs

The Honeywell 5834-4 is actually the same security key fob that ADT provides for their monitored customers. This means that an ADT Key Fob can generally be used in the exact same manner as a 5834-4. If an ADT customer decides to leave ADT, they will most likely be able to use their old ADT Key Fob with their new monitoring company. A user can program their old ADT Key Fob with any compatible alarm system, even if the device has not been deleted from the old system. That said, we do recommend deleting the device from the old system if possible.

The 5834-4 is recognized as a wireless sensor from the Honeywell 5800 Series. Just like the other devices in this lineup, the 5834-4 Key Fob operates at a wireless frequency of 345 MHz. It will interface with any control panel that utilizes this wireless frequency. This includes the Honeywell Lyric Controller, Honeywell LYNX Touch Panels, Honeywell VISTA Panels (with an added wireless receiver), the 2GIG GC3 and the 2GIG GC2. In order to achieve the maximum functionality of the device, the 5834-4 will require eight separate wireless zones on the system.

The 5834-4 can perform system commands at a maximum distance of up to 50 feet away from the alarm system, though a Honeywell 5800RP Wireless Repeater can be used to extend this range. Also, any button press that is made using the 5834-4 must be held down for half a second before the programmed action will go into effect. This helps to prevent potential false alarms caused by the key fob.

In addition to the 5834-4, Honeywell produces two other key fob devices that are very similar in terms of use. The 5834-2 features two buttons and up to three programmable functions. This two-button key fob is a good option for users who do not require a device with as many functions as the 5834-4. Honeywell also offers the 5834-4EN. This is literally the exact same device as the 5834-4. The only difference is that the 5834-4en features a design with a pleasant silver finish.

Enrolling the 5834-4

Each function on a 5834-4 Key Fob is assigned its own wireless zone on a security system. This means that if every possible button entry is set up, the device will take up eight wireless zones. Each button entry can be learned-in with the security system, much in the same way as any other wireless security sensor. With the panel in its learn mode, press and hold the button entry you want to program. The panel will beep to let you know that it has recognized the key fob. Do this three times to auto-enroll that button press with the system.

Please note that some alarm panels will require you to use the panel's designated "key fob zones" to auto-enroll the 5834-4 with the system. For these panels, attempting to assign the 5834-4 with a non-key fob zone will require that the serial number be entered in manually rather than being learned-in automatically. While the 5834-4 can technically be used with any wireless zone, we always recommend assigning the device to a key fob zone if possible. The exact zone numbers for the key fob zones vary between different alarm panels.

Also note that most panels will have a specific sub-menu within programming for setting up key fobs. By setting up a 5834-4 through this sub-menu, the device inputs will automatically be assigned to a designated key fob zone on the system. Again, we strongly recommend setting up a 5834-4 key fob through the key fob sub-menu for the panel.

The table below outlines the key fob zone numbers for various types of alarm systems:

Panel Type
Key Fob Zones
Honeywell VISTA-15P 49-56
Honeywell VISTA-20P & VISTA-21iP 49-64
Honeywell LYNX Touch 140-147
Honeywell Lyric Controller 131-162
2GIG GC2 51-58
2GIG GC3 32 Key Fob Zones*
*Note: The 32 key fob zones on a 2GIG GC3 are considered separate from other wireless zones.

The 5834-4 uses two different 7-digit Serial Numbers. The second Serial Number is one digit higher than the first Serial Number. So for example, if the first Serial Number is 123-4567, then the second Serial Number would be 123-4568. The first Serial Number is used with all single-button presses, while the second Serial Number is used with multi-button presses. Each unique input is assigned a Loop Number 1-4. This means that each of the eight possible inputs will have a Serial Number and Loop Number combination that is unique from all the others. This is shown in the following diagram:

Note that each button is identified by a different letter. The button in the upper-left corner with the closed lock is Button A. The button in the upper-right corner with the open lock is Button B. The button in the lower-left corner with the person standing inside the house is Button C. The button in the lower-right corner with the asterisk (*) is Button D.

Please note that the button combinations of A+D and B+C are not used with the system. But all other two-button combinations are fair game. Serial Number 2 will be one digit higher than Serial Number 1. The following table outlines every Serial Number and Loop Number combination used with the 5834-4 Key Fob:

Input Serial Number Loop Number
A 1 3
B 1 2
C 1 4
D 1 1
A+B 2 1
A+C 2 3
B+D 2 4
C+D 2 2

Configuring the 5834-4

Once an input has been enrolled with the panel, you must then configure the settings for that input. The exact options for for this will vary depending on the type of panel that is being used. Most options are fairly self-explanatory and can be configured with relative ease. For example, below are the menu options displayed for a Honeywell LYNX Touch L7000, assuming that the device is being programmed through the key fob menu. Please note that these are essentially the same menu options that will also be displayed on any other Honeywell LYNX Touch Panel, as well as the Honeywell Lyric Controller. Make sure to save your changes when you have finished configuring the key fob settings.

  • Key Type: This tells the panel how many different inputs are used on the key fob device. Since a 5834-4 Key Fob with eight different possible inputs is being used, the option "8 button" is chosen.
  • User: This will show in the event log which user interacted with the panel. This is great for assigning different system users their own personal key fob.
  • Serial Number: This is the Serial Number for the key fob. If the Serial Number is entered incorrectly, the key fob will not work with the system. For that reason, we strongly recommend auto-enrolling the 5834-4 with the system.
  • Zone: This is the first zone on the system that the key fob will be assigned to. That zone, and the following seven zones will be used with that key fob.
  • Button Key 1: Button A on the 5834-4. This is the picture of the closed lock. This lets you choose the action that will be taken for that input.
  • Button Key 2: Button B on the 5834-4. This is the picture of the opened lock. This lets you choose the action that will be taken for that input.
  • Button Key 3: Button C on the 5834-4. This is the picture of the person standing in the house. This lets you choose the action that will be taken for that input.
  • Button Key 4: Button D on the 5834-4. This is the picture of the asterisk (*). This lets you choose the action that will be taken for that input.
  • Button Key 5: Button combination A+C on the 5834-4. This lets you choose the action that will be taken for that input.
  • Button Key 6: Button combination C+D on the 5834-4. This lets you choose the action that will be taken for that input.
  • Button Key 7: Button combination B+D on the 5834-4. This lets you choose the action that will be taken for that input.
  • Button Key 8: Button combination A+B on the 5834-4. This lets you choose the action that will be taken for that input.

Also take note of the different possible actions that can be used with each possible input:

  • Disarm: This will disarm the system if the system is set to armed stay or armed away.
  • Arm Away: This will set the system to armed away.
  • Arm Stay: This will set the system to armed stay.
  • No Response: The input will not be used with the system.
  • 24 Hour Silent: This will produce a silent alarm on the system. This essentially allows the 5834-4 to be used as a silent panic switch.
  • 24 Hour Audible: This will produce an alarm event on the system. Any sirens and sounders set up with the system will activate.
  • 24 Hour Auxiliary: This will produce an alarm event on the system. The system sounder will activate, but any sirens will not. This is typically used for medical emergencies.
  • Silent Burglary: This will produce a silent alarm on the system. However, this command will only work if the system is armed.
  • Fire No Verification: This will produce a fire alarm on the system.

Standard Mode vs. High-Security Mode

the 5834-4 Key Fob features two different transmitting modes. These are standard mode and high-security mode. Simply put, standard mode has the 5834-4 function as an unencrypted device, while high-security mode has it function as an encrypted device. Putting the 5834-4 into high-security mode will make it nearly impossible for others to hack or compromise the device. However, high-security mode is only compatible with alarm panels that support this feature. For panels that do not support this feature, the 5834-4 Key Fob must be placed in standard mode before it can be used with the system. Some panels that do not support high-security mode include the 2GIG GC3 and the 2GIG GC2.

To activate high-security mode on the 5834-4 Key Fob, press and hold the A+C+D buttons on the device simultaneously for five seconds. The LED light on the device will flash red to indicate that the device has been placed into high-security mode. Once in this mode, any input made using the 5834-4 Key Fob will cause the LED light on the device to flash red.

To activate standard mode on the 5834-4 KeyFob, press and hold the B+C+D buttons on the device simultaneously for five seconds. The LED light on the device will flash green to indicate that the device has been placed into standard mode. Once in this mode, any input made using the 5834-4 Key Fob will cause the LED light on the device to flash green.

The 5834-4 Battery

The Honeywell 5834-4 Key Fob uses a 3-volt CR2032 lithium battery. Every new 5834-4 comes included with a fresh battery that is already installed. The battery should last for about three to five years before requiring a replacement. As the key fob is used, the power that is supplied by the battery will being to slowly drop. Once the power drops below 2.3 volts, a low battery message will be displayed on the alarm system. Please note that this message will only appear if a button is pressed on the key fob. If the key fob is not used, then the panel will not recognize that the battery is low. Additionally, once the battery is low, the LED light on the key fob will no longer flash when an input is made. If the power drops below 2.0 volts, then the device will stop working entirely.

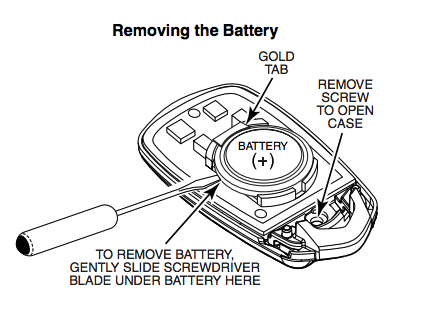
To replace the battery, use a small Phillips head screwdriver to remove the screw on the back of the device. Then slide a flathead screwdriver underneath the battery on the side with the gold tab to pop the battery out. With the old battery removed, slide the new battery into place, making sure that the positive (+) side is facing upwards. Firmly press down on the opposite side to click the battery into place. Finally, reapply the back cover, and screw it into place. Make sure to test the 5834-4 Key Fob after replacing the battery to ensure that it has been installed properly.


If You Need Further Help

The Alarm Grid support team is happy to help any monitored customer with using their 5834-4 Key Fob. Please contact us via email at support@alarmgrid.com or over the phone at 888-818-7728 from 9am-8pm ET M-F if you require further assistance.

Tags: , , , , , , ,

Comments


Posted By

Honeywell has informed us that they are discontinuing production of the largely disused two-button key fob, the 5834-2. The remote fob was made to simply offer an arm and disarm option, but did not allow for an arm stay or a panic function. While, theoretically, removing those buttons would give users the ability to avoid false alarms through mis-presses, the 5834-2's proven to be a fairly unpopular key fob compared to its contemporary the 5834-4.

Used largely with the LYNX series panels such as the L5200 or L7000, the 5834-4 key fobs (as well as the 5834-2) allow for the arming and disarming without the need to enter a code into the panels themselves. This functionality is well loved by end users, and is the reason the 5834-4 has become one of the more popular options, even coming with the available kits for the LYNX panels. But while users will often find themselves purchasing multiple 5834-4s for the system, since the 5834-4 offers the versatility of an end-user programming it to function exactly like the 5834-2, this key fob has been rendered redundant. Alarm Grid has discontinued the item on the site.

For those who want to know how to program a key fob to one of these simple, wireless systems, we have made a series of programming videos for the 5834-4. For those that are looking for functionality that mimics the 5834-2, simply delete the arm stay function which is indicated by the small home picture on the key fob. That would make only the arm stay and arm away buttons work with the system, exactly as the 5834-2 works.


Tags: , , ,

Comments


Posted By

We're giving the site a facelift! We've partnered with POW Photography in Chicago, IL to make sure that our site is filled with high-resolution product photos. The first pictures we've had them take are our most popular items. So this won't all happen over night, but over the next few months, as you come back to research your new alarm system, don't be surprised when you see a new, beautiful photo suddenly take the place of an old, blurry part.

If you want to see a gallery of the new photos, I'll be including them below as we add them to the site:

Honeywell 5834-4 Wireless Key FobHoneywell 5816 thick wireless door and window sensorHoneywell 5811 wafer thin door and window sensor for the L5100Honeywell GSMVLP5-4G wireless cellular communicator for the L5100Honeywell 300-04705 L5100 LYNXTouch TransformerHoneywell LYNXRCHKIT-SC battery backup for the LYNX Touch security systemHoneywell L5100-ZWAVE module for the LYNXTouch L5100 Security SystemHoneywell L5100-Zwave AnteriorHoneywell L5100-WIFI AlarmNet Communicator for the L5100 LYNX TouchHoneywell 7847i-L AlarmNet communicator for the L3000LYNX Plus GSMVLP4G AlarmNet CommunicatorHoneywell 5800PIR-RES Pet Immune Motion SensorHoneywell LT-Cable for the LYNX Touch L5100

Tags: ,

Comments