Honeywell Lyric Posts

Posted By

With the holiday season quickly approaching us, we thought it was a good time to present some holiday buying guides for various security systems. Today, we are focusing on the Honeywell Lyric. This guide will help whether you are considering a new Lyric or adding upon an existing one.

Honeywell lyric controller encrypted wireless security system

The Honeywell Lyric is currently the flagship all-in-one wireless security system from Resideo. It has been one of the most highly regarded alarm systems for the past few years for several reasons. The system supports up to 128 wireless zones, making it suitable for applications big and small. It has a built-in Z-Wave controller, and you can pair up to 72 Z-Wave devices for home automation purposes. The Lyric is also one of the very few alarm panels that can support Apple HomeKit, making it perfect for iOS users looking to expand upon their HomeKit Network. In fact, we believe that the Lyric is the top HomeKit Security System on the market at this time.

The other major appeal of the Lyric is the fact that it can technically be monitored using an IP only communication path. This is because it connects with AlarmNet360 and the Total Connect 2.0 platform. Unlike most other monitoring platforms like Alarm.com which require cellular connectivity, Resideo allows IP only monitoring for panels connected with TC2. The Lyric has a built-in WIFI card, so you can connect with a local network right out of the box. Although we always recommend cellular communication for optimal reliability, we do understand that many users will want to use IP only service as a cost-cutting measure. Additionally, you can always add a cellular communicator to the Lyric System if you decide that you want to go cellular later on. Both the Honeywell LYRICLTE-A (AT&T LTE) and the Honeywell LYRICLTE-V (Verizon LTE) are great options.

Building a Lyric System from Scratch

Honeywell lyricpk lte enc encrypted at and t lte alarm system w For new users starting from scratch, the best option is typically to buy a complete Honeywell Lyric Security System Kit. This will include everything you need to get started with alarm monitoring. Whether you plan to use IP only monitoring service, or you intend on setting up cellular service, there is a perfect kit for you. For those planning to go IP only, no cellular communicator is needed, and you should choose a kit labeled "WIFI Only". If you intend to use the system for cellular monitoring, then both AT&T and Verizon system kits are available. Whether you go with a 3-1 kit (3 contacts and 1 motion) or a 10-1 kit (10 contacts and 1 motion) should depend on the size of the building you are monitoring. You will need more contacts to cover more doors and windows.

We recommend going through the Lyric System Kit Page linked above and finding the perfect Lyric Kit for your needs. In addition to the system, sensors, and optional communicator, you will also get a Honeywell LT-Cable with every kit. This makes it super easy to get the system up and running without having to prepare any standard alarm wiring.

Sensors for New and Existing Lyric Systems

Honeywell sixgb wireless glass break detector

One of the best aspects of the Lyric is that it has one of the most diverse and complete lineup of supported sensors in the entire security industry. Resideo created a sensor lineup designed exclusively for their Lyric System in the Honeywell SiX Series Sensors. These powerful sensors offer an impressive communication range of up to 300 feet indoors and 128-bit AES encryption for enhanced wireless protection. The lineup includes the following products:

With this great lineup, you can achieve a total and complete Lyric Security System by only using SiX Series devices. And for most Lyric users, that is the best option. But these are not the only sensors you can use with the Lyric System. The Lyric is also compatible with nearly any uni-directional 345 MHz sensor, which includes most devices from the Honeywell 5800 Series and the 2GIG 345 MHz lineup. Additionally, these lineups are both a little more fleshed out than the SiX lineup. There are certain sensor types (e.g. outdoor sensors) where you will need to turn to one of these product lineups.

Many users will also supplement their SiX Series devices with Honeywell 5800 Sensors and 2GIG 345 MHz Sensors as a cost-saving measure. These 345 MHz sensors will work just as well as the SiX Series devices on the Lyric. The only difference is that the 345 MHz sensors will not utilize any encryption, making them more susceptible to wireless attacks. The Lyric does have protection against 345 MHz RF jamming, but it can offer some users better peace of mind to know that their wireless sensors are encrypted. But if you are comfortable using non-encrypted wireless devices, then 345 MHz sensors can save you a lot of money when designing your Lyric System.

Some of our favorite Honeywell and 2GIG 345 MHz Sensors for use with the Lyric include:

Other Accessories for Your Lyric

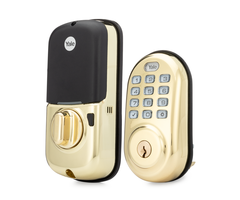
Yale yrd216 brass front z wave push button deadbolt lock

We have already covered the sensors you will use with your Lyric System. However, there are still other devices you may want to add to your setup. The biggest attraction are Z-Wave devices like lights, door locks, and smart thermostats. One admitted weakness of the Lyric is that its automation controller is only a standard Z-Wave controller. The Lyric does not offer a Z-Wave Plus controller, and Lyric users cannot take advantage of the extended range and increased battery life of Z-Wave Plus. You can still use Z-Wave Plus devices with the Lyric System, but they will only offer the functionality of classic Z-Wave peripherals.

With that limitation in mind, you can still use the Lyric as a perfectly capable smart home automation hub. You can even pair the system as a secondary controller to other automation hubs (e.g. Samsung SmartThings) for added flexibility in your smart home. Nearly any Z-Wave automation device can be used with the system, so feel free to explore your options. We have plenty of devices on our website. Just remember that the Lyric System cannot support Z-Wave security devices. The Lyric Z-Wave controller is for automation purposes only. Alarm Grid does not sell Z-Wave security sensors on its website.

If you want to use your Lyric to control your garage door, then you will want to invest in a Honeywell 5877GDPK. This kit includes everything you need to get started with garage door operation for your Lyric System. Inside the kit there is a Honeywell 5877 Z-Wave Garage Door Relay, a Honeywell 5822T Garage Door Tilt Sensor, and a FortrezZ Z-Wave Siren/Strobe. You can purchase these items separately, but this convenient kit makes things easier.

The Lyric has only one compatible wireless keypad option, which is the Honeywell LKP500. This is a fairly standard push-button keypad with an LCD screen. You might also consider getting a cheap tablet and mounting it to the wall and using that as a keypad. You can download the Honeywell My Home Controller App to the tablet and essentially make the device a permanently mounted touchscreen keypad for your Lyric.

Lastly, you might want to get a desk mount for your Lyric System. This will eliminate the need for mounting the panel to the wall. Desk mounts are great for people living in apartments or rental homes, as well as users who simply do not want to drill holes. Using a desk mount sure beats laying the system flat on a counter! The Lyric Desk Mount is called the Honeywell LCP500-DK. There is also a desk mount for the Honeywell LKP500 Lyric Keypad called the Honeywell LKP500-DK.

Ask Us Questions!


Don't be afraid to reach out to us at Alarm Grid if you have any questions about the Lyric, or if you need any help choosing a system and accessories. The best way to reach us is to email support@alarmgrid.com. You may also reach us over the phone at (888) 818-7728. Remember that our support hours run from 9am to 8pm ET M-F. We look forward to hearing from you!

Tags: , , , , , , , , , , , , , , , , , , , , ,

Comments


Posted By

Hi DIYers! Today, we wanted to show you a YouTube video review of one of our Lyric Kits made by Gabe from Security Baron. Gabe checks out each component of our Lyric AT&T-LTE 3-1 Kit. The kit includes a Lyric Panel, LTE communicator, 3 VERSA Contacts, a Honeywell PIR Motion and an LT-Cable.


We think this is a tremendous video, and we would really like to thank Gabe and Security Baron for putting it together. We certainly encourage all our customers to do unboxing videos just like this so that they can share their Alarm Grid experience with others. It makes us very proud to know that many people out there are making great use of our products.

In order to provide better information for our customers, we would like to go through and make some small notes on what was stated in the video. Although the video was super informative, we still can offer some further insight on the equipment that was presented.

First, the wireless door and window contacts featured in the video were actually VERSA-2GIG Door and Window Sensors. VERSA is the same company that manufactures the famous Honeywell 5800MINI Sensors. The VERSA Sensors are exactly the same as the 5800MINI Sensors, but they are available at a much lower cost. Those particular VERSA Contacts will work with the Honeywell Lyric Alarm System, as the 2GIG Go!Control and 2GIG GC3 Systems. Alarm Grid gets these sensors direct from VERSA to provide the lowest possible price for customers.

Versa 2gig honeywell lyric and 2gig compatible sensor pow

The VERSA Sensors are uni-directional devices that only send signals to the alarm system. They are not protected by any wireless encryption, but this is not a major concern for most users. However, Alarm Grid also offers a very similar kit that features encrypted door and window contacts. That kit provides Honeywell SiXMINICT Door and Window Contacts instead of the VERSA-2GIG Contacts. The bi-directional SiXMINICT Sensors use 128-bit AES encryption for added wireless protection.

The motion sensor shown in the video was a Honeywell SiXPIR Motion Sensor. This sensor works by using passive infrared (PIR) technology to detect the changes in infrared energy that occur with movement. Whenever a person or large object comes within the sensor's field of view (FOV), it will detect its energy signature and alert the security system. Just like the SiXMINICT Sensors, the SiXPIR Motion Sensor also uses bi-directional 128-bit AES encrypted communication. For optimal performance, the SiXPIR should be mounted at a height of between 7 and 9 feet.

Honeywell sixpir lyric smart sensor motion

The power cable that is shown is called the Honeywell LT-Cable. This handy accessory comes pre-prepared, and a user will not have to strip any wires to power on their Lyric Panel. By using the LT-Cable, the entire power-up process can be completed with just a simple screwdriver. Alarm Grid includes this cable with many of our system kits to make things easier for DIY users.

Not specifically mentioned in the video is the Honeywell LYRICLTE-A Cellular Communicator. This module is inserted into the side of the Lyric Panel, and it allows the system to communicate with the AlarmNet Servers through the AT&T LTE Network. Cellular communication is perfect for alarm systems because of its fantastic reliability and super fast speeds. By using this communicator, the Lyric System will be immediately capable of using a dual-path setup with both cellular and WIFI.

Honeywell lyric lte a at and t lte cellular communicator for the

In the video, it is noted that the Lyric System works with Apple HomeKit. This is one of the best features of the Lyric, and pairing the system with HomeKit is very easy. By using the platform and a compatible HomeKit Hub, such as an iPad or Apple TV, a user can control their HomeKit devices remotely using their iPhone. We would also like to mention that the Lyric is compatible with Amazon Alexa through Total Connect 2.0.

For clarification, you can only stream live video on the Lyric Panel using a legacy Honeywell IP Camera. You cannot stream video directly from the panel using a newer Honeywell HD Camera, such as the Honeywell IPCAM-WIC2 mentioned in the video. Instead, these cameras can only be streamed through the Total Connect 2.0 service.

For DIY users, we also recommend adding a Honeywell LCP500-DK Desk Mount. This device will allow the user to install the system without having to mount it to the wall. Instead, it can be conveniently rested on any sturdy table or desk. You can also mount the wireless sensors using double-sided foam tape. This will let you complete the entire installation process with nothing more than a screwdriver. You don't need to drill any holes or use any power tools!

Honeywell lcp500 dk lyric controller desk mount

The Honeywell Lyric is not the only alarm control panel offered from Alarm Grid. We also offer many great systems from other companies like Qolsys and 2GIG. Our website also features a wide-selection of pre-packaged wireless system kits to fit a user's unique needs. All of the systems we offer are perfect for pairing with our alarm monitoring services, which start at as little as $10 per month. We can even takeover many existing systems so that users can get started without having to purchase new equipment.

If you want to learn more about Alarm Grid, or if you need help planning a security system, we invite you to reach out to us. The best way to contact us is to send a quick email to support@alarmgrid.com and let us know what you are looking for. If you would prefer to speak with us by phone, you can call us at (888) 818-7728 from 9am to 8pm EST M-F. We look forward to helping you meet your security needs!

Tags: , , , , , , , , ,

Comments


Posted By

Anyone who has a Honeywell Security System knows that using and managing codes is very important for getting the most out of the system. This handy guide will show you everything you need to know about Honeywell System Codes, including how they are are used and how they are created.

Basic Information about System Codes

Note that the default Installer and Master Codes for almost any Honeywell System are 4112 and 1234 respectively. Let's start by reviewing basic concepts and information about system codes.

What is a system code?

A system code on a Honeywell Panel is a numeric password that is used to gain access to certain menus of the system and to perform various functions. The main reason that alarm systems have codes is to make sure that the person who is using the system is supposed to have access. Only the end user and any other individuals they have authorized to use their security system should know any of the system codes.

Depending on the type of code, a master user can restrict access to only specific parts of the system for other users. This makes some system codes more powerful than others. For Honeywell Systems, most codes are four-digits in length and use the digits 0-9. This allows for up to 10,000 possible combinations for any given code!

How should I choose a system code?

Any code you use on a Honeywell System should be a code that is easy for the user to remember, but difficult for others to guess. Remember, the purpose of a code is to prevent access to unauthorized users. If an unauthorized user, like an intruder, is able to provide a valid system code, it could result in a serious security breach. Likewise, if an authorized user forgets a code, it can be inconvenient or even impossible to get back in.

Most Honeywell Systems operate using delay periods. In other words, upon entering the premises, a valid code must be provided within a very limited time period to disarm the system. If a valid code is not provided within this specified time, then an alarm will occur. This will give an end user who knows a valid code enough time to disarm the system. But it will not give an intruder nearly enough time to brute force their way into the system by guessing codes.

What types of codes are used on Honeywell Systems?

There are many types of codes used with Honeywell Panels. The most common are outlined below:

  • Master Code: Each system has one Master Code. This is the main code a user will normally use for arming and disarming. It can perform all security functions, add and delete users, change the current Master Code and perform many additional system functions. This code cannot be deleted from the system entirely. Only the main user and operator of the security system should know the Master Code.
  • User Codes: Most Honeywell Systems can have multiple user codes set up. These codes can arm and disarm the system just like the Master Code. However, they cannot perform other system functions. A user code should be provided to a user who needs regular access to the building, but should not be able to adjust important settings and configurations for the alarm system.
  • Installer Code: Each system has one Installer Code. This is the main code that is used for making programming changes to the system. It is needed for adding, deleting and configuring sensors, adjusting entry and exit delay periods and more. Basically any major system setting will require the use of the Installer Code. An important note is that the Installer Code can only disarm the system if it was used to arm the system in the first place. This means that keeping the Installer Code at its default is not a security risk, as long as the code isn't used to arm the system. This code cannot be deleted from the system.
  • Guest Code: Also called a "babysitter code", a guest code is a restricted-access code that can be established on most Honeywell Systems. The important thing to remember about this code is that it can only disarm the system if it was the code used to arm in the first place. This code is best provided to users who need temporary access to the system, such as a house guest, a babysitter or a maintenance person. The main user can arm their system with the guest code so that they can access the premises. But if nobody else should be using the system, then the Master Code or a regular user code can be used to arm so that the guest code cannot gain access.
  • Duress Code: The duress code is a special code that is used to send a secret signal to a central monitoring station, letting them know that help is needed immediately. When this code is entered, it will appear to disarm the system like normal. But in reality, a distress signal will be sent out to the central monitoring station to request immediate help. This code is very rarely used, as its only purpose it to protect the user in hostage situations. Otherwise, this code should never be used. However, it is still important to remember this code, as it can save lives when used properly.
  • Arm Only: On select panels only. This code can arm the system, but it cannot disarm.
  • Partition Master: Only for systems with multiple partitions. This code is the same as a Master Code, but its authority only applies to a specific partition. This type of code is optional on a system, but it can be useful if multiple partitions have been established.

What are default codes?

When a Honeywell System is used for the first time, its Master Code and its Installer Code will be set to default values. For most Honeywell Panels, the default Master Code is 1234, and the default Installer Code is 4112. It is normally recommended that you change the Master Code for security purposes. However, the Installer Code can be left at its default so that the user can get back into programming. Keeping the Installer Code at the default does not present any type of security risk.

Now that we have covered some basic information for system codes, let's look into some specific panels to learn how codes are used.

Honeywell Lyric Controller

Honeywell lyric controller encrypted wireless security system

For the Lyric, codes are managed through the Users Menu. To access this menu, start from the main screen of the system. Choose Security > Tools > Master Code > Users. This menu will allow you to change any system code, with the exception of the Installer code.

Up to 48 unique codes can be added with the system. The code in slot 01 is the Installer Code. The code in slot 02 is the Master Code. The code in slot 47 is the Guest Code. The code in slot 48 is the duress code. All of the other 44 system codes are optional user codes.

Add New Codes

Press the "Add New" button. You can the provide a name for the code, enter in a valid four-digit code, and set whether or not the code can be used to control any Z-Wave door locks. The user number will be automatically assigned. Remember to press the "Save" button in the lower-right corner when you have finished.

Edit Existing Codes

Click on the code you want to edit to highlight it. Then press the Edit button in the lower-left corner of the screen. You can then edit the Name, the 4-digit numeric code and the Z-Wave lock settings for the code. Make sure to press "Save" when finished.

Delete Codes

Click on the code you want to delete to highlight it. Then press the Delete button in the lower-right corner of the screen. Press "Yes" when asked if you are sure. The code will be deleted.

Changing the Installer Code

The default Installer Code for the Honeywell Lyric Alarm System is 4112. We recommend keeping this code at the default to prevent the user from being locked out of programming. However, this code can be changed through programming if desired. You will need the current Installer Code to do this. You cannot do this using the Master Code.

Start from the main screen of the system. Choose Security > Tools > Installer Code (default is 4112) > Program > Installer Code. You can then change the Installer Code for the system. Press the "Done" button in the lower-right corner when finished.

Honeywell LYNX Touch Panels

Honeywell l5210 lynx touch wireless security system with 4 1 sla

Managing user codes for a Honeywell LYNX Touch System is very similar to the process for the Honeywell Lyric Controller. Most codes can be managed through the User Codes menu. To access this menu, start from the main screen, and choose Security > More > Tools > Master Code > Users. This menu will allow you to edit any system code, except for the Installer Code.

Please note that the number of user codes that can be added depends on the type of LYNX Touch Panel that is being used. On each system, the Installer Code will be user 01, the Master Code will be user 02, the Guest Code will be the second-to-last available code, and the Duress Code will be the last.

For reference, the L7000 will support up to 48 codes, the L5210 and L5200 will support up to 32, and the L5100 and L5000 will support up to 16.

Add New Codes

Click the "Add New" button at the bottom of the screen. The following menu will let you change the Name, the four-digit code and the Z-Wave lock settings for the code. The user number for the new code will be automatically assigned. Press "Save" in the lower-right corner to finish.

Edit Codes

Click on the code you want to edit to highlight it. Then press the Edit button in the lower-left corner. From there, you can change the name, the four-digit code, and the Z-Wave lock settings. Press "Save" in the lower-right corner when finished.

Delete Codes

Click on the code you want to delete to highlight it. Then press the Delete button in the lower-right corner. The panel will ask you if you are sure. Choose "Yes". The code will be deleted.

Changing the Installer Code

All of the LYNX Touch Panels use 4112 as their default Installer Code. This code is normally left at its default to prevent the user from being locked out of programming later. But it can be changed using the current Installer Code for the system if desired. Remember, keeping the Installer Code at the default does not present any type of security risk.

To change the code, start from the main screen of the system. Choose Security > More > Tools > Installer Code (default is 4112) > Program > Installer Code. You will then be able to change the Installer Code. Please note that when exiting programming, always choose "Yes" when asked you want to allow the installer to get back into programming. Choosing "No" will lock the user out of programming, and the user will need to use the backdoor method to get back in.

Backdoor Method for Accessing Programming

If you ever get locked out of programming, either due to choosing "No" when asked if you want to allow the Installer to get back into programming, or because you lost an Installer Code that wasn't set to the default of 4112, you can use the backdoor method to get back in.

First, reboot the panel by going to Security > More > Tools > Master Code > Test > Reboot. Alternatively, if you don't know the Master Code, you can power the system down by unplugging the transformer and disconnecting the backup battery. Then power it back on by plugging the transformer in. Once the white screen on the reboot appears, immediately press and hold the Home Button (the picture of the house) on the front of the panel. Release the button once the green bar with "Ready to Arm" appears across the top. Then choose Security, followed by Arm Stay. In the number pad that appears, press Clear, followed by 00. Choose "Program" to enter the Programming Menu.

Once you are inside, you can then set the Installer Code for the system to reenter programming later. You can also restore the system to factory default settings through "Default Config" to restore the system to its factory default settings. This will reset the Master Code to its default of 1234. Please note, this will also delete all programming settings for the system.

Honeywell VISTA P-Series

Honeywell vista 21ip internet alarm control panel open

The VISTA P-Series Panels use hardwired keypads for virtually all system operations and overall access. This includes adding, editing and deleting codes. Since codes do not require deep level programming, alphanumeric keypads and fixed English keypads can be used for this purpose. The VISTA 21iP and VISTA 20P can support up to 48 system codes. The VISTA 15P can support up to 32 system codes. The VISTA 10P can support up to 16 system codes. Remember, two of these slots will go to the Installer Code (slot 01) and the Master Code (slot 02).

For these systems, each Code Type is associated with a particular Authority Level. This Authority Level is assigned when assigning attributes. Please note that since the Installer Code and Master Code are hardcoded to slots 01 and 02 respectively, they are not associated with any particular Authority Level. The table below outlines the the Authority Levels that can be assigned to system codes.

Code Type
Authority Level
Notes
User 0 Can arm and disarm the system.
Arm Only 1 Can only arm the system.
Guest 2 Can disarm if it was the code used to arm.
Duress 3 Sends secret distress signal to station.
Partition Master 4 Partitioned systems only. One per partition.

Also note the various attributes for VISTA System codes:

Attribute
Attribute Number
Assigned Value and Notes
Authority Level 1 See previous table.
Access Group 2 0-8. An entry of [0] means no group.
Active Partitions 3 Enter the partition numbers, then [#].
RF Zone Number 4 2-digit key fob number.
Open/Close Paging 5 0 for No. 1 for Yes.

Add New Codes

Enter the following command on the keypad:

[Master Code] + [8] + [2-digit User Number] + [desired 4-digit code]

The panel will beep to confirm the new code has been added. However, a long tone indicates that the process was unsuccessful, likely because the code was already taken.

Edit Codes

This is basically the same as adding a new code, only you will be working with a code that has already been programmed.

[Master Code] + [8] + [2-digit User Number] + [desired 4-digit code]

The panel will beep to confirm that the code has been changed. But if a long tone is produced, it indicates that the process was unsuccessful. This could be because the code was already taken.

Deleting Codes

Note that you cannot delete the Installer Code or the Master Code. Enter the following command:

[Master Code] + [8] + [2-digit User Number] + [#] + [0]

Assigning Attributes

Enter the following command:

[Master Code] + [8] + [2-digit User Number] + [#] + [Attribute Number] + [Attribute Value]

Backdoor Into Programming

If you don't have your Installer Code or if you have locked yourself out of programming., you can get back into programming using the backdoor method. To do this, power down the panel by unplugging the transformer and disconnecting the backup battery. Press and hold the the [*] and [#] buttons on the keypad simultaneously. With these buttons held down, power the system back on by plugging the transformer back in. The message "20" or "Installer Code 20" should appear on the keypad to indicate that programming has been accessed. Then press [*] + [20] + [4112] to set the Installer Code back to 4112. Then press [*] + [99] to exit programming. Never use [*] + [98] to exit programming, as this will lock you out!
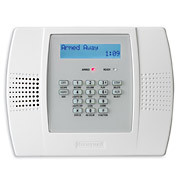
Honeywell LYNX Plus L3000

Honeywell l3000 wireless alarm control panelThe Honeywell LYNX Plus L3000 is relatively outdated by today's standards, but it is still used in some cases. The panel can only support up to 8 different codes. Much like the other panels, slot 01 goes to the Installer Code, and slot 02 goes to the Master Code. These codes cannot be deleted from the panel. Also, slot 07 goes to the Guest Code, and slot 08 goes to the Duress Code. Only codes 03 thru 06 can be assigned to regular user codes.

Adding a Code

Enter the following command:

[Master Code] + [8] + [Code Number] + [Desired Code]

The panel will beep to confirm success. Remember that [03] thru [08] can be entered for the Code Number.

Deleting a Code

Only codes [03] thru [08] can be deleted. Codes 01 and 02 are for the Installer Code and the Master Code respectively, and they cannot be deleted from the system. Enter the following command:

[Master Code] + [8] + [Code Number]

The panel will beep to confirm that the code has been deleted.

Editing a Code

Codes cannot be truly edited. Instead, a code must be deleted, and then re-added with a new entry. Start by deleting the code:

[Master Code] + [8] + [Code Number]

Then add the new code:

[Master Code] + [8] + [Code Number] + [Desired Code]

The panel will beep to confirm the code has been added.

Change the Master Code

This process is the mostly same as adding a new code. Note that the Master Code is assigned slot 02. Enter the following command:

[Master Code] + [8] + [02] + [Desired Master Code] + [Desired Master Code Again]

The panel will beep three times after a Master Code change.

Conclusion

We hope that this guide has been informative for you in learning all about codes of Honeywell Systems. In future, we hope to expand this guide to include the commercial polling loop VISTA Systems as well. If you have any questions, please reach out to us at support@alarmgrid.com, or call us at (888) 818-7728 from 9am to 8pm EST M-F.

Tags: , , , , , , , , , , , , , ,

Comments


Posted By

Hi DIYers! When many people think of a professional Honeywell Security System, they usually think of a top-of-the-line security system installed by a professional. Well the truth is you can install the system yourself. Thanks to Honeywell Home Security Systems, do it yourself is possible!

Honeywell lyric controller encrypted wireless security system

You don't have to be a professional to install your own Honeywell Home Security System. In fact, with the right setup, you won't even need any tools! Okay, maybe you'll need a screwdriver to connect some wires. But that is not asking a lot. By following some simple instructions, you can install your own complete and professional set up on your own. The same equipment that the professionals use is all available on the Alarm Grid site!

Why would you want to install your own security equipment? Well for one, a professional installer can charge hundreds or even thousands of dollars for a simple installation. It can also be somewhat unsettling to allow a stranger into your house, especially to work with something as sensitive and personal as your home security system. The truth is you - that's right, you - can install your own home alarm system just as well as a pro. And you can save money and learn about your system in the process. It doesn't get any better!

Honeywell sixminict wireless door slash window contact for lyric

The panel that we recommend using for a DIY Honeywell Security System is the Honeywell Lyric Alarm System. This is the latest and most advanced security panel available from Honeywell. All of the sensors and equipment can be easily programmed with the system. The menus are easy to navigate and the process is extremely intuitive once you know what you're doing. The Lyric allows sensors to auto enroll with the system. This means you won't have to memorize or enter any long and confusing codes, and you will confirm for sure that the sensors have been recognized by the panel. Before you know it, you'll have your entire home set up and protected in a jiffy!

We recommend using Honeywell SiX Series Sensors with the Honeywell Lyric Controller. These are all wireless sensors with a 200 foot nominal range. They feature 128-bit AES encryption for added protection and security when you need it most. Since these are wireless sensors, no wires need to be run. This makes the installation process super easy, even for beginners. When mounting the sensors, you don't even need to drill holes. Instead, you can just use double-sided foam tape. Slap the tape on the back of the sensor, plop the sensor on the wall, and boom, you're good to go! Some of the best Honeywell SiX Series Sensors for a home installation include Honeywell SiXMINICT Door Sensors, Honeywell SiXPIR Motion Sensors, Honeywell SiXGB Glass Break Sensors and Honeywell SiXSMOKE Smoke Detectors.

Honeywell sixgb wireless glass break detector

As for the panel, you can mount it to the wall if you want. But for a DIY user, an easy option that requires no tools is to use a desk mount. The Lyric has a great desk mount just for this purpose. Simply slide the desk mount on the panel, and rest it on a table or desk for quick and easy access. There's no need to mount the panel to the wall, and you won't need to drill any holes. For connecting to the transformer, Honeywell offers the fantastic LT-Cable that eliminates the need to strip any wires. Simply screw the spaded ends to the transformer, connect the other end to the lyric, plug-in the barrel connector, and the setup is complete!

With a user-friendly and convent Honeywell Home Security Systems, do it yourself is the name of the game! Why hire a professional installer when you can truly do it yourself? Not only can you achieve a great DIY installation, you can do it right! From there, you can customize your system to suit your home. The Honeywell Lyric Alarm Control Panel is fully loaded, and it has everything you need to get started. A built-in WIFI card allows you to connect with the Honeywell AlarmNet Servers for use with the Total Connect 2.0 service. An integrated Z-Wave controller allows your set up smart home automation devices with ease. And iOS users will love the fact that the Lyric is compatible with the Apple HomeKit service for use with HomeKit smart scenes and automations. This HomeKit security system is perfect for those who want to expand upon their HomeKit setup.

Once you have the Honeywell Lyric Security System, you just need an alarm monitoring plan to get started with professional and reliable home security. Alarm Grid can connect your home with three reliable central stations that operate 24/7. Our monitoring partner is Criticom Monitoring Services, which operates three central stations across the country in Florida, New Jersey and California. If one station is ever unavailable, the calls will be routed to a different central station for the ultimate reliability. This way, you and your family are always protected.

Don't wait to get started! Email us at support@alarmgrid.com, or call us at (888) 818-7728 from 9am to 8pm EST M-F to receive monitoring service for your DIY Honeywell Home Security System!

Tags: , , , , ,

Comments


Posted By

With Total connect 2.0's December update, Honeywell continues to take both end-user and dealer feedback seriously to improve the platform. In this release, there are improvements in loading speed, multiple changes to the way panel and Total Connect users are handled, as well as the reintroduction of the Night Stay Arming option in both Lyric and Lynx panels, and the addition of Custom Arming in the Lyric panels.

Here's the splash screen for the December update. It outlines all the updates and improvements included with this release. This screen will come up when you first log in to the website after the update, but you can always access it from the About Screen in TC2 by following the "What's New in this app" link. This is also where you can provide feedback directly to Honeywell regarding the page.
What's New Splash Screen

The user administration section is now more streamlined, allowing you to view current or all location's users, as well as add users to any or all locations, for multi-location accounts, from a single screen. The process of adding a user is now menu driven, making it much simpler

New Menu Driven User EditingAdd User Prompts

In the security screen, on Lyric and Lynx Touch panels, you now have the option to Arm Night Stay, if there are any interior zones on your system programmed with Night Stay enabled. On Lyric panels, you also have the option to choose Arm custom. When you do, you'll be presented with a screen showing all available zones. Any zones you select with a check mark will automatically be bypassed, with the rest being armed. Security Screen with Night Stay and Arm Custom
You can choose whether or not you want the system to provide you with an Entry Delay, once armed. The panel will always provide an Exit Delay. Keep in mind that even though you may be bypassing all motion detectors, the panel considers this an "Away" arming, and will sound the Exit Delay beeps, if enabled. The panel does know the difference between arming via Total Connect 2.0, and arming via the keypad, so Auto Stay arming logic will not apply in this situation, as it would if you custom armed through the Lyric panel itself.
Arm Custom

Notification edits are now much easier to perform, and can be done directly from the Notification List page. You can still toggle a notification on or off quickly and easily, but you can also add a new notification Group from a drop down menu, and you can click on the name of the Notification Event to access an Edit screen, where you can change the name of the notification, shown as the subject of the notification message when it's received, add additional groups, then set those groups to also receive this notification, and so on. The Save option will only be available if information is changed on this screen.Edit Notification

I'm glad to see Honeywell is taking input from both dealers and end-users seriously, and I look forward to seeing more improvements in the future. What do you think about the new features and improvements to Total Connect 2.0? What other changes would you like to see? Let us know in the comments section!

Tags: , , , , , ,

Comments


Posted By

Honeywell released the MR3 firmware update for the Lyric security platform. This is a critical update that repaired some bugs and added some cool new integrations. In our MR3 firmware announcement Sterling summarized all the features of the update. After the announcement Honeywell re-released the update with a patch to fix a bug with APL technology. Now you can request this firmware update from your alarm company. Since it is a critical update it does not require anyone at the panel to accept it.

Although we mentioned it in our general announcement, Lyric alarm systems running the newest firmware now support 2GIG sensors! We did not go into much detail on why this may be important and which sensors are supported. Well we have done some testing in our lab and confirmed that all the 2GIG 345MHZ sensors are now compatible with the Lyric Controller. Generally we feel that the Honeywell sensors are superior and offer a wider range of products but this is a great thing for converting existing 2GIG systems to the Lyric platform.

The 2GIG wireless sensors use a 345MHz RF transmission to speak to the Go!Control panels: GC2 and GC3. Now the Lyric is able receive these transmissions making the panel even more flexible. Before the MR3 update, the Lyric only supported both lines of Honeywell wireless sensors: SiX and 5800 series. This makes the Lyric the first Honeywell alarm system to support 2GIG peripheral devices. The GC2 and GC3 have always supported Honeywell 5800 series devices but this did not work the other way around. Well now it does with the Lyric specifically. Lynx Touch and VISTA series panels still do not support 2GIG sensors. However there is a third party translator that technically is capable of converting 2GIG to Honeywell and much more. It is the Resolution Products RE524x.

2GIG sensor compatibility may not be a feature that many Lyric owners will utilize and certainly get excited about. The general trend that Honeywell is opening up their systems to other technologies and brands is a wonderful thing though. Integrations like SkyBell's video doorbell and August's smart lock prove that even companies like Honeywell that tend to operate in a proprietary bubble sense the demand for more dynamic, multi-brand technology ecosystems that compose the "Internet of Things" aka IOT. This is the future and its promising to see that Honeywell is jumping aboard the train to IoT land.

Note: The local bypass function does not work on the DW40. It simply functions as a normal door/window contact. Also, we still need to test the 2GIG garage tilt sensor and flood sensor. If they are compatible we will get them up and add them to the 345MHz landing page linked above.

Tags: ,

Comments