Alarm Grid Video Recap: November 4th - 8th
Posted By Michael GorisHi DIYers! We're back with another video recap. Sadly, our video team took a break a couple weeks ago, so there was no recap last week. But they came back strong last week with seven (7) new videos! The Alarm Grid boys Jarrett, Jorge, and Joe are all back. Let's check out the videos!
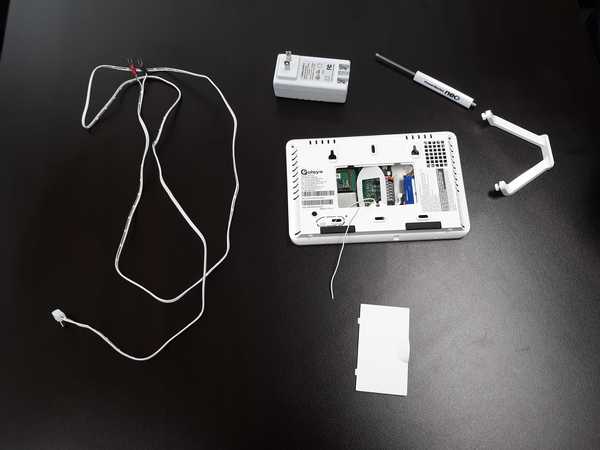
Cellular Communicators That Work With a Honeywell VISTA 20P
Our always helpful alarm technician Jarrett explains which cellular communicators work with a Honeywell VISTA 20P. The system needs an added alarm monitoring communicator to connect with the AlarmNet360 servers and Total Connect 2.0. If you decide to get a cellular communicator, then you must make sure that your monitoring plan supports cellular service. It is strongly recommended that you get an LTE cellular communicator for the system. These include the Honeywell LTE-XA (AT&T LTE), the Honeywell LTE-XV (Verizon LTE), the Honeywell LTE-IA (AT&T LTE & IP) and the Honeywell LTE-IV (Verizon LTE & IP).
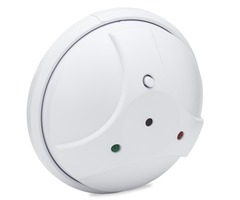
Deciding Whether to Use 2-Wire or 4-Wire Smoke Detectors
Joe smiles and waves as he helps you make the decision of whether to use 2-wire smoke detectors or 4-wire smoke detectors with your hardwired security system. Most users will choose 2-wire smoke detectors because they can be used without extra equipment. But the downside is that 2-wire smoke detectors can only be used with a designated smoke detector reset zone, such as Zone 1 on a Honeywell VISTA Panel. A 4-wire smoke detector can be used on any hardwired zone, but you will need extra equipment, including a power supply and relay.
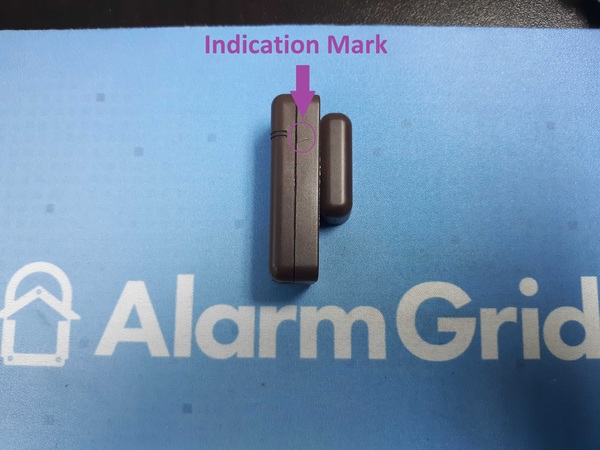
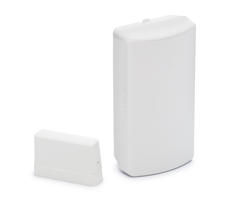
Reasons Why the Wired Alarm Contact on a Door May Not Work
Joe gives another big wave as he provides various reasons why a hardwired door and window contact sensor may not be working properly. A common reason for this is that the magnet is not properly aligned with the sensor. This causes the reed switch inside the sensor to remain open, even when the door or window is closed. Properly aligning the magnet with the sensor will fix this issue. Another possibility is that the wire leading from the sensor to the panel may be damaged or cut. In that case, you would need to re-wire the sensor.
Putting a 5834-4 Into High Security Mode
Three cheers for Joe, as he explains how to put a Honeywell 5834-4 Key Fob into its high-security mode. This key fob can be set for a low-security mode or a high-security mode. When the key fob is in high-security mode, the device is essentially "synced" with the system and using rolling-code encrypted communication. This makes it significantly more difficult for a savvy intruder to try and tamper with the device. The 5834-4 will use a green LED in its low-security mode, while it will use a red LED in its high-security mode.
Enrolling a PowerG CO Detector to a Qolsys IQ Panel 2 Plus
Joe graces us with a fourth video, as he shows how to enroll a PowerG CO Detector with a Qolsys IQ Panel 2 Plus. Adding carbon monoxide sensors to your security system is important. Carbon monoxide is an odorless and tasteless gas that kills hundreds of people every year in the United States. Most of these deaths occur during the winter months when heaters are commonly used in homes. A faulty heater can lead to a CO outbreak. However, CO deaths can also occur due to other factors, such as accidentally leaving a vehicle running in an enclosed garage.
Learning the DSC PG9939 Key Fob to the Qolsys IQ Panel 2 Plus
Jorge is here to show us how to enroll a DSC PG9939 Key Fob with a Qolsys IQ Panel 2 Plus. This key fob can be auto-enrolled like pretty much any other compatible sensor for the system. This is done by putting the system into its auto-enrollment mode and then activating the device to transmit a signal. You will need to choose a Sensor Group for the key fob. The most common Sensor Group to choose is 1 - Mobile Intrusion. The DSC PG9939 features four (4) buttons that you can use to control the IQ Panel 2 Plus System.
Finding the Serial Number on a Honeywell Key Fob
Jorge is the master of key fobs, as he shows you how to find the Serial Number for a Honeywell Key Fob. The Serial Number is used for enrolling the key fob with the system. The best way to enroll a Honeywell Key Fob with a system is to auto-enroll it. If you manually enter the Serial Number, there is a chance that you might make a mistake. Auto-enrolling will prevent this. It also ensures that the key fob can communicate the with panel properly. Once you auto-enroll the key fob, the Serial Number will automatically appear on the screen.


 Our goal at Alarm Grid is to help you keep your business safe and your assets protected at all times. We have all the equipment and resources you need, whether your business is big or small. If you ever need help selecting the perfect security equipment, or if you want to learn more about how we can
  Most of the information presented in this post can be found in the Qolsys IQ Panel 2 DIY Installation Manual. You are free to follow along with that manual, which can be found