Alarm.com Compatible Door and Window Sensors
Posted By Michael GorisIf you're setting up a new security system for use with Alarm.com, then you might be wondering which door and window sensors to use. The answer really comes down to which system you are using and how you intend on using your sensors. Plenty of contact sensor options are usually available!
![]()
Alarm sensors do not communicate directly with Alarm.com. Instead, sensors communicate with alarm panels. From there, the panel will use an alarm monitoring communicator to send signals to Alarm.com. This communicator must be activated and registered for Alarm.com service. Per Alarm.com requirements, cellular connectivity is required. This means that your system must use a cellular communicator or a dual-path communicator that is built for use with Alarm.com.
As far as choosing specific sensors, it comes down to determining whether or not they will work with the system you are intending to use with Alarm.com. Today, we're going to break down some of the most popular Alarm.com Security Systems and help you determine the best sensors to use. Remember that our security system kits already come with some compatible sensors to get started. It may only be that you just need to add a few more door and window sensors, or you might not need to add any extra ones at all!
We will give you three (3) scenarios for each system. These are:
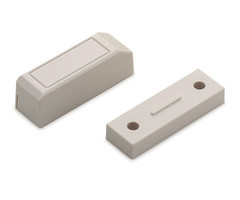
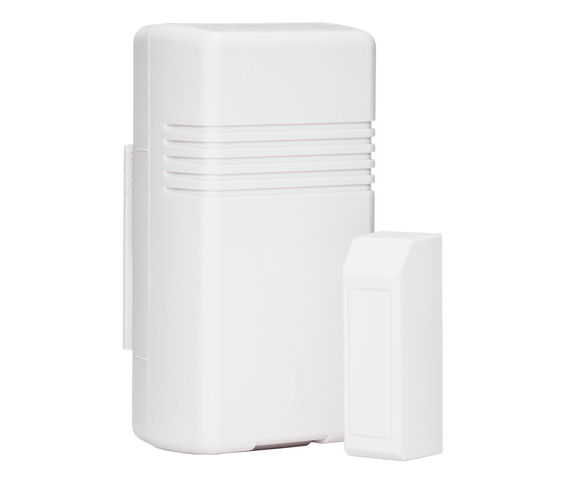
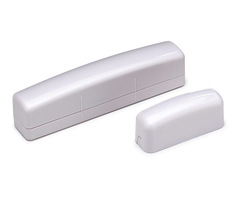
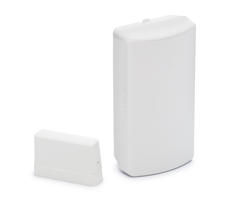
In most situations, surface-mounted sensors are what you want to go with. These are the standard regular sensors that you would use with virtually any door or window. They are super easy to install, and they are some of the most basic security devices you will encounter.
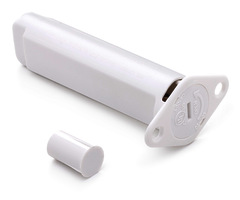
If appearance is important to you, and you want the sensor to remain hidden while the door or window is closed, then you may consider getting recessed sensors instead. Just remember that recessed sensors will require you rolling up your sleeves and drilling holes into your door/window and its frame. In addition to the added work, this may also have warranty ramifications with regard to the door or window.
And of course, if you plan on using the door/window sensor in an outdoor environment, then you will want to make sure the sensor is approved for outdoor use. Trying to use an indoor-only sensor in an outdoor environment will likely result in damage to the device due to exposure to rain, dust, etc. This also typically applies if you plan on using the sensor in an area that is not insulated, such as a shed, a gate or a barn.
Note: If you are totally new to door and window sensors and want to know more about how they operate, please check out this FAQ.
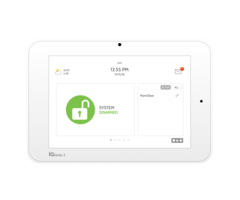
Qolsys IQ Panel 2 Plus (PowerG)
 |
 |
 |
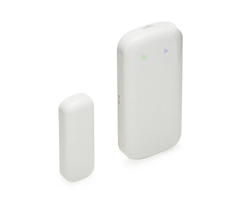
Arguably the most popular system to use with Alarm.com right now in 2020 is the Qolsys IQ Panel 2 Plus. There are three (3) versions of the system, with each one supporting a different legacy sensor frequency (319.5 MHz, 345 MHz, 433 MHz). We will discuss the legacy sensor options in a minute. But one of the biggest reasons to purchase an IQ Panel 2 Plus is to use PowerG Sensors. All three versions of the Qolsys IQ Panel 2 Plus support the PowerG Sensors. These sensors can communicate with the IQ Panel 2 Plus System from up to 2,000 feet away in open air, and they utilize 128-bit AES encryption and frequency hopping spread spectrum (FHSS) for enhanced wireless security. For anyone with an IQ Panel 2 Plus, these are the sensors we would point to first.
- Surface-Mounted Sensor: DSC PG9303
- Recessed Sensor: DSC PG9307
- Outdoor Sensor: DSC PG9312
2GIG GC3e & 2GIG GC2e (eSeries)
 |
|
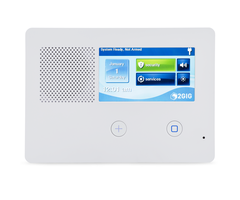 |
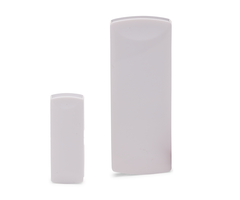
Right now, we view the 2GIG GC3e and the 2GIG GC2e as the best alternatives for users who want to get started with Alarm.com, but don't want to use a Qolsys IQ Panel 2 Plus. The most popular sensors to use with these systems are the encrypted 2GIG eSeries Sensors. They are built for the GC3e and GC2e Systems, and they utilize encryption for protection against wireless hacking or takeover attempts. Remember that these systems are both backwards compatible with 345 MHz sensors (more on those later). But if you're running a GC3e or a GC2e, then we're going to recommend the eSeries products.
- Surface-Mounted Sensor: 2GIG DW10e
- Recessed Sensor: 2GIG DW20e
- Outdoor Sensor: 2GIG DW30e
Original Qolsys IQ Panel 2, IQ Panel, Interlogix Simon Systems (Legacy 319.5 MHz)
 |
 |
 |
Things become a little tricky when we get into the legacy sensor frequencies. There is usually a lot of inter-compatibility across manufacturers, so often the choice comes down to preference. We will list our favorites based on value and functionality. But understand that you have a lot of options available when it comes to 319.5 MHz sensors. This frequency is used with the original Qolsys IQ Panel 2, the original Qolsys IQ Panel, and all of the legacy Interlogix Simon Series Panels. Keep in mind that you can also use these sensors with the 319.5 MHz version of the IQ Panel 2 Plus as an alternative to PowerG. The 319.5 MHz frequency is also typically used with any wired Interlogix NetworX Panel that has a wireless receiver added.
- Surface-Mounted Sensor: VERSA-GE
- Recessed Sensor: Qolsys IQ Recessed Door-S
- Outdoor Sensor: ELK 319DG
2GIG GC3 & 2GIG GC2 (Legacy 345 MHz)
 |
|
 |
If you are working with a 2GIG GC3 or a 2GIG Go!Control GC2, then you will be enrolling legacy 345 MHz sensors with your system. This frequency was popularized by the Honeywell 5800 Sensors, and later the 2GIG 345 MHz Sensors. The GC2 and GC3 support both of these lineups, so you really have a lot of options to choose from. We're just going to list our particular favorites. Remember that you can also use these sensors with a 345 MHz IQ Panel 2 Plus as an alternative to PowerG.
- Surface-Mounted Sensor: VERSA-2GIG
- Recessed Sensor: 2GIG GW20R
- Outdoor Sensor: 2GIG DW30-345
DSC Impassa & DSC PowerSeries (Legacy 433 MHz)

DSC popularized their own wireless frequency of 433 MHz. If you have a DSC Impassa, then these will be the sensors you are using. The 433 MHz sensors can also be used with a DSC PowerSeries Panel that has a wireless receiver added. Although we do not sell the original DSC PowerSeries Systems, we do offer the DSC RF5132-433 Wireless Receiver that will allow support for these sensors. And of course, you can also use these 433 MHz sensors with the 433 MHz version of the IQ Panel 2 Plus as an alternative to PowerG. Unfortunately, we don't have a good recommendation for a 433 MHz outdoor door and window sensor. so we'll just list the other two types instead.
-
Surface-Mounted Sensor: VERSA-DSC
- Recessed Sensor: DSC EV-DW4917
Honeywell VISTA, DSC PowerSeries, DSC PowerSeries NEO, Interlogix/GE NetworX (Wired Sensors)
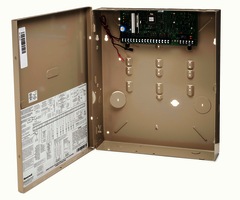
Many hardwired security systems can connect with Alarm.com using what is known as an Alarm.com System Enhancement Module (SEM). And since hardwired panels often use wired sensors, this makes hardwired door and window contacts technically compatible with Alarm.com as well! Honeywell VISTA Systems, DSC PowerSeries Systems, DSC PowerSeries NEO Systems, and Interlogix/GE NetworX Systems all have compatible SEM communicators available.
The great thing about hardwired contacts is that they are pretty much universal across all wired systems, provided that the system is not using polling loop sensors. We'll focus on standard non-polling loop sensors here, but these are all good options for most hardwired alarm panels. Also keep in mind that there are MANY options when it comes to wired contacts. Don't feel like you are restricted to the ones we happened to pick!
-
Surface-Mounted Sensor: Honeywell PAL-T
- Recessed Sensor: Honeywell 951WG
- Outdoor Sensor: Honeywell 958
Get Started with Alarm Grid & Alarm.com
If you are interested in signing-up for Alarm.com service through Alarm Grid, make sure to check out our monitoring page. We support Alarm.com with our Gold and Platinum Level Plans (Self & Full) and our Cell-Only Plan. If you have any questions about our products or monitoring services, be sure to shoot us an email at support@alarmgrid.com. We operate support hours from 9am to 8pm ET M-F. We look forward to hearing from you!


 Before we get into general door contacts that would be used for most applications, we want to make special mention of some more unique sensors that would be used for specific setups.
 First, a user should understand exactly how a door and window contact works. Almost every wireless Honeywell door and window contact functions using the exact same principles. These devices consist of a sensor and


 Types of Door Sensors - The Two Distinctions
 Other Programming Settings