Total Connect 2.0 Posts

Posted By

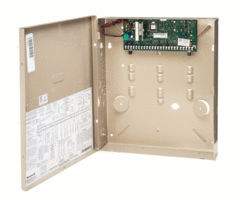
Hi DIYers! Today, we are happy to unveil the Honeywell Home VISTA-21iPLTE. This is the newest hardwired system from the VISTA Series by Resideo, and it is essentially replacing the existing VISTA-21iP System. The big addition is its ability to support special plug-in LTE communicators.


The Honeywell Home VISTA-21iPLTE is actually the same as a VISTA-21iP System, except that the 21iPLTE board has been upgraded to support new plug-in LTE communicators. This includes the Honeywell Home LTE-21V with Verizon LTE (available now).

This new plug-in module is just like the older Honeywell VISTA-GSM4G Communicator, which is conveniently plugged into the VISTA-21iP board. The only difference is that the LTE-21V supports LTE connectivity. This is important for anyone looking to use cellular communication with a security system.

The reason you want to use an LTE communicator with your alarm system is that it offers superior speed and reliability when compared with older 3G and CDMA networks. Also, these older networks are in the process of being shut down. By going with LTE, you are providing a long-term solution for your panel.

Just like the existing VISTA-21iP, the new VISTA-21iPLTE has a built-in IP communicator, which is basically the equivalent of a Honeywell 7847i Communicator. Even if you don't add a cell module to the VISTA-21iPLTE, you will still be able to connect it with AlarmNet for IP monitoring and access to Total Connect 2.0.

Honeywell vista gsm4g alarmnet vista 21ip cellular alarm monitor

But, adding a cellular communicator is very important for dealing with internet outages. If the internet goes out and you don't have a cellular backup, then your 21iPLTE will lose connectivity with the AlarmNet360 Servers. Maintaining this connection is necessary for properly utilizing any monitoring service. This makes cellular backup crucial!

By connecting your VISTA-21iPLTE Panel with AlarmNet360, you will also be able to control your system through Total Connect 2.0. This is an interactive monitoring and automation platform that you can access from nearly anywhere using your phone. Make sure you choose a monitoring plan with TC2 service!

If you plan to use cellular communication with your VISTA-21iPLTE and Alarm Grid, then you will need a Gold or Platinum Level Plan (Self or Full). This is needed to activate the cellular radio and connect it with AlarmNet360. You can find more information about all our monitoring plans on our monitoring page.

Once you have access to Total Connect 2.0, you will be able to control your 21iPLTE System from any location with network access. You can use Total Connect 2.0 to arm and disarm, check current system status, control Z-Wave devices (controller required), view IP cameras (video monitoring required), and so much more!

Honeywell vista 21ip internet alarm control panel open

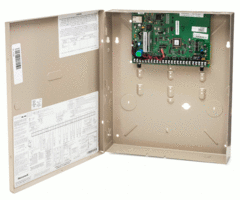
As far as functionality is concerned, the VISTA-21iPLTE is just like like a VISTA-21iP. Other than the added support for the LTE-21V, they are the same panel. As a result, almost any specification that applies to the VISTA-21iP also applies to the VISTA-21iPLTE.

The VISTA-21iPLTE is capable of supporting up to 64 total zones. However, you can only use eight (8) hardwired zones out of the box. To use additional wired zones, you will need to add Honeywell 4219 Expansion Modules. To use wireless sensors, you will need a wireless receiver, such as the 6160RF Keypad.

By adding up to five (5) 4219 Expansion Modules, you can use up to 48 hardwired zones on the VISTA-21iPLTE. Keep in mind that Zones 2 through 8 support zone doubling. Zone 1 is a special zone for use with 2-wire smokes. That is why it does not support zone doubling, although it can be used as a burglary or environmental zone if 2-wire smokes are not needed. You can have up to 16 2-wire smokes on the zone.

Adding a compatible wireless receiver will let you use wireless 345 MHz sensors from the Honeywell 5800 Series. A standard wireless receiver will only support uni-directional (one-way) devices. But a wireless transceiver like the 6160RF will also let you use bi-directional devices. Up to 56 wireless zones can be used. The number of available wireless zones depends on the number of wired expansion zones being used.

It is important to keep in mind that the total number of zones (wired and wireless) can never exceed 64. Additionally, zones 49 through 64 on a VISTA-21iPLTE are designated as key fob zones. But you can use these zones with any wireless sensor, as long as you have a wireless receiver added.

Honeywell 6160rf alphanumeric alarm keypad with integrated transceiver

There are also some other accessories you can add to a VISTA-21iPLTE System. First and foremost, you will want a keypad for controlling the system. As stated earlier, the Honeywell 6160RF is a great option. If you don't plan to use wireless sensors, then the standard Honeywell 6160 will work just as well.

You might also consider getting a touchscreen keypad for the system. These can be easier to use than push-button keypads. But just remember that only push-button keypads can backdoor into programming. The new Honeywell 6290W is a great option. Or you could go with the Tuxedo Touch which will also add Z-Wave functionality.

There are limits to the number of keypads you can use with the system. Up to eight (8) push-button keypads can be added. Touchscreen keypads count as AUI devices, and the VISTA-21iPLTE will only support a max of four (4) of these. Keep in mind that the Total Connect 2.0 service also counts as an AUI device!

Speaking of Z-Wave, a Z-Wave controller is needed if you want to use Z-Wave devices with the system. Adding a Tuxedo Touch is a great way to add Z-Wave capabilities. If you already have a keypad, then the standalone Honeywell VAM was an option, but it has recently been discontinued. Remember, you can control all Z-Wave devices through TC2.

Ultratech 1240 alarm control panel battery backup 12v 4 dot 5ah

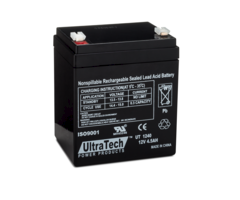
Lastly, the system comes with its own transformer for supplying power. You will still need to supply a backup battery like the UltraTech IM-1250F1. Power cabling is not included with the VISTA-21iPLTE system, so you must add your own. We recommend using 18-gauge wiring, or even better, a Honeywell LT-Cable.

We would also like to mention that the VISTA-21iPLTE supports two (2) partitions, along with a third common partition. It also supports other miscellaneous features like Quick Arming, Scheduling, up to 48 unique user codes, 100-event event log, two (2) low-current trigger outputs, chime functionality, and more.

The VISTA-21iPLTE System and the LTE-21V LTE Communicator are both available for purchase now from the Alarm Grid website. This system is great for anyone looking for a simple, yet effective hardwired panel. It will certainly serve as a long-lasting addition to your home or business and help keep you safe.

If you have any questions about the system, please email us at support@alarmgrid.com. We will check your email at our earliest convenience and reply as soon as possible. You may also call us at (888) 818-7728. Remember that our support hours are 9 am to 8 pm EST M-F. We look forward to hearing from you!

Tags: , , , , , , , , ,

Comments


Posted By

Hi DIYers! We have a quick video recap today, with four (4) new videos this week. Three videos featuring Jorge were uploaded on Thursday, September 19th. Another featuring Joe was uploaded a day later. We hope these videos help you out. Let's take a look at the newest videos from Alarm Grid!

Alarm grid inside security stickers

Finding the Installer Code on a VISTA-21iP

Jorge explains what to do if you do not know the Installer Code on a Honeywell VISTA System. You use the command [Installer Code] + [800] to enter programming. If you do not know the code, then you should first try the default code of 4112. If that doesn't work, then you might try to get in using the backdoor method. If the backdoor method fails, then you should try asking the previous monitoring company or system owner for the Installer Code.


Setting Up TC 2.0 on a Phone

Jorge shows you how to set up Total Connect 2.0 on a phone. The Total Connect 2.0 Mobile App is available for Android and iOS devices. You can get it for free from the Google Play Store or the Apple App Store. Once you have the app, you can login using your Total Connect 2.0 account, just like you would from the website. If you don't have access to Total Connect 2.0, then you might want to check out one of our monitoring plans to get access. Remember, TC2 is for Honeywell Panels only.


Linking a Honeywell Lyric Alarm System to HomeKit

Jorge explains the process for linking a Honeywell Lyric with Apple HomeKit. This will let you use the system with the rest of your HomeKit network. You can also get notifications regarding system activity, and you can control your system using Siri voice commands from your iPhone. For best results, you will want to have a proper HomeKit Hub established. You will also want to continue to use Total Connect 2.0 alongside HomeKit, as TC2 will provide more detailed alerts for the Lyric System than HomeKit.


Programming the 5800COMBO to a VISTA Panel

Joe teaches you how to enroll a Honeywell 5800COMBO with a Honeywell VISTA Panel. In order to use this wireless 345 MHz sensor from the Honeywell 5800 Series, you must add a wireless receiver to the system. This combination sensor will provide the smoke & heat detection, carbon monoxide detection, and freeze detection. Each function will require its own wireless zone on the system. You can also program a additional zones for maintenance detection and end of product life detection.

Tags: , , , , ,

Comments


Posted By

Hi DIYers! It's time for our video recap again, this time covering September 9th thru 13th. We have five (5) new videos this time featuring Jarrett, Jorge, and myself. We have been getting some positive feedback regarding our videos lately, thank you so much! Let's check out the new ones!

Enrolling the 2GIG PAD1-345 Wireless Keypad to the 2GIG GC2

I show you how to enroll a 2GIG PAD1-345 with a 2GIG GC2 Security System. The 2GIG PAD1-345 is a relatively simple push-button keypad that is great for basic arming and disarming. You can keep it by a second entrance in your home or business so that you can arm and disarm as you come and go. It is also compatible with other 2GIG Systems. These include the 2GIG GC2e, the 2GIG GC3, and the 2GIG GC3e.


Using a WIFI Communicator with a Honeywell Alarm System

Jorge from Alarm Grid talks about using a WIFI communicator with a Honeywell System. This can be a great way to monitor your system if you have WIFI in your home or business. IP communication is known for being fast and relatively reliable for the most part. You just need to be wary of internet outages, as they will leave your system unmonitored. For that reason, you might want to get cellular backup for your system as well.


Using L7000 Alarm Panels Together

Team MVP Jorge explains how you cannot use two Honeywell L7000 Systems together. As a general rule, it is not possible to use multiple security systems together. You cannot pair one alarm control panel with another alarm control panel. This is true even if they are the same exact system. If you want a second controller for operating your alarm system, then you should get a keypad instead. A good keypad for the L7000 is the Honeywell 5828.


Self-Monitoring an Alarm.com Security System

Super Alarm Grid Hero Jarrett explains how you can self-monitor an Alarm.com Security System. The Alarm.com service is used with many security systems. This service will send you text and/or email notifications regarding any system activity. As a result, it is possible to use an Alarm.com System without it being connected with a central monitoring station. This practice is known as self-monitoring. Just remember, it will be up to you to contact the authorities if needed!


Defaulting a Resideo Lyric Controller

Wonder Boy Jarrett shows you how to default a Resideo Lyric Alarm System. Performing a factory default on a Lyric is normally only done if you are planning to get rid of the system, or as a last resort troubleshooting step. Doing this will reset the Installer Code back to 4112 if it was changed. All zones from the system will be cleared. It will reset the panel time. And all general system settings will be reset back to their default values.

Tags: , , , , , ,

Comments


Posted By

Hi DIYers! Today, we wanted to let you know about some of the new security system kits that are available from the Alarm Grid website. We have new kits that feature the Resideo Lyric, the Qolsys IQ Panel 2 Plus (319.5 MHz, 345 MHz, and 433 MHz), the 2GIG GC3e and the 2GIG GC2e Systems.

Honeywell lyricpk10 lte enc encrypted at and t lte alarm system

Our system kits are perfect for anyone just getting started with alarm monitoring service. Each one includes a brand-new alarm panel, some door and window sensors, a motion sensor, an LTE cellular communicator, and a power cable. You can easily expand around any of these systems later on if needed. Just remember that you will need a monitoring plan to use one of these systems with Alarm Grid. A Gold Plan or higher is needed for cellular communication.

Now that you know a little bit about our kits, let's take a look at each new one individually:

Resideo Lyric w/ Verizon LTE Communicator Kits

Lyric Verizon-LTE 3-1 Kit


Lyric Verizon-LTE 10-1 Kit

  • Lyric System
  • LYRICLTE-V Verizon LTE Communicator
  • 10 Versa-2GIG Contacts
  • SiXPIR Motion
  • LT-Cable


Lyric Verizon-LTE 3-1 Encrypted Kit


Lyric Verizon-LTE 10-1 Encrypted Kit

  • Lyric System
  • LYRICLTE-V Verizon LTE Communicator
  • 10 SiXMINICT Contacts
  • SiXPIR Motion
  • LT-Cable


Qolsys IQ 319.5 MHz PowerG Kits

IQ Panel 2 319.5 MHz AT&T LTE 3-1 Kit


IQ Panel 2 319.5 MHz AT&T LTE 10-1 Kit
  • IQ Panel 2 Plus 319.5 MHz w/ AT&T LTE
  • 10 PG9303 PowerG Contacts
  • PG 9914 PowerG Motion


IQ Panel 2 319.5 MHz Verizon LTE 3-1 Kit


IQ Panel 2 319.5 MHz Verizon LTE 10-1 Kit
  • IQ Panel 2 Plus 319.5 MHz w/ Verizon LTE
  • 3 PG9303 PowerG Contacts
  • PG 9914 PowerG Motion


Qolsys IQ 345 MHz PowerG Kits

IQ Panel 2 345 MHz AT&T LTE 3-1 Kit


IQ Panel 2 345 MHz AT&T LTE 10-1 Kit

  • IQ Panel 2 Plus 345 MHz w/ AT&T LTE
  • 10 PG9303 PowerG Contacts
  • PG 9914 PowerG Motion


IQ Panel 2 345 MHz Verizon LTE 3-1 Kit


IQ Panel 2 345 MHz Verizon LTE 10-1 Kit

  • IQ Panel 2 Plus 345 MHz w/ Verizon LTE
  • 10 PG9303 PowerG Contacts
  • PG 9914 PowerG Motion


Qolsys IQ 433 MHz PowerG Kits

IQ Panel 2 433 MHz AT&T LTE 3-1 Kit


IQ Panel 2 433 MHz AT&T LTE 10-1 Kit

  • IQ Panel 2 Plus 433MHz w/ AT&T LTE
  • 10 PG9303 PowerG Contacts
  • PG 9914 PowerG Motion


IQ Panel 2 433 MHz Verizon LTE 3-1 Kit


IQ Panel 2 433 MHz Verizon LTE 10-1 Kit

  • IQ Panel 2 Plus 433 MHz w/ Verizon LTE
  • 10 PG9303 PowerG Contacts
  • PG 9914 PowerG Motion


2GIG GC3e Kits

2GIG GC3e Verizon-LTE 3-1 Kit


2GIG GC3e Verizon-LTE 10-1 Kit

  • 2GIG GC3e System
  • 2GIG LTEV-1-A-GC3 Verizon LTE Communicator
  • 10 2GIG DW10e Door and Window Sensors
  • 2GIG PIR1e Motion
  • LT Cable


2GIG GC2e Kits

2GIG GC3e Verizon-LTE 3-1 Kit


2GIG GC2e Verizon-LTE 10-1 Kit

  • 2GIG GC2e System
  • 2GIG LTEV1-A-GC2 Verizon LTE
  • Communicator
  • 10 2GIG DW10e Door and Window Sensors
  • 2GIG PIR1e Motion
  • LT Cable


All of these great kits are available from Alarm Grid right now. If you have any questions or need help choosing a system, please email us at support@alarmgrid.com. You may also call us during our regular business hours of 9am to 8pm EST M-F. We look forward to hearing from you!

Tags: , , , , , , , , , , , , , , , , , , , , , , , , , , , , , , , ,

Comments


Posted By

Hi DIYers! It's time again for our video recap. Our video team did a great job last week, as they worked very hard to put up some helpful new videos. Jorge made the most videos with four (4) this time around. I even made a rare on-camera appearance! Let's check out the new videos.

Alarm grid inside security stickers

Setting the Communication Path In a Lyric Controller

Jorge explains how to set the communication path for a Resideo Lyric Alarm System. You can choose between WIFI & Cellular, WIFI-Only, Cellular-Only, and None. If you have both WIFI and cellular enabled, then the system will use WIFI as the primary path to communicate with the AlarmNet Servers. Please note that you will need to add a cellular module to use cellular communication with the Lyric System. We recommend using the LYRICLTE-A or the LYRICLTE-V.


Using the IPCAM-WOC1 With a Lyric Security System

Jorge talks about how it is not possible to view the live feed for the IPCAM-WOC1 Security Camera through a Resideo Lyric Alarm System. The only way that you can view the live feed for this camera is through Total Connect 2.0. This is the interactive monitoring and automation platform that is commonly used with the Lyric System. You can access this platform through the TC2 website or mobile app. You will also need an alarm monitoring plan that includes access to TC2 and video surveillance.


Reasons to Purchase an LTE Cellular Communicator

Jarrett discusses the reasons why you should make sure to buy an LTE cellular communicator for your alarm system. An LTE communicator will provide a fast and reliable connection that will keep your system monitored at all times. It will also provide a long-term monitoring solution for your panel. This is because cellular service providers have no plans to shut down their LTE networks any time soon. Older cellular networks like 3G and CDMA are expected to be shut down sometime in the coming years.


Setting Up The Slideshow Feature on the Qolsys IQ Panel 2 Plus

Jorge teaches users how to set up the slideshow function on the Qolsys IQ Panel 2 Plus Security System. The slideshow feature allows the panel to operate like a digital picture frame. This can be nice for making the aesthetic in your home more pleasant. Images are loaded onto the panel through a MicroSD card. There are many restrictions regarding the pictures that can be used in the slideshow function. Make sure to pay close attention in the video so you know which images you can add.


Z-Wave Light Status with Alarm.com

Jorge goes into detail about the Z-Wave light status feature for Alarm.com. A maximum of ten (10) "uncertified" Z-Wave lights can have their current ON/OFF status displayed from Alarm.com. Although you can add more Z-Wave lights beyond this limit, Alarm.com won't know whether the light is ON or OFF. In other words, you will be controlling these lights blindly. Alarm.com also has a list of "certified" Z-Wave Plus lights that do not count towards this device limit.


Alphanumeric, Fixed English, or Touchscreen Keypad?

I help you determine whether the keypad for your Honeywell VISTA System is an Alphanumeric Keypad, a Fixed English Keypad, or a Touchscreen Keypad. You can recognize an Alphanumeric Keypad because it will display "Installer Code 20" when you enter programming. A Fixed English Keypad will only display "20". A Touchscreen Keypad will have a Console Mode that allows the system to behave as an Alphanumeric Keypad. You should only use an Alphanumeric Keypad or a Touchscreen Keypad in Console Mode to complete deep-level programming.

Tags: , , , , ,

Comments


Posted By

Hi DIYers! Resideo has updated the Total Connect 2.0 Mobile App for Android devices. The update fixes the time and date issues that some users were experiencing with SkyBell devices. It also improves the registration process for SkyBell Doorbells and provides general stability improvements.

Skybell dbcam hd video doorbell

The latest TC2 Android update is Version 5.9.3.304. With this update, the time and date for any SkyBell video should now be correct when accessed using the TC2 Mobile App for Android. Before, some users were reporting that SkyBell videos showed the incorrect time and date when accessed from an Android device. This issue has since been resolved.

Additionally, the latest update now makes it possible to register new and existing SkyBell devices from within the Android app. Users should now find it easier to register their SkyBell devices using the TC2 Mobile App for Android. The update also includes various stability fixes to make the app run smoother.

SkyBell Video Doorbell Cameras make for a great addition to any Total Connect 2.0 account. These are high-definition doorbell cameras that allow you to see exactly what is going on in front of your house at any time. You can easily access your SkyBell device and the rest of your security system through your TC2 account. Any SkyBell Clip can be viewed for up to seven (7) days from TC2, and you can store up to 400 clips per month. Check this FAQ for more information.

It is also possible to have TC2 send you an alert any time your SkyBell detects movement, or when someone rings your doorbell. This is great for knowing exactly who is at your door so that you only get up if it is important. For example, you might want to know if your unexpected visitor is your friend, or just some door-to-door sales person who isn't worth your attention. You can also use it to scare off a potential intruder who is standing outside your door. This can be done from anywhere using the app!

You do not even need a video monitoring plan to get started with a SkyBell Video DoorBell. You can use it with any monitoring plan that supports Total Connect 2.0. Getting started is super easy. Just follow the integration guide we have posted on our website. Remember that you can only have one (1) SkyBell device per TC2 account. More information can be found here.

You can easily apply this update from the Google Play Store on your Android device. Just open the Google Play Store App, and search "Total Connect 2.0". Find the TC2 app, and click "Update". You will then begin downloading the updated version. If you have any questions about this update or about SkyBell or TC2 in general, please email us at support@alarmgrid.com. We look forward to hearing from you!

Tags: , , , , , , ,

Comments


Posted By

Hi DIYers! We have exciting news today, as the Honeywell LTE-IA for VISTA Series Panels is now available! This has been eagerly anticipated by VISTA users with strong service from the AT&T LTE Network. We are sure that many of you will want to take advantage of this great new communicator!

Honeywell vista 20p wired alarm control panel

As a dual-path communicator, the Honeywell LTE-IA can send signals thorough both a local IP network and a cellular network. It uses a hardwired ethernet connection for IP service, and it works across the AT&T LTE Network for cellular service. The communicator will use IP as its primary path, and cellular will serve as the backup.

Being able to connect with the AT&T LTE Network is the best feature of this communicator. AT&T has stated that they will support their LTE network well into the very distant future. The network will remain in-service even as newer networks like 5G are made available many years from now. AT&T invested huge amounts of money into their LTE infrastructure. Their LTE network is not going anywhere anytime soon. The result is that this communicator will keep your VISTA Panel monitored in the long-run.

The importance of reliable cellular backup cannot be stressed enough. Internet outages, and it is highly likely that your system will need to rely on its cellular connection at some point or another. As long as the cellular path is still available, your VISTA System will remain connected with the AlarmNet360 Servers. This means that you will still be able to take advantage of all the great features from Total Connect 2.0.

Speaking of Total Connect 2.0, a proper AlarmNet Communicator like the Honeywell LTE-IA is required if you want to use this service. If you didn't know, TC2 is an interactive monitoring and automation platform that you can access from anywhere. This is possible using the Total Connect 2.0 Mobile App on Android and iOS devices.

By accessing TC2, you can arm and disarm your system, check its status, control Z-Wave devices (Tuxedo Touch or VAM required), view TC2 Cameras (video plan needed), and more. All you need is a compatible Honeywell System with an AlarmNet Communicator, and an appropriate alarm monitoring plan.

For the VISTA P-Series Panels, the VISTA 15P, VISTA 20P, and VISTA 21iP can all support TC2. There are just some firmware requirements you need to keep in mind. A 15P or 20P must be running firmware 9.12 or higher. A 21iP must be running firmware 3.13 or higher. If you aren't sure of the firmware, just check the PROM Chip. This is a small black chip on the panel's main board. It will have a code that begins with the letters "WA". This code will tell you the firmware version.

If you find that the PROM Chip is not high enough, don't worry! We sell new 15P PROM Chips, 20P PROM Chips, and 21iP PROM Chips. Just be aware that a 15P or 20P System will need to be at least firmware 2.0 or higher to receive a PROM Chip upgrade. Any VISTA 21iP can receive a PROM Chip upgrade.

To replace the PROM Chip, start by powering down the panel by disconnecting the backup battery and unplugging the transformer. Carefully pry off the old PROM Chip with the metal end of a binder clip. Then apply the new one by putting it in the same place and pressing it down until it clicks. Just be careful not to bend the metal prongs on the new PROM Chip! You can then power up your system by plugging the transformer back in and reconnecting the backup battery.

If you actually have better service from the Verizon LTE Network than the AT&T LTE Network, you should also know that a similar Verizon LTE Dual-Path Communicator called the Honeywell LTE-IV has been available for quite some time. Remember, the service provider for your alarm system has nothing to do with the service provider for your phone. Just go with whichever service works best in your area, regardless of which service you use for your smartphone.

If you have any questions about the Honeywell LTE-IA, please reach out to us. The best way to contact us is to email support@alarmgrid.com. Another option is to call us during our normal business hours of 9am to 8pm EST M-F at (888) 818-7728. We look forward to hearing from you!

Tags: , , , , , , ,

Comments


Posted By

Hi DIYers! We have learned about a super convenient feature for Total Connect 2.0. You can now set smart scenes on Total Connect 2.0 to have your Lyric Arm or Disarm automatically based on a set schedule. This was previously only possible for Alarm.com users. TC2 users rejoice!

Honeywell lyric controller encrypted wireless security system

This feature is extremely convenient if you want to have your Resideo Lyric Panel Arm or Disarm at a set time on a regular basis. You can select both the day(s) of the week and the time of the day when the Arm or Disarm will occur. If your system is already Armed or Disarmed accordingly, then no change will occur. Otherwise, the scene will go through automatically, with no code being required.

Please note that this feature is only available for the Lyric Controller. It will not work with other Honeywell Panels that can use Total Connect 2.0 like the VISTA Panels or the LYNX Touch Panels. If you want to use this feature with TC2, then you will need to upgrade to the Lyric System. This is a great system anyway with its increased zone support and HomeKit compatibility. You might also consider going with an Alarm.com System, as the Alarm.com platform supports this feature for all their compatible panels. A great option is the 345 MHz version of the IQ Panel 2 Plus, which can support the same great 5800 Series Sensors that are commonly used with LYNX and VISTA Panels.

Users who follow a set routine every day should find that this feature is extremely useful. For example, if you go to work at the same time Monday thru Friday, you can set the system to Arm automatically shortly after the time you leave every day. You won't have to remember to Arm your system before you leave. Likewise, you can also have your system automatically Disarm a little before you normally return home. No more racing to beat your system's Entry Delay! Another example is if your kids leave the house after you do, and they sometimes forget to arm the system, you can set an arming schedule to run just after they are set to leave to be sure the system arms.

And if you ever want to make sure that your system Armed or Disarmed like it was supposed to, you can always check the Total Connect 2.0 Mobile App on your Android or iOS device. The app is also a great way to Arm and Disarm your system, and you can use it from pretty much anywhere. Another option available to make sure the system is Armed or Disarmed is to create Open (Disarm) and Close (Arm) notifications that will be sent via text, email, or push notification any time the system is armed or disarmed. We are sure that many of you will love automatic Arming and Disarming for your Lyric from Total Connect 2.0.

For our example, we will show you how to set up automatic Arming and Disarming from a web browser. But you should also have no problem doing this from the mobile app. To get started, login to your TC2 account on the website. Once you have logged-in, click "Scenes" on the left side of the page.


Then click the "Add Scene" button at the top of the screen.


Then give a name for your scene. We recommend choosing something easy to remember, like "Automatic Arm Away" or "Automatic Disarm". In our example, we just went with "Test Arm Stay". Then press the blue Continue button in the lower-right corner. When asked what you want the scene to do, choose Security. Then choose the status you want to put your system in when the scene activates. In our example, we choose "Arm Stay". Then press the blue Continue button in the lower-right corner.


Assuming that you only want the scene to Arm or Disarm your system, press the blue Continue button again. You will then be able to set the schedule for the scene. Start by pressing the "On a recurring schedule" button near the top.


And now you will set the schedule. You can choose multiple days of the week and the time. You can also choose to have the scene occur at Sunrise and/or Sunset on the selected days. For our test example, we set the scene to occur Monday thru Friday at 11:00am. Press the blue Continue button after making your selection.


Finally, press the blue Save button in the lower-right corner to save your new scene!


If you ever want to run the scene manually, you can press the Play button next to the scene. Otherwise, in our example, the scene will run automatically at 11:00am M-F if the system is Disarmed at the time. Once the scene runs, the system will automatically go into Arm Stay mode. If the system is already Armed at 11:00am M-F, then nothing will happen. The picture below shows the play button if you wanted to run the scene manually.


Remember that you will need to create separate scenes if you want to have your Lyric System both Arm and Disarm automatically at separate times. Also keep in mind that you can only do this on TC2 if you have a Resideo Lyric Controller. If you don't have a Lyric yet, now is a great time to upgrade to this powerful wireless security system.

If you have any questions about this feature, please reach out to us! We are happy to provide technical support for Alarm Grid monitored customers. The best way to reach us is to email support@alarmgrid.com. If you would prefer to call us, you can reach us at (888) 818-7728 during our regular business hours of 9am to 8pm Monday thru Friday. We look forward to hearing from you!

Tags: , , , , ,

Comments


Posted By

Hi DIYers! It's time for our weekly video recap. We have a great batch of videos for you all today. Our technicians Joe, Jarrett, and Jorge will all help you learn how to use your alarm systems and get the most out of your equipment. Let's check out the latest videos from the team.

Alarm grid inside security stickers

Adding Wired Motion Detectors to the VISTA 20P

Joe teaches users how to add wired motion detection sensors to a Resideo VISTA 20P System. Hardwired motion sensors will use a 4-wire connection, with two (2) wires being used for the zone input, and two (2) wires being used for power. Most hardwired motion sensors use a Normally Closed (NC) wiring configuration, meaning that they are wired in Series. However, there are some Form C motion sensors that can use a Normally Open (NO) wiring configuration for wiring in parallel.


Troubleshooting a Low Battery Condition on a VISTA Panel

Joe explains how to troubleshoot a low battery condition on a Resideo VISTA Alarm Panel. You will need a voltmeter to do this. The first step is to check the AC voltage. You should expect to see about 18 to 19 volts on a 16.5VAC transformer. Next, check the Auxiliary Power. You should see a reading of 13 volts or higher. Finally, you should check the charging voltage. This should be the same as the auxiliary power voltage.


Adding a 2-Wire Smoke to the Qolsys Hardwire 16-F

Joe teaches users how to add 2-wire smoke detectors to a Qolsys Hardwire 16-F. Any 2-wire smoke detectors used with the Hardwire 16-F must be connected at Zone 16. You must wire the smoke detector(s), plus any other sensors used with the module, before enrolling the Hardwire 16-F with the panel. This lets the module know the proper configuration for each zone. The 2-wire smoke detectors will use Normally Open (NO) wiring. Most burglary devices use Normally Closed (NC) wiring. CO detectors cannot be used with the Hardwire 16-F. You will also need 4.7k resistors at each zone.


Turning Off "Arm Confirm" in a Qolsys IQ Panel 2 Plus

Jorge explains how you cannot turn off the Arm Confirm feature on a Qolsys IQ Panel 2 Plus System. The Arm Confirm feature has the panel produce a loud tone when the system is Armed Away using a key fob or wireless keypad. The purpose of this tone is to make sure that the user knows that they have set their system to Arm Away and that they should exit the premises. Unfortunately, you cannot turn off the Arm Confirm feature on the IQ Panel 2 Plus System because it does not exist.


Arm Away Vs. Arm Maximum

Jarrett discusses the difference between the Arm Away and Arm Maximum modes. When you Arm Maximum, you are telling your system to ignore all of the Entry Delay Periods on your system. This means that if you open an Entry/Exit Zone while the system is set to Arm Maximum, then an immediate alarm will occur. If you are outside the building, you will need to disarm using a key fob or an interactive platform like Total Connect 2.0 or Alarm.com.

Tags: , , , , ,

Comments


Posted By

Hi DIYers! It's time for another Alarm Grid video recap! We have videos from all the usual team members. Those team members are Jarrett, Joe, and Jorge, and they're all here to help you learn how to use your security system. Let's check out the latest videos from the Alarm Grid video team!

Troubleshooting 2-Wire Smokes on the Qolsys Hardwire 16-F

Joe explains the best practices for troubleshooting 2-wire smoke detectors when they are used with a Qolsys Hardwire 16-F Wired to Wireless Converter. The Qolsys Hardwire 16-F supports 2-wire smoke detectors when they are wired at Zone 16. This wired to wireless converter can work with any 319.5 MHz wireless alarm system, including the 319.5 MHz version of the Qolsys IQ Panel 2 Plus. Remember that you will need to wire the 2-wire smoke detectors to Zone 16 before enrolling the Hardwire 16-F with the system. You must also use a 4.7k end of line resistor.


Testing the Honeywell 5808W3 Smoke Detector on the Qolsys IQ Panel 2 Plus

Jarrett rocks some protective ear gear while he explains how to test the Honeywell 5808W3 Smoke and Heat Detector on the 345 MHz version of the Qolsys IQ Panel 2 Plus. The Honeywell 5808W3 Smoke and Heat Detector has a recessed test button that you can test using a thin object like a screwdriver. If you want to test the actual functionality of the sensor, you can use a hair dryer for the heat detection function and canned smoke for the smoke detection function. Always remember to put your system on test mode before testing this sensor!


Using Power over Ethernet (PoE) on Alarm.com Cameras

Joe discusses how you can use Power over Ethernet (PoE) with certain Alarm.com Cameras. Power over Ethernet means that the camera will receive both power and data from the same ethernet cable. This means that you will not need to connect a power adapter to the camera. You can just use the ethernet cable. This can help reduce installation time and allow you to utilize a more flexible wiring configuration. In order to complete a PoE setup, you may need a PoE injector like the Alarm.com ADC-POE-INJ. This will depend on the network switch or router being used.


Using the Qolsys IQ Siren with a Honeywell LYNX Touch Panel

Jorge explains how to use the Qolsys IQ Siren with a LYNX Touch System. The Qolsys IQ Siren is a Z-Wave Siren that communicates with a system wirelessly. To pair this siren with a LYNX Touch System, the panel must have an L5100-ZWAVE Module installed. Since these panels will see the IQ Siren as a light switch, you must create special scenes for it to work properly. You need a scene to activate the siren during intrusion alarms, a scene to activate the siren during fire alarms, and a scene to stop the siren when an alarm is cleared.


Zone Status Indications on the Qolsys IQ Panel 2 Plus

Jarrett discusses the various zone status symbols that will appear next to zones on the main screen of the Qolsys IQ Panel 2 Plus. The different statuses that can be displayed include Open, Closed, Active, Idle, Unreachable, and Tampered. The Open and Closed statuses are for door and window contact sensors. The Active and Idle statuses are for motion sensors, glass break sensors, environmental sensors, and life-safety sensors. The Unreachable status refers to a sensor experiencing loss of RF supervision. The Tampered status means that someone has activated the tamper cover for the sensor.

Tags: , , , , , , ,

Comments